36
❏ 6. Glue the bottom, front seam together from
the outside.
Note: If any of the clear windows “fog” from curing CA,
the fogging can be removed by using a cotton swab
lightly moistened with CA debonder. Use care because
the debonder can remove the paint and smear the clear
plastic windows.
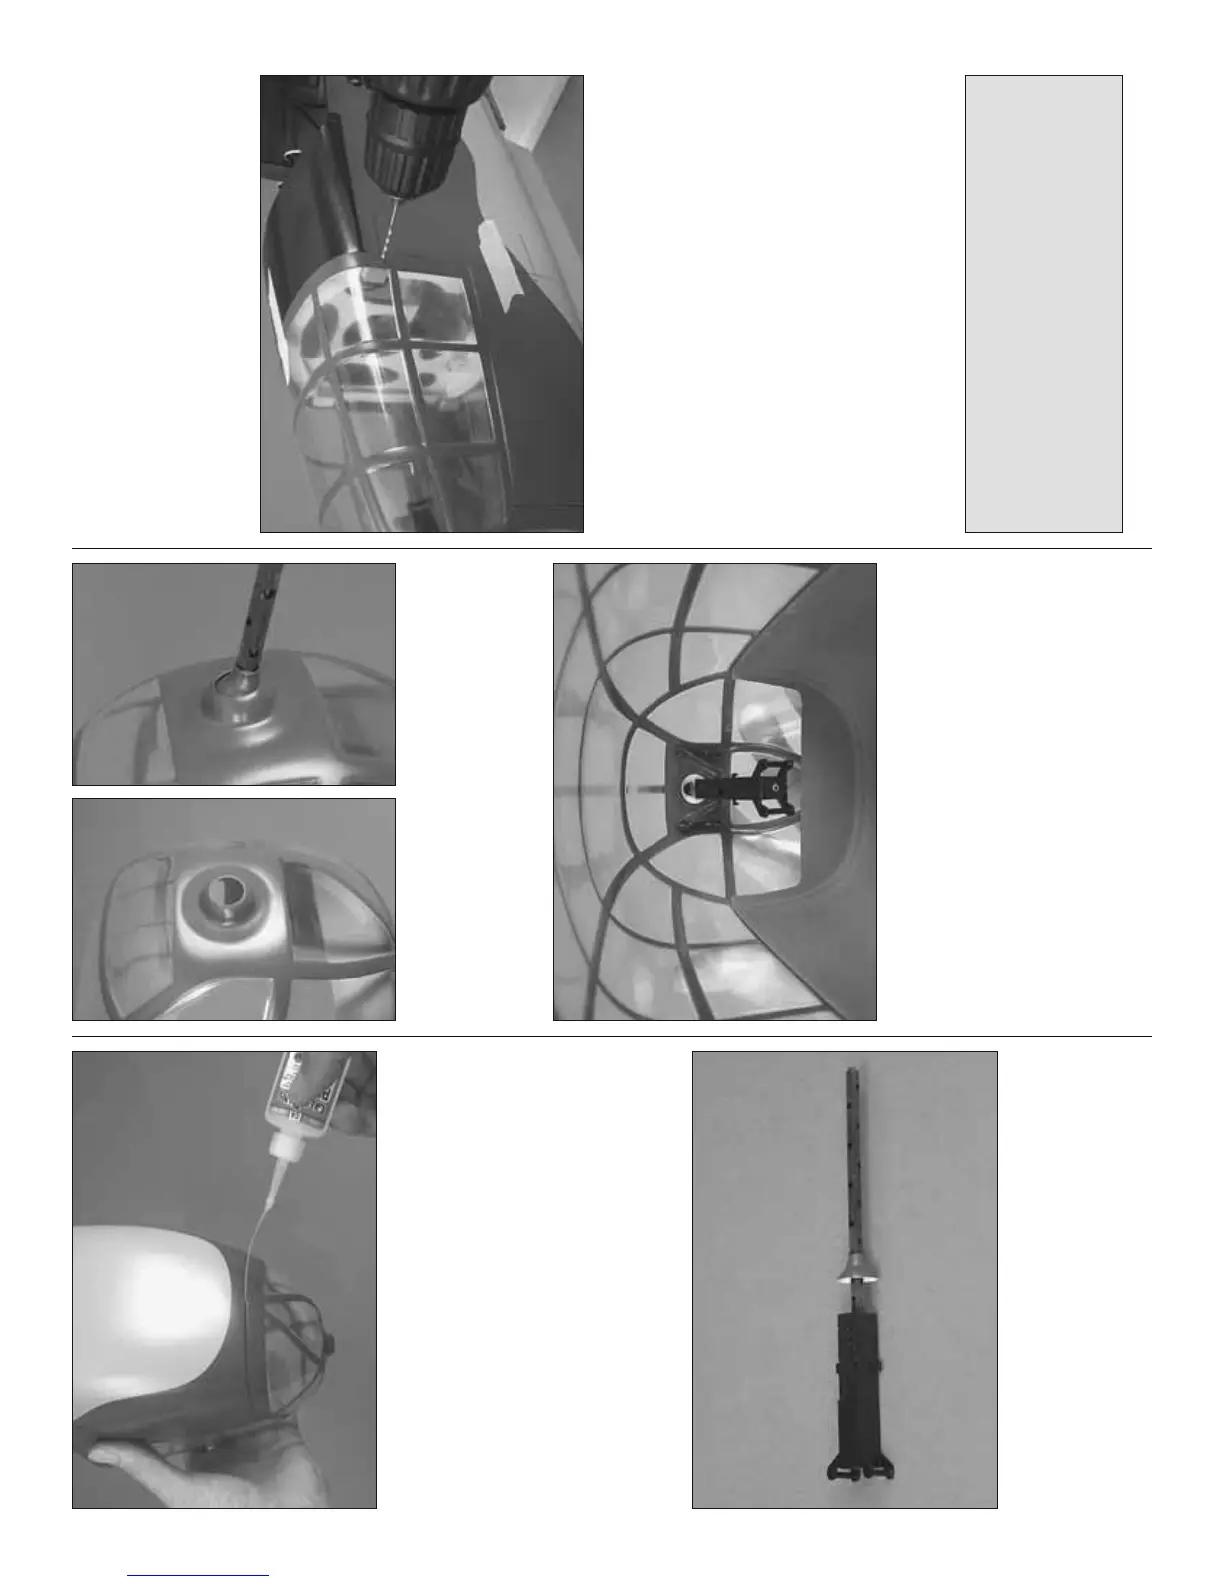
❏ 7. Glue one of the 6-1/8" [155mm] machine gun
barrels into the nose machine gun—be certain to glue
in the end of the barrel that does not have the holes
in it. Use plastic-cutting scissors or a hobby knife to
trim the pivot cup as shown. Glue the pivot cup to the
barrel 1/4" [6mm] from the front of the gun.
❏ 8. Cut a 3/8" [9.5mm] diameter hole in the front of
the nose-gunner canopy for the nose machine gun.
Test fi t the machine gun in the hole to make sure it
fi ts well and can pivot up and down and side-to-side.
Make adjustments as necessary.
❏ 9. Mount the nose machine gun by using a piece
of leftover wire with an “L” bend on the end to hook
two or four small rubber bands to the hooks on the
machine gun and to the hooks in the canopy—two
rubber bands on the top will make the gun droop
as it would be when the plane is grounded or when
the gun is not in use—rubber bands on the top and
bottom will hold the gun level.
Optional: For added scale effect, insert eight 00-90
x 1/8" screws and 00-90 nuts into the canopy around
the machine gun pivot (to replicate the bolts on the
full-size subject). The retainer ring can also be painted
silver as the model on the kit box cover.
Use this photo for the following two steps.
❏ 10. Use a fi ne-point felt-tip pen and a straightedge
to mark lines on the fuselage centered over the
middle of each of the four mounting blocks for the
nose-gunner canopy. Place the nose-gunner canopy
on the fuselage and tape it into position.
❏ 11. Drill 1/16" [1.6mm] holes through the canopy
and the mounting blocks centered on the lines 3/16"
[5mm] from the aft edge of the canopy.
❏ 12. Remove the canopy. Enlarge the holes in
the canopy only with a 3/32" [2.4mm] drill. Mount
the nose-gunner canopy to the fuselage with four
#2 x 3/8" [9.5mm] button-head Allen screws.
CAUTION: In direct sunlight, extreme heat may
cause the top of the nose-gunner canopy to warp
at the aft edge where it meets fuselage.To prevent
this, it may be a good idea to keep the model in the
shade or cover the nose with a white cloth or towel
when temperatures are high.