43
SET THE CONTROL THROWS
Use a Great Planes AccuThrow or a ruler to
accurately measure and set the control throw of each
control surface as indicated in the chart that follows. If
your radio does not have dual rates, we recommend
setting the throws at the low rate setting.
NOTE: For the ailerons, the throws are measured at
the widest part (at the root end).
These are the recommended high and low rate
control surface throws.
High Rate Low Rate
ELEVATOR: 1-1/4" up 1" up
1-1/4" down 1" down
[32mm] [25mm]
RUDDER: 1-1/4" right 3/4" right
1-1/4" left 3/4" left
[32mm] [19mm]
AILERONS: 5/8" up 3/8" up
5/8" down 3/8" down
[16mm] [10mm]
*FLAPS: 1/2" [13mm] 1" [25mm]
(1/2 fl ap) (full fl ap)
* 1/4" [6mm] of down elevator should be mixed in with full fl ap defl ection
to control “pitch-up” when fl aps are extended.
IMPORTANT: The Top Flite B-25J Mitchell ARF
has been extensively fl own and tested to arrive at
the throws at which it fl ies best. Flying your model
at these throws will provide you with the greatest
chance for successful fi rst fl ights. If, after you have
become accustomed to the way the B-25 fl ies, you
would like to change the throws to suit your taste,
that is fi ne. However, too much control throw could
make the model diffi cult to control, so remember,
“more is not always better.”
IDENTIFY YOUR MODEL
No matter if you fl y at an AMA sanctioned R/C club
site or if you fl y somewhere on your own, you should
always have your name, address, telephone number
and AMA number on or inside your model. It is required
at all AMA R/C club fl ying sites and AMA sanctioned
fl ying events. Fill out the identifi cation tag on the decal
sheet and place it on or inside your model.
CHARGE THE BATTERIES
Follow the battery charging instructions that came with
your radio control system to charge the batteries. You
should always charge your transmitter and receiver
batteries the night before you go fl ying, and at other
times as recommended by the radio manufacturer.
CAUTION: Unless the instructions that came with
your radio system state differently, the initial charge
on new transmitter and receiver batteries should
be done for 15 hours using the slow-charger that
came with the radio system. This will "condition"
the batteries so that the next charge may be done
using the fast-charger of your choice. If the initial
charge is done with a fast-charger the batteries
may not reach their full capacity and you may be
fl ying with batteries that are only partially charged.
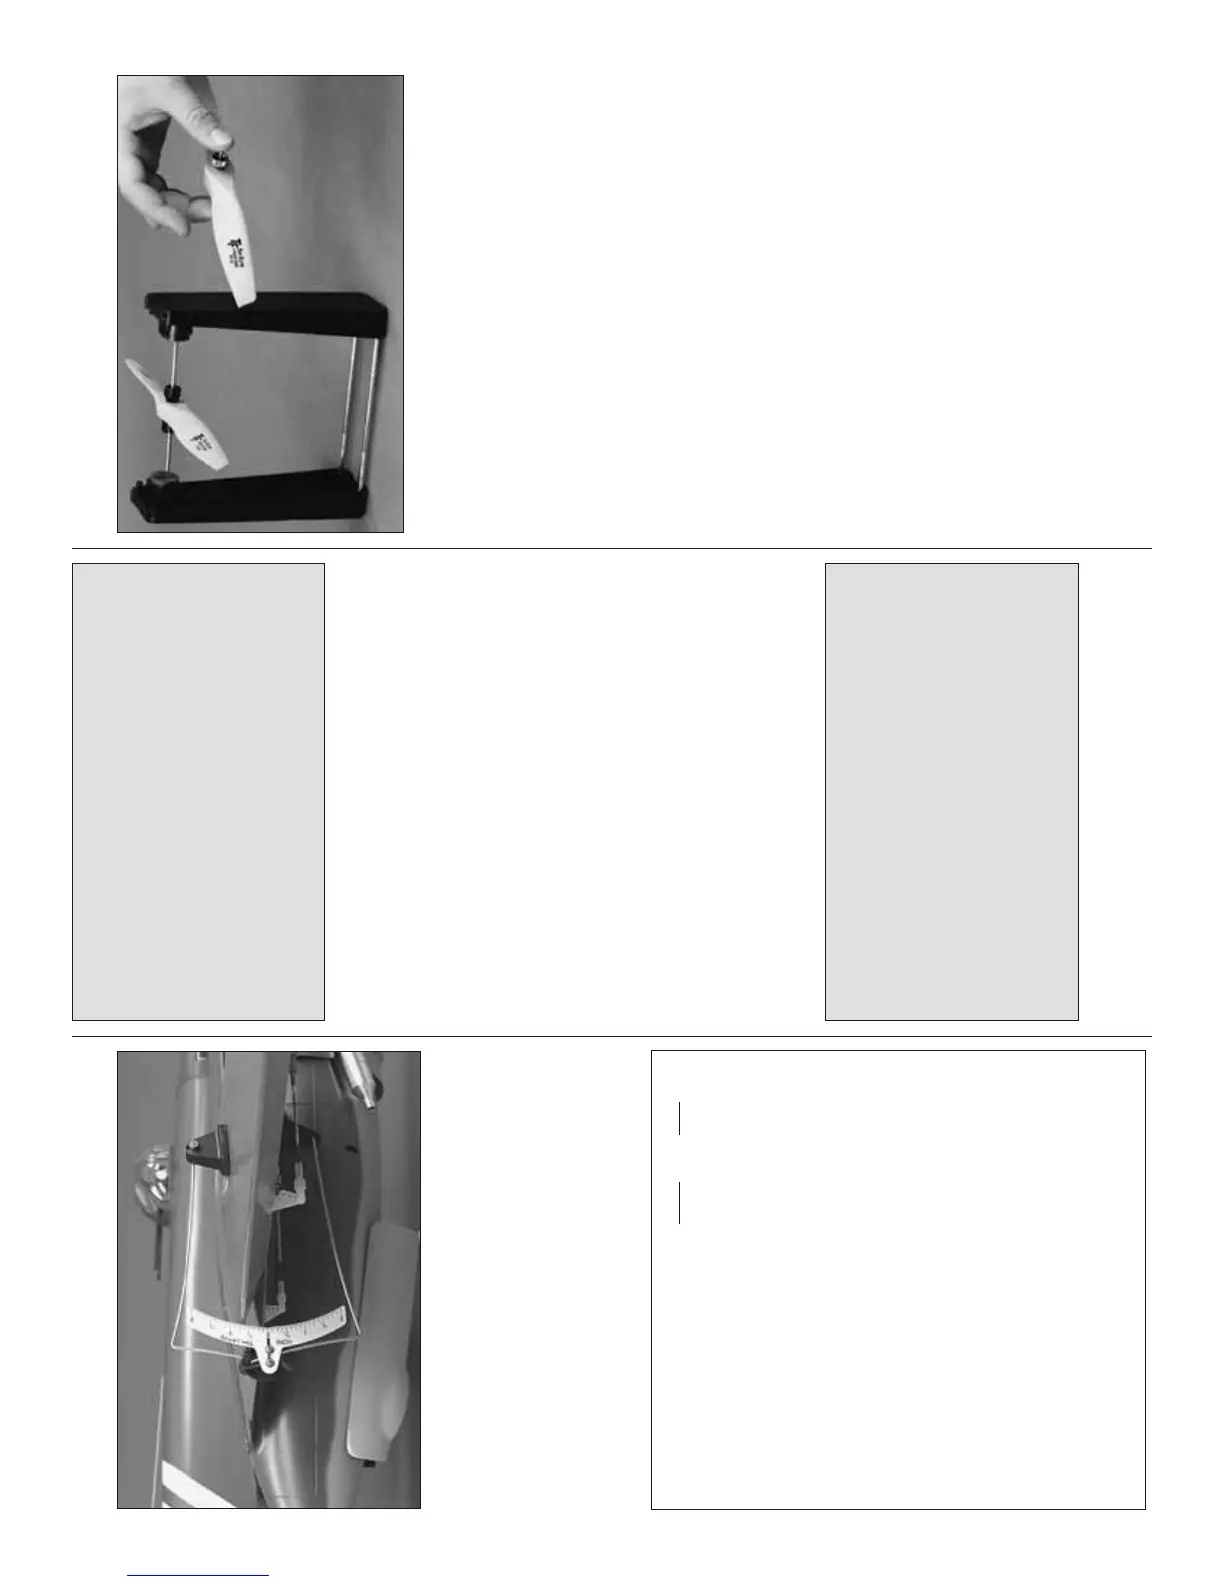
BALANCE PROPELLERS
Carefully balance your propeller and spare propellers
before you fl y. An unbalanced prop can be the single
most signifi cant cause of vibration that can damage
your model. Not only will engine mounting screws
and bolts loosen, possibly with disastrous effect, but
vibration may also damage your radio receiver and
battery. Vibration can also cause your fuel to foam,
which will, in turn, cause your engine to run hot or quit.
We use a Top Flite Precision Magnetic Prop Balancer
(TOPQ5700) in the workshop and keep a Great
Planes Fingertip Prop Balancer (GPMQ5000) in our
fl ight box.
GROUND CHECK
If the engines are new, follow the engine
manufacturer’s instructions to break-in the
engines. After break-in, confi rm that the engines idle
reliably, transition smoothly and rapidly to full power
and maintain full power—indefi nitely. After you run
the engines on the model, inspect the model closely
to make sure all screws remained tight, the hinges
are secure, the props are secure and all pushrods
and connectors are secure.