42
❏ 3. With all parts of the model installed, the model
ready to fl y (less receiver battery), the landing gear
down and an empty fuel tank, place the model on a
Great Planes CG Machine, or lift it with your fi ngers
on the balance point marked by the thin strips of tape
on the bottom of the wings.
❏ 4. If the tail drops, the model is “tail heavy” and the
battery pack must be mounted forward or weight must
be added to the nose to balance. If the nose drops,
the model is “nose heavy” and the battery pack must
be mounted aft or weight must be added to the tail to
balance. If you haven’t yet mounted the battery pack,
place it on top of the fuselage to see where it should
be mounted inside to achieve the perfect balance
point without having to add any additional ballast.
If you already mounted the battery, or if additional
weight is required, use Great Planes (GPMQ4485)
“stick-on” lead. The best place to add stick-on nose
weight is to the bottom of the nose-gunner platform.
The best place to add tail weight is inside the very
back of the fuselage behind the horizontal stabilizer.
Begin by placing incrementally increasing amounts of
weight on the fuselage over the location where it will
be permanently attached inside the model until you
can get it to balance. Once you have determined the
amount of weight required (or the battery positioning),
it can be permanently attached.
❏ 5. If you haven’t yet done so, mount the battery
pack inside the fuselage, or attach any required
lead ballast inside the nose or tail. Note: Do not rely
upon the adhesive on the back of the lead weight to
permanently hold it in place. Over time, the adhesive
may weaken causing the weight to fall off. Use
#2 sheet metal screws, RTV silicone or epoxy to
permanently hold the weight in place.
❏ 6. Connect the receiver battery to the on/off switch
using a servo extension if necessary. Secure the
connections with heat shrink tubing.
❏ 7. IMPORTANT: Once you’ve mounted the battery
or added any additional weight, recheck the C.G.
after it has been installed.
BALANCE THE MODEL LATERALLY
❏ 1. With the wing level, have an assistant help you
lift the model under the middle of the fuselage behind
the nose-gunner canopy and under the tail-gunner
cockpit. Do this several times.
❏ 2. If one wing always drops when you lift the model,
it means that side is heavy. Balance the airplane by
adding weight to the other wing tip. An airplane
that has been laterally balanced will track better
in fl ight and maintain its heading better during
maneuvers when the plane is climbing.
PREFLIGHT
CHECK THE CONTROL DIRECTIONS
❏ 1. Turn on the transmitter and receiver and center
the trims. If necessary, remove the servo arms from
the servos and reposition them so they are centered.
Reinstall the screws that hold on the servo arms.
❏ 2. With the transmitter and receiver still on, check
all the control surfaces to see if they are centered.
If necessary, adjust the clevises on the pushrods to
center the control surfaces.
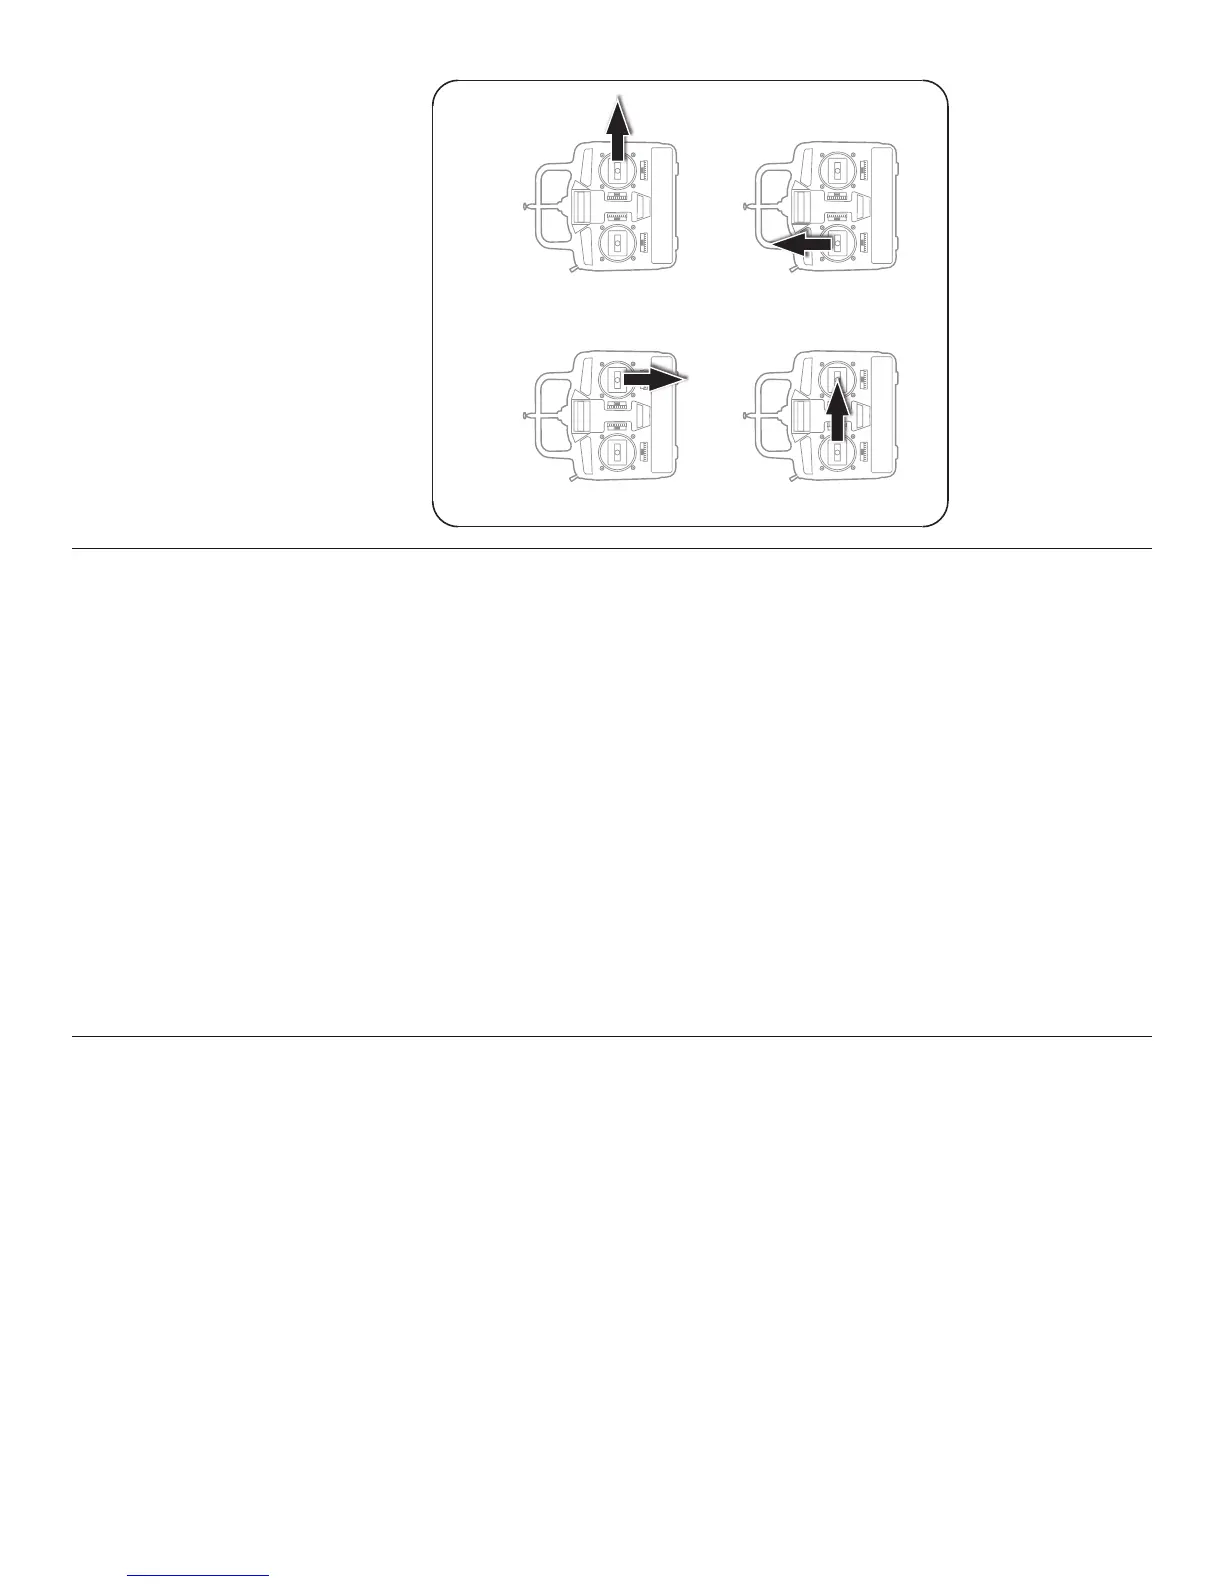
FULL THROTTLE
RUDDERS MOVE RIGHT
ELEVATOR MOVES UP
RIGHT AILERON MOVES UP
LEFT AILERON MOVES DOWN
4-CHANNEL RADIO SETUP
(STANDARD MODE 2)
❏ 3. Make certain that the control surfaces and
the carburetor respond in the correct direction as
shown in the diagram. If any of the controls respond
in the wrong direction, use the servo reversing in
the transmitter to reverse the servos connected to
those controls. Be certain the control surfaces have
remained centered. Adjust if necessary.