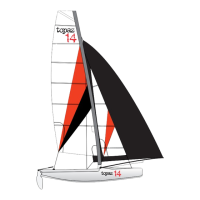
The Topaz 14 is a catamaran designed for sailing, with rigging instructions provided in the manual to assist users in setting up, operating, and maintaining the craft. It is manufactured by Topper International Ltd.
Function Description:
The Topaz 14 is a catamaran designed for recreational sailing. The manual provides comprehensive instructions for rigging the boat, including setting up the hull, mast, jib, mainsail, rudders, and an optional spinnaker kit. It also covers important maintenance procedures to ensure the longevity and performance of the craft.
Important Technical Specifications (derived from the manual's content):
- Hull: Features a nose, painter (rope for towing/tying), transom (back), fore (forward), aft (rearward), mast step (integral tube for mast heel), rail (upper/outermost edge), port (left side looking forward), starboard (right side looking forward), leeward (direction away from wind), windward (direction from wind), and gudgeon (fitting for rudder).
- Spars: Includes the mast (main vertical spar), mast heel (lower edge of mast), boom (spar at bottom of mainsail), outhaul (purchase system for tightening lower edge of sail), vang (purchase system for tightening rear edge of sail), cunningham (purchase system for tightening forward edge of sail), and sheet (rope for controlling mainsail position).
- Foils: Consists of a daggerboard (blade in middle of hull to counteract leeward slippage), rudder (blade at transom for steering), and pintle (male part of rudder hanging system).
- Sails: Features a mainsail (larger sail aft of mast), jib (smaller sail forward of mast), tack (forward lower corner), clew (rear lower corner), head (upper corner), leach (rear edge), luff (forward edge), foot (bottom edge), and battens (thin stiffening strips).
- Rigging System: Utilizes a 2-part jib halyard system, a single-line asymmetric spinnaker system with a shoot system for launch and retrieval, and various blocks, cleats, and ropes for control.
- Dimensions/Measurements (implied by instructions):
- Hull bolts: 2 x 17mm spanners for tightening.
- Trapeze wire loop: Approximately 15cm in length.
- Mainsheet knots: Approximately 1m and 0.75m from the end of the mainsheet.
- Furler cleat holes: 2 x 3.7mm for screwing.
- Spinnaker pole suspension: Approximately 5cm below the striker bar.
- Spinnaker dynema lines: Loop tied approximately 2/3rds down each line.
Usage Features:
- Hull Setup: Involves bolting hulls together, refitting hatch covers, and fitting the trampoline. The trampoline is laced to the rear beam, with tensioning lines attached to the rod and around buttons on the rear beam. Side tensioning lines are attached to metal eyes and plastic rings, then tied off. A central tie is fitted to a small metal loop midway between beams. The trampoline should be kept as tight as possible for easier movement.
- Mast Rigging: The mast is laid along the center line for attaching rigging. The furler is fitted to the forestay, and the furler swivel is attached to the large bow shackle. The forestay and jib halyard pulley loop fix into the furler. Trapeze wires (if fitted) are added, and the jib halyard is threaded through its block. Rigging is attached to the mast, ensuring shackles are tightened and rigging is separated to correct sides. The mast head halyard pulley (for trapeze kit) is tied off to the metal eye near the top of the mast. Shroud adjusters are attached to hull plates (approximately 4th hole down). The striker bar is attached to the bow of the hull, with the furler drum attached to its center screw fitting. The cleat for the furler line is fitted to the port side of the front crossbeam. The mast is then lifted, and the mast foot is fitted to the ball on the crossbeam. The forestay is loosely tied to the furler drum, allowing the mast pin to be removed for rotation. Rig tension is then applied using the forestay. Trapeze wires are secured to elastic loops.
- Capsize Line: An orange capsize line is tied around the base of the mast with a bowline knot. Figure-8 knots are tied along the line to prevent hands from slipping during righting. When not in use, it's stored in a marked pocket on the trampoline.
- Mainsheet Attachment: The mainsheet rope controls traveler car movement. Mainsheet blocks are pre-threaded. Figure-8 knots are tied in the mainsheet to limit travel (approximately 1m and 0.75m from the end). The pulley system is shackled to the traveler car. The mainsheet is fed through the cleat on the traveler car and a round hole on the plate, then secured with a stopper knot through the deck eye on the rear crossbeam. The car's travel is adjusted by the knot's position.
- Jib Rigging: The Topaz 14 uses a 2-part jib halyard system. The jib is attached to the furler drum using the forestay's long tail. The jib halyard is attached to the webbing loop on the top of the jib sail with a bowline knot. Plastic hanks are attached to the wire forestay as the jib is hoisted. Once hoisted, the two parts of the halyard are untied, and a loop is tied in the end of the section attached to the top of the jib. The rope is stored in a trampoline pocket. The forestay/jib tie-down tail is fed through the halyard loop and down through the cleat on the jib. Jib tension is applied, and excess halyard can be cut. Jib sheets (2:1 purchase system) are run through two eyes in the sail. The jib sheet is fed through a bridge on the cleat on the forward crossbeam, and stopper knots are tied. The jib sheet is then fed through the other eye on the jib sail and back through the cleat. The jib can be furled to prevent flapping.
- Mainsail Raising: Ensure the boat faces into the wind. All sail battens must be securely in place. The main halyard is shackled to the top of the sail, ensuring the pin is through the sail and the rope runs over the shackle body. The sail is fed into the mast track, locating the guide slug first. Battens should rotate in the same direction during hoisting. Once hoisted, the halyard is secured in the mast cleat and stored in a trampoline pocket. The bottom of the sail is fed into the mast track. The downhaul is threaded through the sail eye, pulley, and V-cleat, and should not be pulled tight until sailing. The mainsheet is hooked into the eye at the back of the mainsail just before going on the water.
- Rudder Attachment: Rudders attach to transom fittings, with tiller arms angled inward. The connector crossbar and tiller extension are joined using a UJ, with cover plates clipped in place. On water, rudder blades are pushed down and secured with bungee loops over the stainless steel arm.
- Spinnaker Kit Rigging (Optional): The single-line asymmetric spinnaker system uses a shoot system. The spinnaker sock is fitted to the shoot mouth on the pole, with the rope edge fed around the slot on the back of the hoop and Velcro tabs securing it. The pole spike is inserted into the hole on the front crossbeam. The pole is suspended by a line tied to the striker bar. Dynema lines attached to the front of the pole prevent it from pulling up; a loop is tied 2/3rds down each line, fed through the fixing eye at the bow of each hull, and back through the loop. Tension is applied by pushing the pole down, ensuring it's centered. A line attached to the shoot mouth is tied to the bow fitting on the port side to hold it up. The halyard turning ring and sheet blocks are fitted at the rear of the trampoline. A bungee with a ring is fed between the trampoline and rear beam, tied to the mainsheet attachment loop. Spinnaker sheet ratchet blocks are attached to the lower part of the shroud plates. To thread the spinnaker halyard, one end is secured to the pole, and the free end is threaded through the pulley at the back of the pole (back to front), then through the double block attached to the tack line. The halyard is then led back through the crossbeam cleat, to the ring by the rear beam, and forward to the metal ring at the front of the capsize line pocket (under jib sheets). The halyard is fed through the spinnaker sock. The rear of the sock is secured with lines tied around the mast foot and beam eyelet on the trampoline, loosely to allow movement.
- Spinnaker Packing: Spinnaker sheet ratchet blocks are attached to the lower shroud plates. Start at the "Tack" corner, push a loop of the tack line through the sail eye, pass the knot through the loop, and pull tight. Work along the front edge to the "Head," attaching it to the halyard with a bowline knot. Work down the back edge to the "Clew," attaching sheets by pushing a loop of rope through the sail eye and pulling the ends tight. One end of each sheet is threaded through the ratchet block on the shroud. The ends of the sheets are tied together in the middle of the boat with an overhand knot (fisherman's or love knot). The downhaul line is attached by feeding the halyard end from the shoot mouth through the metal ring on the lower patch and tying it to the cross tapes on the top patch with a bowline knot. The gennaker is pulled back into the sock, ideally with a second person guiding it to prevent snagging.
Maintenance Features:
- Rudder: Check the retaining clip before launching to prevent the rudder from falling off. Repair nicks or deep scratches with gelcoat filler. Ensure the rudder blade remains tight between the stock when down.
- Sails: Roll the mainsail loosely after sailing to extend its life. Avoid letting sails flap unduly by furling the jib. Do not leave the mainsail hoisted for extended periods. Raise and drop the spinnaker smoothly. Avoid trawling the spinnaker through water. Remove the spinnaker from the chute after sailing to prevent damage from mice. Always dry sails before folding and packing. Rinse sails and the boat after sailing in salt water. ALWAYS RELEASE JIB TENSION WHEN NOT SAILING.
- Foils: Repair nicks or deep scratches in the rudder with gelcoat filler. Ensure the rudder blade remains tight between the stock.
- Hull and Fittings: Repair small dents by gently warming the hull with a hot air blower (avoid melting). Check fitting attachments regularly, especially those screwed into hull fixings. Keep blocks, cleats, and ropes clean and rinse after salt water exposure. Remove the bung to empty water after sailing and leave it out when not sailing to prevent pressure buildup.
- Ropes: Replace any ropes showing signs of wear immediately.
- General: Retighten hull bolts regularly. Keep rigging instructions and owner's manual in a secure place and transfer them to the new owner when selling the craft.