17
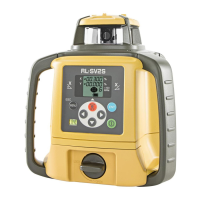
Centering by Using the Plate Level
1) Rotate the instrument horizontally by using the Horizontal motion/clamp
screw and place the plate level parallel with the line connecting leveling
screws A and B, and then bring the bubble to the center of the plate level
by turning leveling screws A and B.
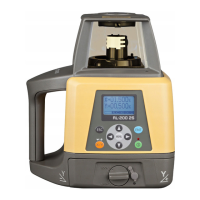
2) Rotate the instrument 90° (100g) around its vertical axis and turn the
remaining leveling screw or C to center the bubble once more.
3) Repeat the procedures 1 and 2 for each 90° (100g) rotation of the
instrument and check whether the bubble is correctly centered for all four
points.
Centering by Using the Optical Plummet Telescope
Adjust the eyepiece of the optical plummet telescope to your eyesight.
Slide the instrument by loosening the tripod screw, place the point on the
center mark, and then tighten the tripod screw. Sliding the instrument care-
fully not to rotate that allows you to get the least dislocation of the bubble
Completely Leveling the Instrument
Leveling the instrument precisely in a similar way to 4. Rotate the instrument
and check to see that the bubble is in the center of the plate level regardless
of telescope direction, then tighten the tripod screw hard.
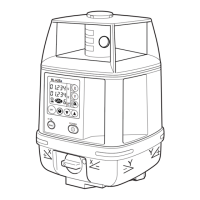
Leveling screw A
Leveling screw B
Leveling screw C
 Loading...