DANGER
Whenfueling,undercertaincircumstances,a
staticchargecandevelop,ignitingthegasoline.A
reorexplosionfromgasolinecanburnyouand
othersanddamageproperty.
•Alwaysplacegasolinecontainersontheground
andawayfromyourvehiclebeforelling.
•Donotllgasolinecontainersinsideavehicle
oronatruckortrailerbedbecauseinterior
carpetsorplastictruckbedlinersmayinsulate
thecontainerandslowthelossofanystatic
charge.
•Whenpractical,removegasoline-powered
equipmentfromthetruckortrailerandrefuel
theequipmentwithitswheelsontheround.
•Ifthisisnotpossible,thenrefuelsuch
equipmentonatruckortrailerfromaportable
container,notfromagasolinedispensernozzle.
•Ifyoumustuseagasolinedispensernozzle,
keepthenozzleincontactwiththerimofthe
fueltankorcontaineropeningatalltimesuntil
fuelingiscomplete.
Useafuelstabilizer/conditionerregularlyduring
operationandstorage.Astabilizer/conditionercleans
theengineduringoperationandpreventsgum-like
varnishdepositsfromformingintheengineduring
periodsofstorage.
Important:Donotusefueladditivesotherthan
afuelstabilizer/conditioner.Donotusefuel
stabilizerswithanalcoholbasesuchasethanol,
methanol,orisopropanol.
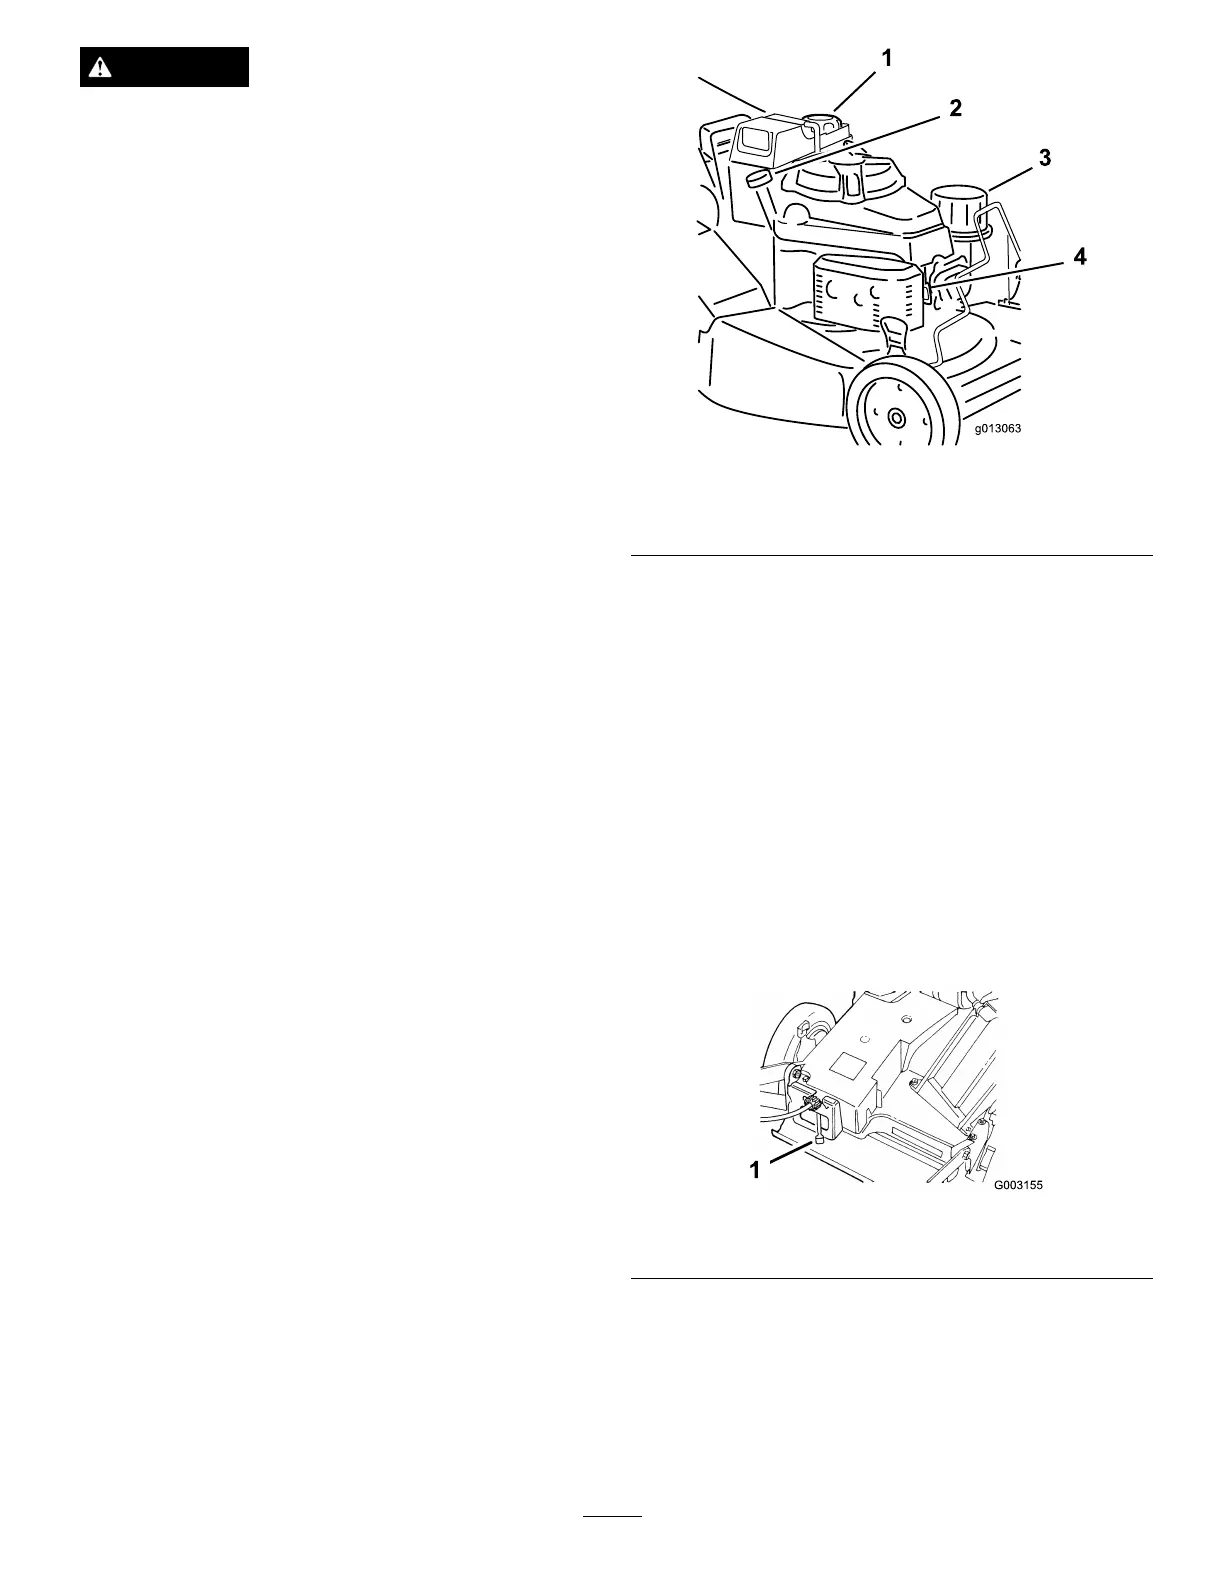
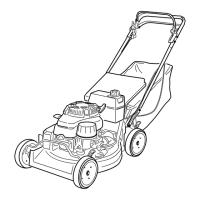
1.Cleanaroundthefueltankcap(
Figure12).
Figure12
1.Fueltankcap3.Aircleaner
2.Oilll/dipstick4.Sparkplug
2.Removethecapfromthetank.
3.Fillthefueltankwithunleadedgasolineuptothe
bottomofthellerneck.Donotllintotheller
neck.
4.Installthefueltankcapandwipeupanyspilled
gasoline.
StartingtheEngine
1.Connectthewiretothesparkplug(Figure12).
2.Openthefuelvalve(Figure22).
3.MovethethrottlecontroltotheChokeposition.
4.MovethegroundspeedcontroltotheNeutral(N)
position(Figure13).
Figure13
1.Groundspeedcontrol
5.Pullthestarterhandlelightlyuntilyoufeel
resistance,thenpullitsharply.
6.Regulatethethrottleandthegroundspeedcontrol
asdesiredwhentheenginestarts.
Note:Iftheenginefailstostartafter3pulls,repeat
steps
3through6.
12