themachine,usegenuineTororeplacementblades.
Replacementbladesmadebyothermanufacturersmay
resultinnon-conformancewithsafetystandards.
WARNING
Contactwithasharpbladecancauseseriousinjury.
Wearglovesorwrapsharpedgesofthebladewith
arag.
1.Holdthebladeendusingaragorthickly-padded
glove.
2.Removethebladebolt,anti-scalpplate,andblade
fromthespindleshaft(
Figure23).
SharpeningtheBlades
WARNING
Whensharpeningblade,piecesofbladecouldbe
thrownandcauseseriousinjury.
Wearpropereyeprotectionwhensharpening
blades.
1.Sharpenthecuttingedgeatbothendsoftheblade
(Figure21).Maintaintheoriginalangle.Theblade
retainsitsbalanceifthesameamountofmaterialis
removedfrombothcuttingedges.
Figure21
1.Sharpenatoriginalangle
2.Checkthebalanceofthebladebyputtingitona
bladebalancer(Figure22).Ifthebladestaysina
horizontalposition,thebladeisbalancedandcanbe
used.Ifthebladeisnotbalanced,lesomemetaloff
theendofthesailareaonly(
Figure23).Repeatthis
procedureuntilthebladeisbalanced.
Figure22
1.Blade2.Balancer
InstallingtheBlades
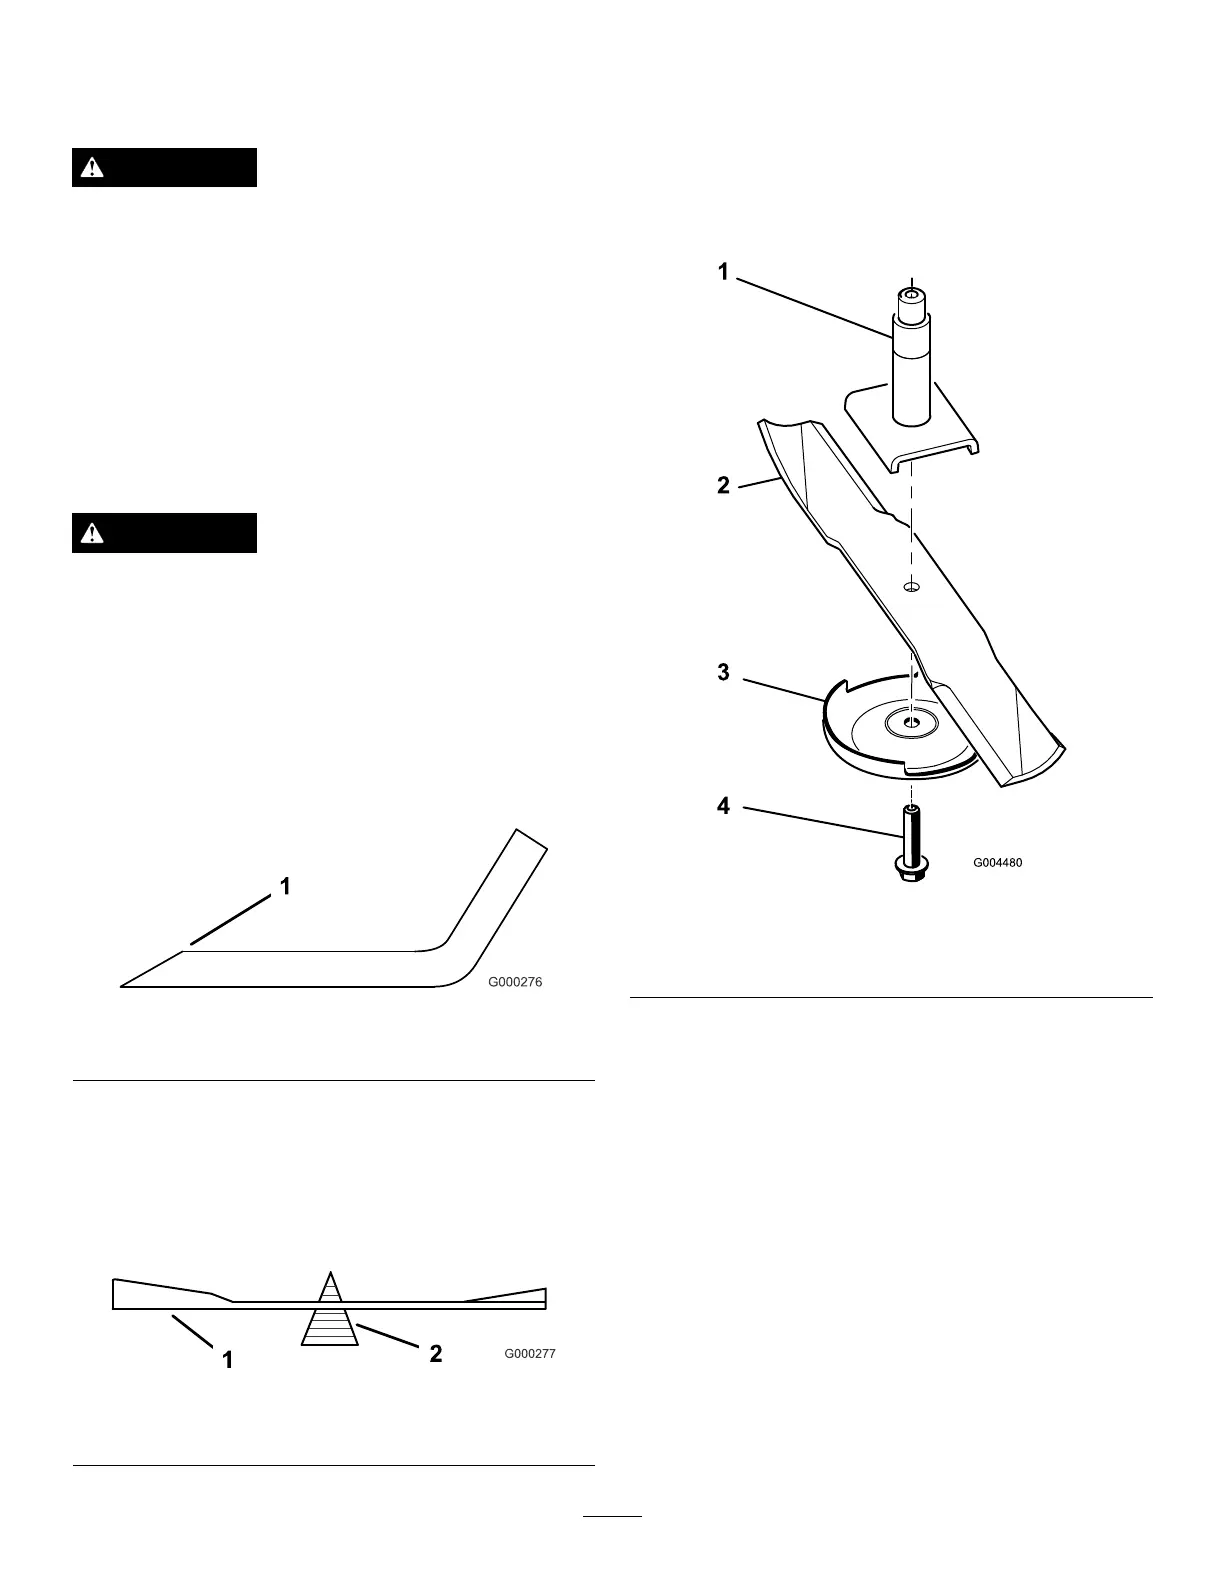
1.Installthebladeontothespindleshaft(Figure23).
Important:Thecurvedpartoftheblademust
bepointingupwardtowardtheinsideofthe
mowertoensurepropercutting.
2.Installtheanti-scalpplateandbladebolt(
Figure23).
Figure23
1.Spindle
3.Anti-scalpplate
2.SailAreaofBlade
4.BladeBolt
3.Torquethebladeboltto85-110ft-lb(115-150N⋅m).
CorrectingMowerMismatch
Ifthecutisunevenacrossthemowerswath,correct
itasfollows:
1.Positionthemachineonalevelsurfaceontheshop
oor.
2.Setthecuttingunittothedesiredheightofcut,
movethethrottlelevertotheSlowposition,stop
theengine,settheparkingbrake,andremovethe
ignitionkey.
3.Checkandadjustfrontandreartractortirepressure;
refertoCheckingTirePressure.
4.Checkforbentblades.
20