33
Servicing Belts
Check tension of all belts initially after the first day of
operation and every 100 hours thereafter.
Alternator Belt
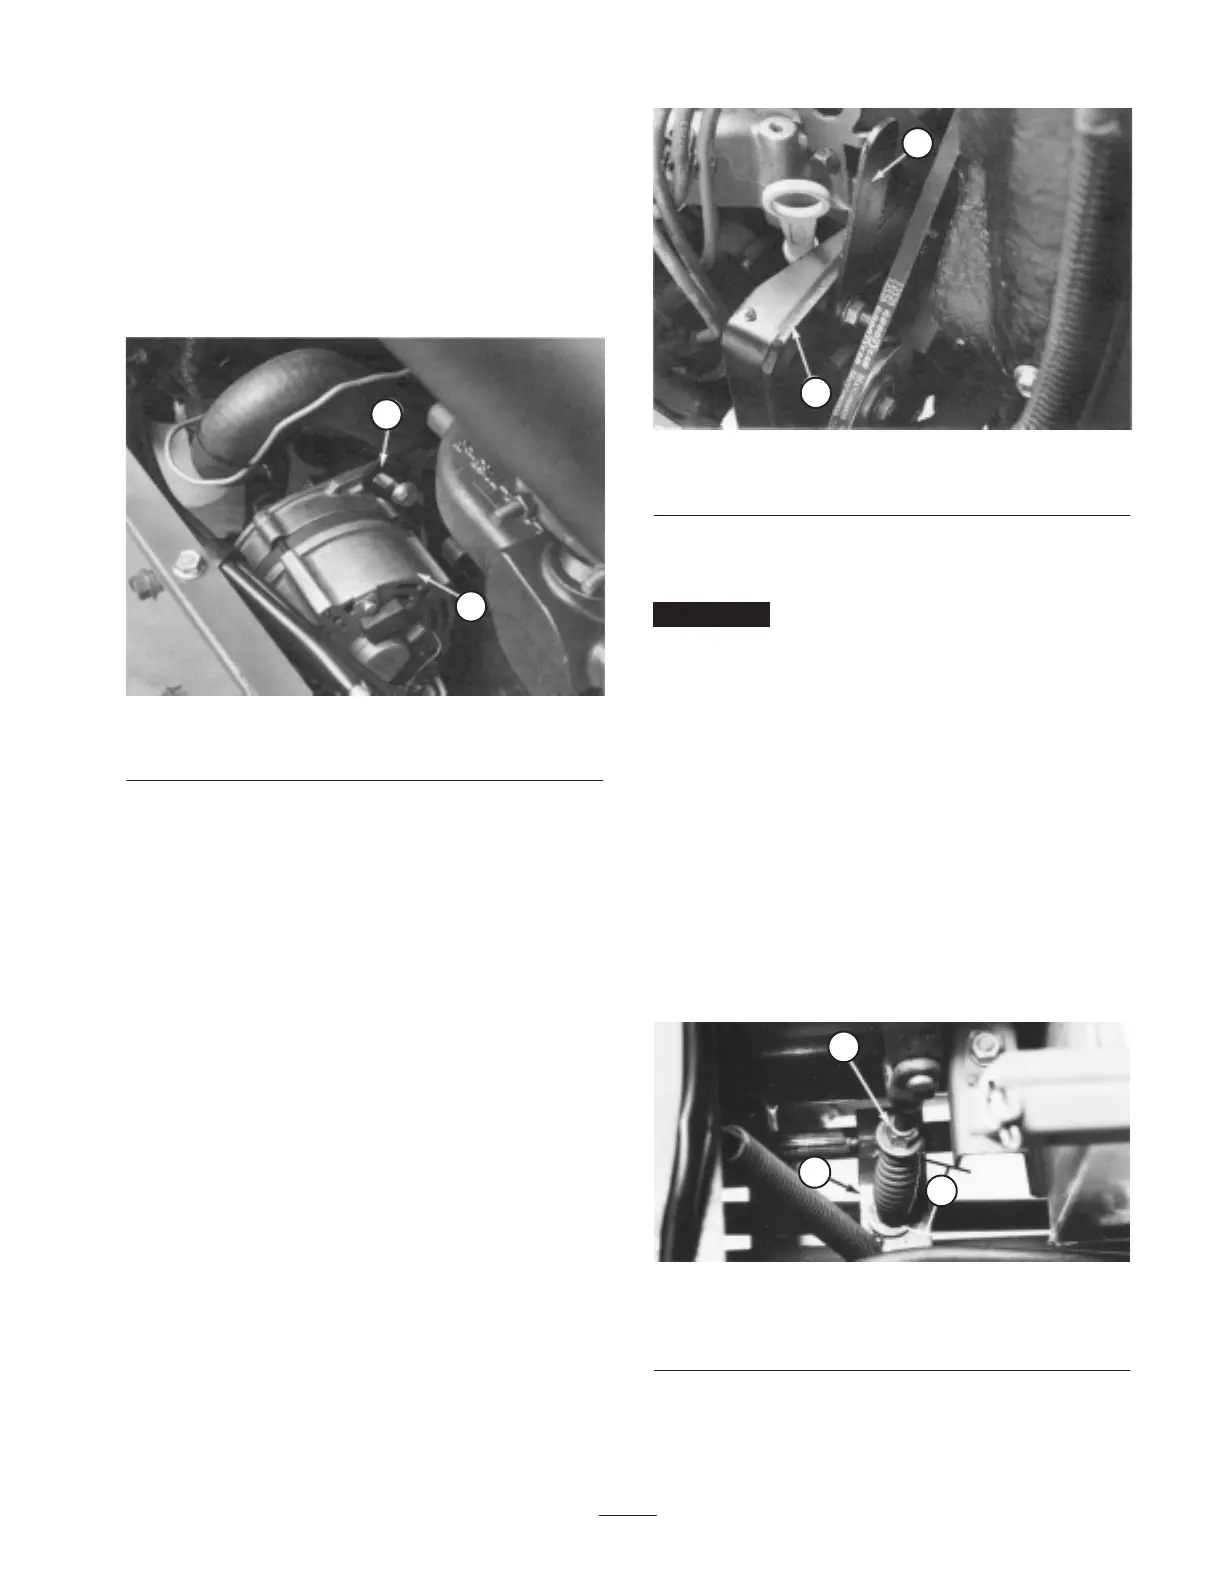
A new alternator belt (Fig. 30) is to be tensioned to 65 lbs.
A used belt is to be tensioned to 40 lbs.
1
2
Figure 30
1. Alternator 2. Brace
1. To adjust belt tension, loosen bolt securing brace to
engine, bolt securing alternator to brace and alternator
mounting bolt (Fig. 30).
2. Insert pry bar between alternator and engine and pry out
on alternator (Fig. 30).
3. Hold alternator in position after proper belt tension
setting is achieved and tighten alternator and brace bolts
to secure adjustment.
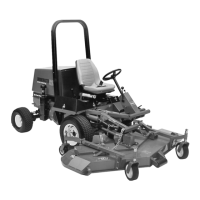
Cooling Fan Belt
A new cooling fan belt (Fig. 31) is to be tensioned to 65
lbs. A used belt is to be tensioned to 40 lbs.
1. To adjust belt tension, loosen upper and lower nuts
securing idler arm to front engine mount (Fig. 31).
2. Pull out on idler arm until desired belt tension is
achieved.
3. Tighten mounting nuts to secure adjustment.
1
2
Figure 31
1. Idler arm 2. Engine mount
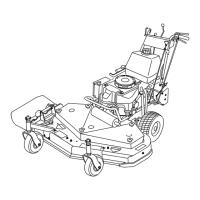
Adjusting PTO Drive Belt Tension
Important Check PTO belt tension initially after first
10 hours and 50 hours of operation and after every 100
hours of operation thereafter.
If belt begins to slip because it has stretched or because of
worn linkage adjust as follows:
1. Unlatch and remove instrument cover.
2. Move PTO control lever to ON position.
3. Measure length of PTO spring between flat–washers
(Fig. 32). There should be a spring length of 3-3/16 in.
(81 mm).
4. To adjust, hold head of adjusting screw with wrench
(under PTO actuating arm) and turn locknut (Fig. 32).
5. Move PTO lever to OFF position and install instrument
cover.
1
2
3
Figure 32
1. 3-3/16 in. (81 mm)
2. PTO actuating arm
3. Locknut