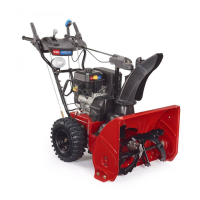
EasyManua.ls Logo

Toro 37772 - User Manual

Toro 37772
28 pages
Print Icon
To Next Page IconTo Next Page
Loading...
FormNo.3407-110RevA
PowerMax
®
826OESnowthrower
ModelNo.37772—SerialNo.400010798andUp
Operator'sManual
Introduction
WARNING
CALIFORNIA
Proposition65Warning
Thisproductcontainsachemicalorchemicals
knowntotheStateofCaliforniatocausecancer,
birthdefects,orreproductiveharm.
Theengineexhaustfromthisproduct
containschemicalsknowntotheStateof
Californiatocausecancer,birthdefects,
orotherreproductiveharm.
Thismachineisintendedtobeusedbyresidential
homeownersorprofessional,hiredoperators.Itis
designedforremovingsnowfrompavedsurfaces,such
asdrivewaysandsidewalks,andothersurfacesfor
trafconresidentialorcommercialproperties.Itisnot
designedforremovingmaterialsotherthansnow,noris
amodelwithapivotingscraperdesignedforclearingoff
gravelsurfaces.
Readthisinformationcarefullytolearnhowtooperateand
maintainyourmachineproperlyandtoavoidinjuryand
machinedamage.Youareresponsibleforoperatingthe
machineproperlyandsafely.
YoumaycontactTorodirectlyatwww .Toro.comformachine
andaccessoryinformation,helpndingadealer,ortoregister
yourmachine.
Wheneveryouneedservice,genuineToroparts,oradditional
information,contactanAuthorizedServiceDealerorToro
CustomerServiceandhavethemodelandserialnumbers
ofyourmachineready.Figure1identiesthelocationofthe
modelandserialnumbersonthemachine.Writethenumbers
inthespaceprovided.
g018884
Figure1
1.Modelandserialnumberlocation
ModelNo.
SerialNo.
Thismanualidentiespotentialhazardsandhassafety
messagesidentiedbythesafety-alertsymbol(Figure2),
whichsignalsahazardthatmaycauseseriousinjuryordeath
ifyoudonotfollowtherecommendedprecautions.
Figure2
1.Safety-alertsymbol
Thismanualuses2wordstohighlightinformation.
Importantcallsattentiontospecialmechanicalinformation
andNoteemphasizesgeneralinformationworthyofspecial
attention.
Important:Ifyouareusingthismachineabove1500m
(5,000ft)foracontinuousperiod,ensurethattheHigh
AltitudeKithasbeeninstalledsothattheenginemeets
CARB/EPAemissionregulations.TheHighAltitude
Kitincreasesengineperformancewhilepreventing
spark-plugfouling,hardstarting,andincreased
emissions.Onceyouhaveinstalledthekit,attach
thehigh-altitudelabelnexttotheserialdecalonthe
machine.ContactanyAuthorizedToroServiceDealer
toobtaintheproperHighAltitudeKitandhigh-altitude
labelforyourmachine.Tolocateadealerconvenientto
you,accessourwebsiteatwww.Toro.comorcontactour
ToroCustomerCareDepartmentatthenumber(s)listed
inyourEmissionControlWarrantyStatement.
©2016—TheToro®Company
8111LyndaleAvenueSouth
Bloomington,MN55420
Registeratwww.T oro.com.
OriginalInstructions(EN)
PrintedintheUSA
AllRightsReserved
*3407-110*A

Questions and Answers

Summary

Safety

General Safety Precautions

Provides essential safety rules for operating the snowthrower, including keeping clear of moving parts.

Safety and Instructional Decals

Control and Warning Decals

Setup

Checking Traction Drive Operation

Step-by-step procedure to verify the proper functioning of the traction drive system.

Operation

Before Operation Safety

Crucial safety checks and preparations before starting the machine.

Starting the Engine

Detailed steps for starting the snowthrower engine, including choke and primer use.

Operating the Traction Drive

Instructions on engaging and disengaging the machine's traction drive.

During Operation Safety

Critical safety warnings and best practices during snowthrower operation.

Shutting Off the Engine

Procedures for safely stopping the engine and securing the machine.

Operating the Auger;Impeller Drive

Instructions for engaging and disengaging the auger and impeller.

Unclogging the Discharge Chute

Safety warnings and procedures for clearing a clogged discharge chute.

Operating Tips

General Operating Dangers and Safety

Warnings about rotating parts, thrown objects, and safe operating practices.

After Operation

Maintenance

Recommended Maintenance Schedule

Outlines maintenance tasks based on service intervals (hours, daily, yearly).

Changing Engine Oil

Step-by-step guide on how to change the engine oil, including oil type and capacity.

Replacing the Spark Plug

Detailed steps for removing the old spark plug and installing a new one.

Maintenance Safety Precautions

General safety rules to follow before performing any maintenance.

Checking Engine-Oil Level

Detailed instructions for checking the engine oil level.

Maintenance

Storage

Preparing for Storage

Steps to take to prepare the snowthrower for long-term storage, including fuel treatment.

Troubleshooting

Electric Starter Issues

Lists problems, causes, and corrective actions for the electric starter not turning.

Engine Start or Hard Start Issues

Troubleshooting steps for when the engine won't start or starts hard.

Engine Runs Rough Issues

Solutions for problems causing the engine to run rough.

Overview

This document describes the Toro Power Max 826 OE Snowthrower, Model No. 37772, a machine designed for removing snow from paved surfaces like driveways and sidewalks, as well as other residential and commercial properties. It is not intended for clearing materials other than snow or for use on gravel surfaces if it has a pivoting scraper. The manual emphasizes safe and proper operation and maintenance to prevent injury and machine damage.

Function Description

The Toro Power Max 826 OE Snowthrower is a self-propelled machine equipped with an auger/impeller system to clear snow. It features a traction drive system with multiple forward and reverse speeds, allowing the operator to adjust the machine's movement according to snow conditions and terrain. The Quick Stick® discharge chute control enables easy adjustment of the chute's direction and deflector height, allowing the operator to direct snow discharge precisely. The machine can be started using either a recoil-start handle or an electric starter (if equipped). An engine with a fuel-shutoff valve, choke, and throttle controls its operation. The auger/impeller drive is engaged via a lever, and the traction drive is engaged independently, with a locking mechanism that allows the auger/impeller lever to remain engaged while freeing the operator's right hand.

Usage Features

Before operation, users are advised to read and understand the entire Operator's Manual, ensuring all safety devices are in place and working. The machine can be operated in either freewheeling mode (wheels slide inward, axle pins through axle holes but not wheel hubs) or self-propel mode (axle pins through both wheel hubs and inner axle holes).

Starting the Engine:

  1. Check the engine-oil level.
  2. Turn the fuel-shutoff valve counterclockwise to open.
  3. Insert the ignition key.
  4. Prime the engine by pushing the primer bulb a specified number of times based on ambient temperature (2 times for -9°C (15°F) and above; 4 times for below -9°C (15°F)).
  5. Rotate the choke to the CHOKE position.
  6. Move the throttle to the FAST position.
  7. Start the machine using the recoil-start handle or electric-starter button. For electric start, connect a UL-listed, 16-gauge power cord (not longer than 15 m (50 ft)) to a GFCI power outlet, then to the machine.

During Operation:

  • Traction Drive: Engage by squeezing the left (traction) lever to the handgrip; release to stop.
  • Speed Selector: Release the traction lever and shift the speed-selector lever to the desired position (6 forward, 2 reverse gears).
  • Auger/Impeller Drive: Engage by squeezing the right (auger/impeller) lever to the handgrip; release to stop. When both levers are engaged, the traction lever locks the auger/impeller lever down.
  • Quick Stick® Control: Hold the blue trigger cap down to move the discharge chute left/right and the chute deflector up/down. Release the cap to lock the chute and deflector in position.
  • Unclogging the Discharge Chute: If snow is not discharging, release the left (traction) lever. While the auger/impeller is running, push down on the handles to raise the front of the machine slightly, then quickly lift the handles to bump the front on the pavement. Repeat if necessary. If this fails, shut off the engine, wait for all moving parts to stop, and use the snow-cleanout tool. Never use hands.

Shutting Off the Engine:

  1. Move the throttle to the SLOW position, then to the STOP position.
  2. Wait for all moving parts to stop.
  3. Remove the ignition key.
  4. Close the fuel-shutoff valve by rotating it clockwise.
  5. Pull the recoil-start handle 3 or 4 times to prevent freezing.

After Operation:

  • Allow the engine to run for a few minutes to prevent parts from freezing. Engage the auger/impeller to clear snow from the housing and rotate the Quick Stick.
  • With the engine off, pull the recoil-start handle several times and push the electric-starter button once to prevent freezing.
  • Remove all ice and snow from the machine.

Maintenance Features

The manual provides a comprehensive maintenance schedule and procedures to ensure the machine's longevity and safe operation.

  • After the first 2 hours: Inspect and adjust the traction cable and auger/impeller cable if necessary.
  • After the first 5 hours: Change the engine oil.
  • Before each use or daily: Check engine-oil level, skids, scraper, traction cable, and auger/impeller cable.
  • Yearly: Check auger-gearbox oil, change engine oil, lubricate hex shaft, and replace spark plug.
  • Yearly or before storage: Check tire pressure, drain fuel, run engine dry, and have an Authorized Service Dealer inspect/replace drive belts.

Maintenance Procedures:

  • Checking Engine-Oil Level: Remove, wipe, and reinsert the dipstick. Remove again to check the level. Add oil if below the "Add" mark.
  • Changing Engine Oil: Run the engine briefly to warm the oil. Clean around the oil-drain cap, slide a pan under the drain extension, remove the cap, and drain the oil. Replace the cap and fill the crankcase with new oil of the appropriate viscosity (determined by outdoor temperature range).
  • Checking and Adjusting Skids and Scraper: Check tire pressure. Loosen nuts securing skids. Adjust scraper to be 3 mm (1/8 inch) above and parallel to a level surface. Move skids down until even with the ground. Tighten nuts.
  • Checking and Adjusting Traction Cable: If the machine does not drive or drives when the lever is released, loosen the jam nut, engage the traction lever, and adjust the turnbuckle until the spring length is 5.5 cm (2.18 inches). Tighten the jam nut.
  • Checking and Adjusting Auger/Impeller Cable: Loosen the jam nut, engage the auger/impeller lever, and adjust the turnbuckle until the spring length is 7 cm (2.75 inches). Tighten the jam nut.
  • Checking Auger-Gearbox-Oil Level: Move the machine to a level surface. Clean around the pipe plug, remove it, and check the oil level (should be 9.5 mm (3/8 inch) below the filler opening). Add GL-5 or GL-6, SAE 80-90 EP gear oil if low. Do not use synthetic oil. Install the pipe plug.
  • Lubricating the Hex Shaft: Drain fuel, tip the machine forward, and remove the back cover. Move the speed-selector lever to R2, lubricate the hex shaft with automotive engine oil, move the lever to 6, lubricate the other end, and move the lever forward/rearward a few times.
  • Replacing the Spark Plug: Remove the upper snow hood, choke knob, and ignition key. Remove screws securing the hood. Slowly remove the hood, ensuring primer-bulb hose and ignition wire remain connected. Remove the bracket thumbscrew and bracket. Clean around the spark plug, remove it, and discard. Set the gap on a new Champion QC12YC (or equivalent) spark plug to 0.76 mm (0.030 inch). Install the new plug, tighten, and attach the ignition wire. Reinstall the bracket, hood, choke knob, and ignition key.
  • Adjusting the Discharge-Chute Latch: Loosen the clamp fastener on the chute-support plate. Remove slack by pulling the cable conduit rearward. Tighten the clamp fastener.
  • Replacing Drive Belts: If the auger/impeller drive belt or traction drive belt is worn, oil-soaked, or damaged, have an Authorized Service Dealer replace it.

Storage:

  • Add fuel stabilizer to fresh fuel during the last refueling of the year.
  • Run the engine for 10 minutes to distribute conditioned fuel.
  • Run the machine until it runs out of fuel, then prime and start again until it shuts off and is dry.
  • Allow the engine to cool.
  • Remove the ignition key.
  • Clean the machine thoroughly.
  • Touch up chipped surfaces with paint and use rust preventative.
  • Tighten all loose fasteners.
  • Cover the machine and store it in a clean, dry place out of reach of children.

Removing from Storage:

  • Remove the spark plug and spin the engine to blow excess oil from the cylinder.
  • Install and tighten the spark plug.
  • Connect the spark-plug wire.
  • Perform annual maintenance procedures.

The manual also includes important safety warnings, such as avoiding moving parts, keeping bystanders away, shutting off the engine before servicing, and not operating without all guards in place. It also warns about California Proposition 65 regarding chemicals and engine exhaust.

Toro 37772 Specifications

General IconGeneral
Model37772
Engine Type4-Cycle
Clearing Width (in)24
Start TypeElectric Start
Auger MaterialSteel
Reverse Speeds2
Electric StartYes
TypeTwo-Stage

Related product manuals