25
Greasing and Lubricating the
Tractor
Grease the tractor with a general-purpose grease after every
25 operating hours or once a year, whichever occurs first.
Grease the tractor more frequently when the operating
conditions are extremely dusty or sandy.
How to Grease the Tractor
1. Disengage the PTO and set the parking brake.
2. Stop the engine, remove the key, and wait for all
moving parts to stop before leaving the operating
position.
3. Clean the grease fittings with a rag. Make sure to scrape
any paint off of the front of the fittings.
4. Connect a grease gun to each fitting and pump grease
into it.
5. Wipe up any excess grease.
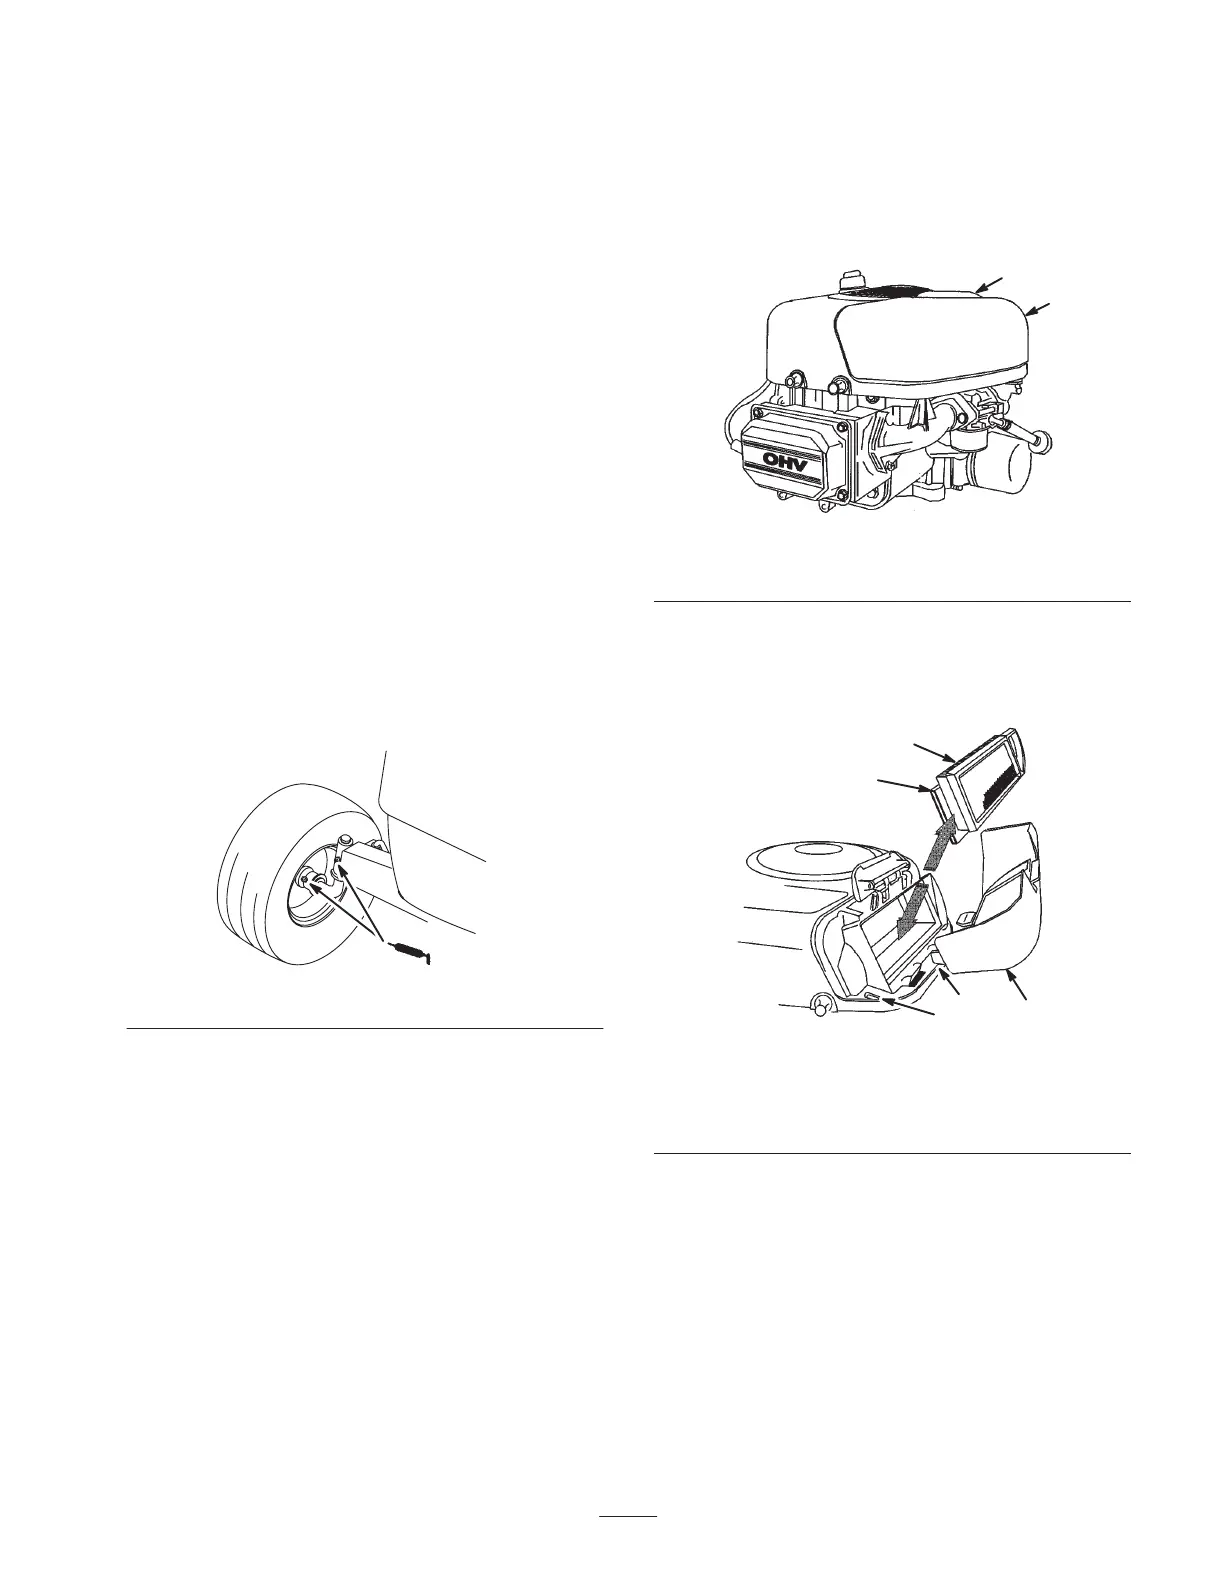
Where to Add Grease
1. Lubricate the front wheels and steering spindles until
grease begins to ooze out of the bearings (Fig. 22).
2346
Figure 22
Servicing the Air Cleaner
Clean the foam element after every 25 operating hours, or
yearly, whichever occurs first. Replace the paper element
after every 100 operating hours or yearly, whichever occurs
first.
Note: Service the air cleaner more frequently if the
operating conditions are extremely dusty or sandy.
Removing the Foam and Paper Elements
1. Disengage the PTO and set the parking brake.
2. Stop the engine, remove the key, and wait for all
moving parts to stop before leaving the operating
position.
3. Open the hood.
4. Clean around the air cleaner to prevent dirt from getting
into the engine and causing damage.
5. Pull up on the air cleaner cover handle and rotate it
toward the engine (Fig. 23).
1
2
Figure 23
1. Air cleaner cover 2. Air cleaner cover handle
Note: Remove the air cleaner cover.
6. Carefully slide the paper element and the foam element
from the blower housing (Fig. 24).
2
1
3
5
4
Figure 24
1. Paper element
2. Foam element
3. Air cleaner cover
4. Tab
5. Slot