Assembly
9
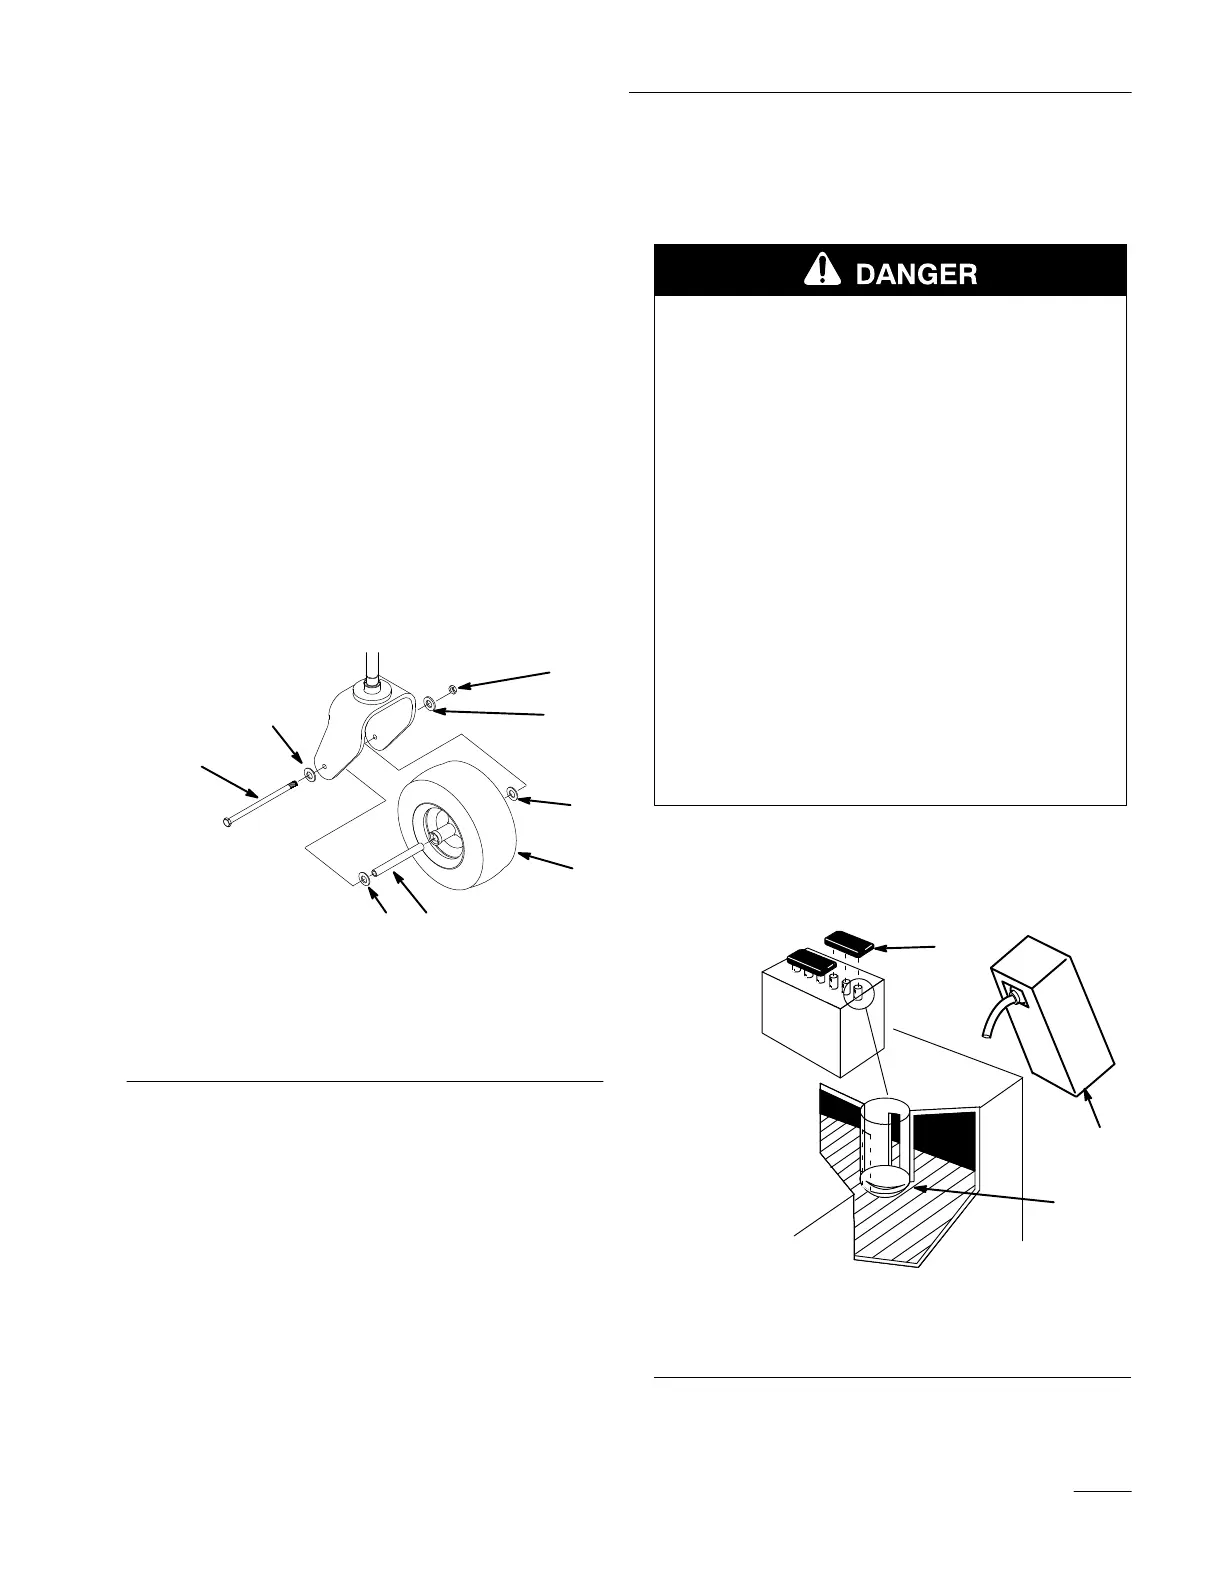
Install Castor Wheel
1. Remove locknut, washers and axle bolt from
fork (Fig. 1).
2. Jack up rear of unit until castor fork is clear of
skid.
3. Check for spacer inside wheel hub, place 3/4”
(19 mm) washers outside spacer and align wheel
between forks (Fig. 1).
4. Secure wheel with (2) 1/2” (13 mm) washers,
1/2–13 x 9” (230 mm) axle bolt and 1/2–13
locknut.
5. Torque nut to 75 ft–lb (55 N⋅m).
6. Grease castor wheel bearings (Fig. 1).
m–3957
Figure 1
1. Wheel assembly
2. Spacer
3. Washer 3/4” (19 mm)
4. Axle bolt 1/2-13 x 9”
(230 mm)
5. Washer 1/2” (13 mm)
6. Locknut 1/2–13
Check the air pressure in the front and rear tires: refer
to Tire Pressure in Maintenance section.
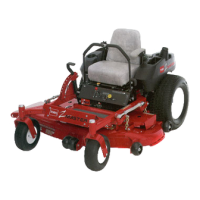
Activate the Battery
Bulk electrolyte with 1.260 specific gravity must be
purchased from a local battery supply outlet.
1. Remove the battery from the machine.
IMPORTANT: Be careful not to damage the
long vent tube when removing the battery
box.
POTENTIAL HAZARD
• Battery electrolyte contains sulfuric acid
which is a deadly poison and it causes
severe burns.
WHAT CAN HAPPEN
• If you carelessly drink electrolyte you could
die or if it gets onto your skin you will be
burned.
HOW TO AVOID THE HAZARD
• Do not drink electrolyte and avoid contact
with skin, eyes or clothing. Wear safety
glasses to shield your eyes and rubber
gloves to protect your hands.
• Fill the battery where clean water is always
available for flushing the skin.
• Follow all instructions and comply with all
safety messages on the electrolyte container.
2. Remove filler caps from the battery. Slowly pour
electrolyte into each cell until the electrolyte
level is up to the lower part of the tube (Fig. 2).
1
2
3
m–1262
Figure 2
1. Filler caps
2. Electrolyte
3. Lower part of the tube