ConvertingtoSide
Discharge
Machineswith81cm(32-inch)
MowerDecks
Themowerdeckandmowerbladesshippedwiththe
machineweredesignedforoptimummulchingand
side-dischargeperformance.
RemovingtheDischargeCoverforSide
Discharging
1.Parkthemachineonalevelsurface,disengage
theblade-controlswitch,andengagetheparking
brake.
2.Shutofftheengine,removethekey,andwait
forallmovingpartstostopbeforeleavingthe
operatingposition.
3.Removethewingnutandboltsecuringthe
coverinplace(Figure11).
Note:Retainallofthepartsforfutureuse.
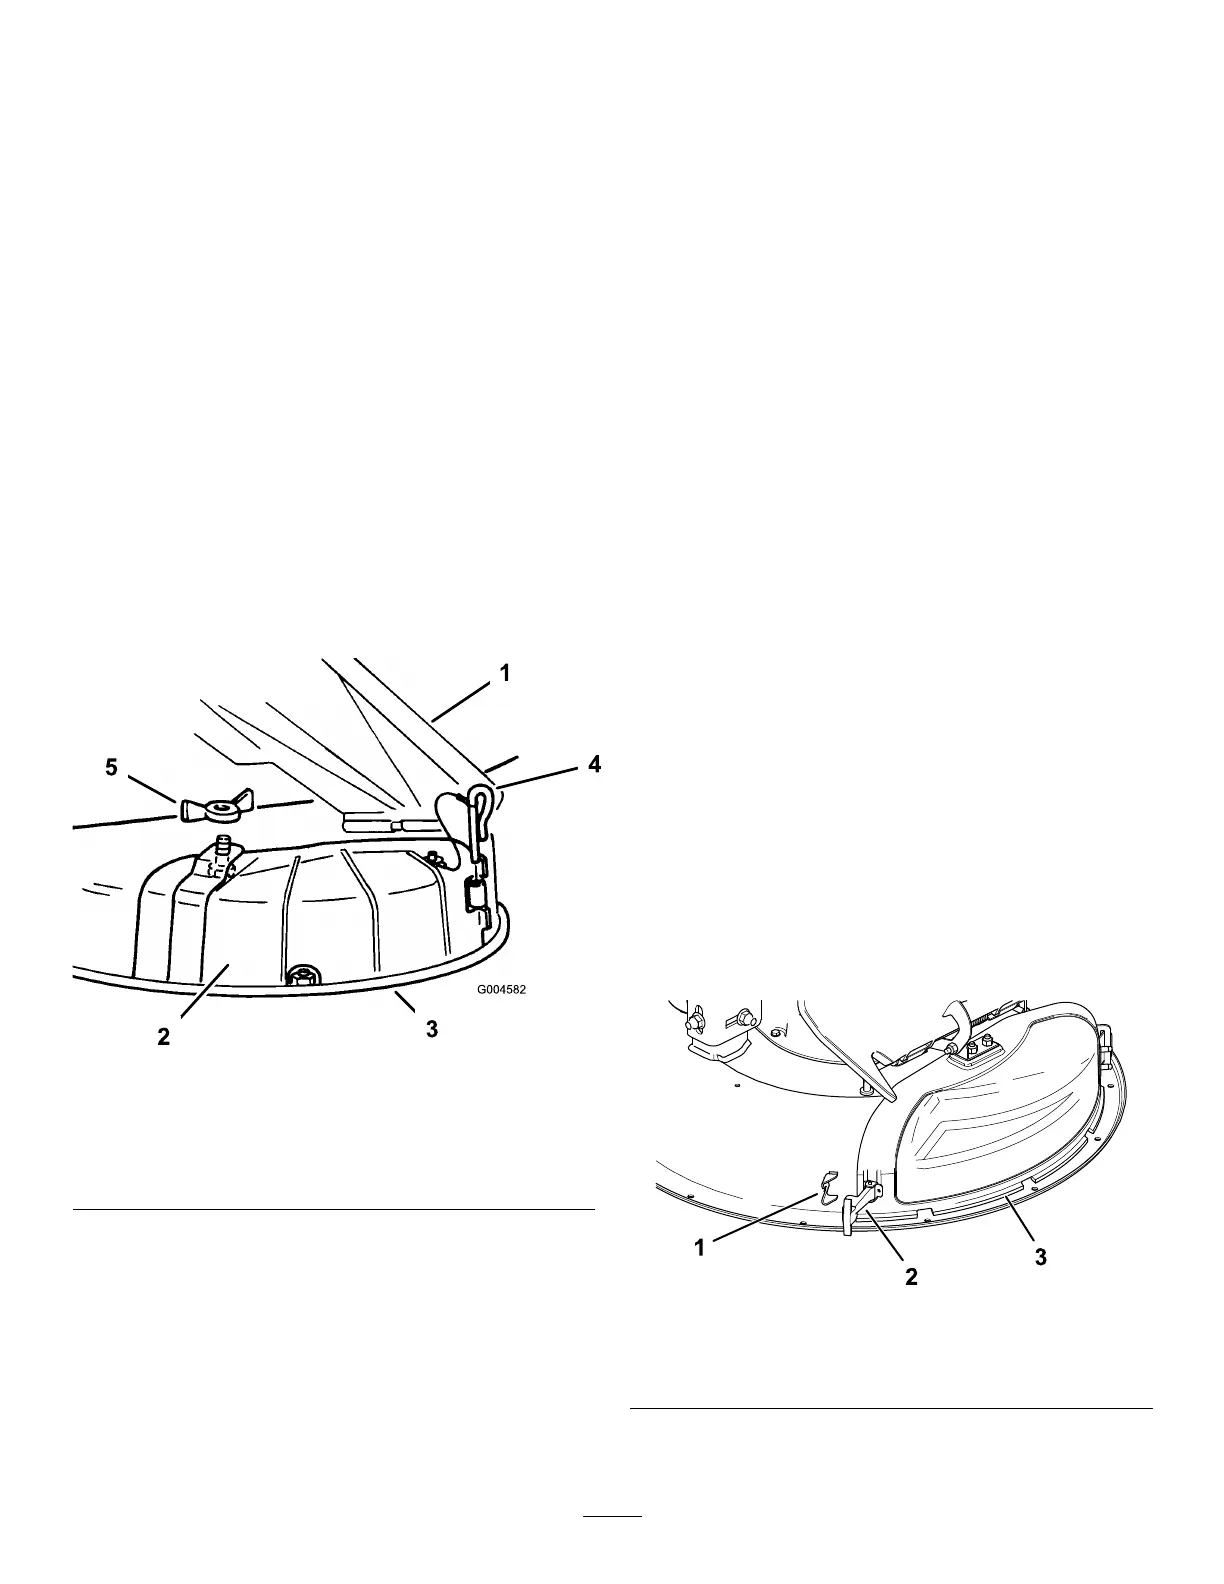
g004582
Figure11
1.Grassdeector
4.Hingepin
2.Dischargecover5.Wingnut
3.Lowerlip
4.Removethehingepinsecuringthecovertothe
deck(Figure11).
5.Liftthecoveroutandawayfromthedeck.
6.Lowerthegrassdeectoroverthedischarge
opening.
Important:Ensurethatthemowerhas
ahingedgrassdeectorthatdisperses
clippingstothesideanddowntowardthe
turfwhileinside-dischargemode.
InstallingtheDischargeCoverforMulching
1.Parkthemachineonalevelsurface,disengage
theblade-controlswitch,andengagetheparking
brake.
2.Shutofftheengine,removethekey,andwait
forallmovingpartstostopbeforeleavingthe
operatingposition.
3.Liftthegrassdeectorandplacethedischarge
coverovertheopeningontothelowerlipofthe
mowerandslideitintothefronthinge(Figure
11).
4.Slidethehingepinthroughthehinge(Figure11).
5.Securethedischargecovertothemowerwith
thewingnut(Figure11).
6.Lowerthegrassdeectoroverthedischarge
opening.
Machineswith107cm(42-inch)
MowerDecks
Themowerdeckandmowerbladesshippedwiththe
machineweredesignedforoptimummulchingand
side-dischargeperformance.
RemovingtheDischargeCoverfor
Side-Discharging
1.Parkthemachineonalevelsurface,disengage
theblade-controlswitch,andengagetheparking
brake.
2.Shutofftheengine,removethekey,andwait
forallmovingpartstostopbeforeleavingthe
operatingposition.
3.Releasetheexiblelatchfromthelatchretainer
onthedischargecoverandpivotthedischarge
covertotheright(Figure12).
g230251
Figure12
1.Latchretainer3.Dischargecover
2.Latch
4.Releasethehook-shapedlatchontopofthe
dischargecoverfromthepivotrod(Figure16).
19