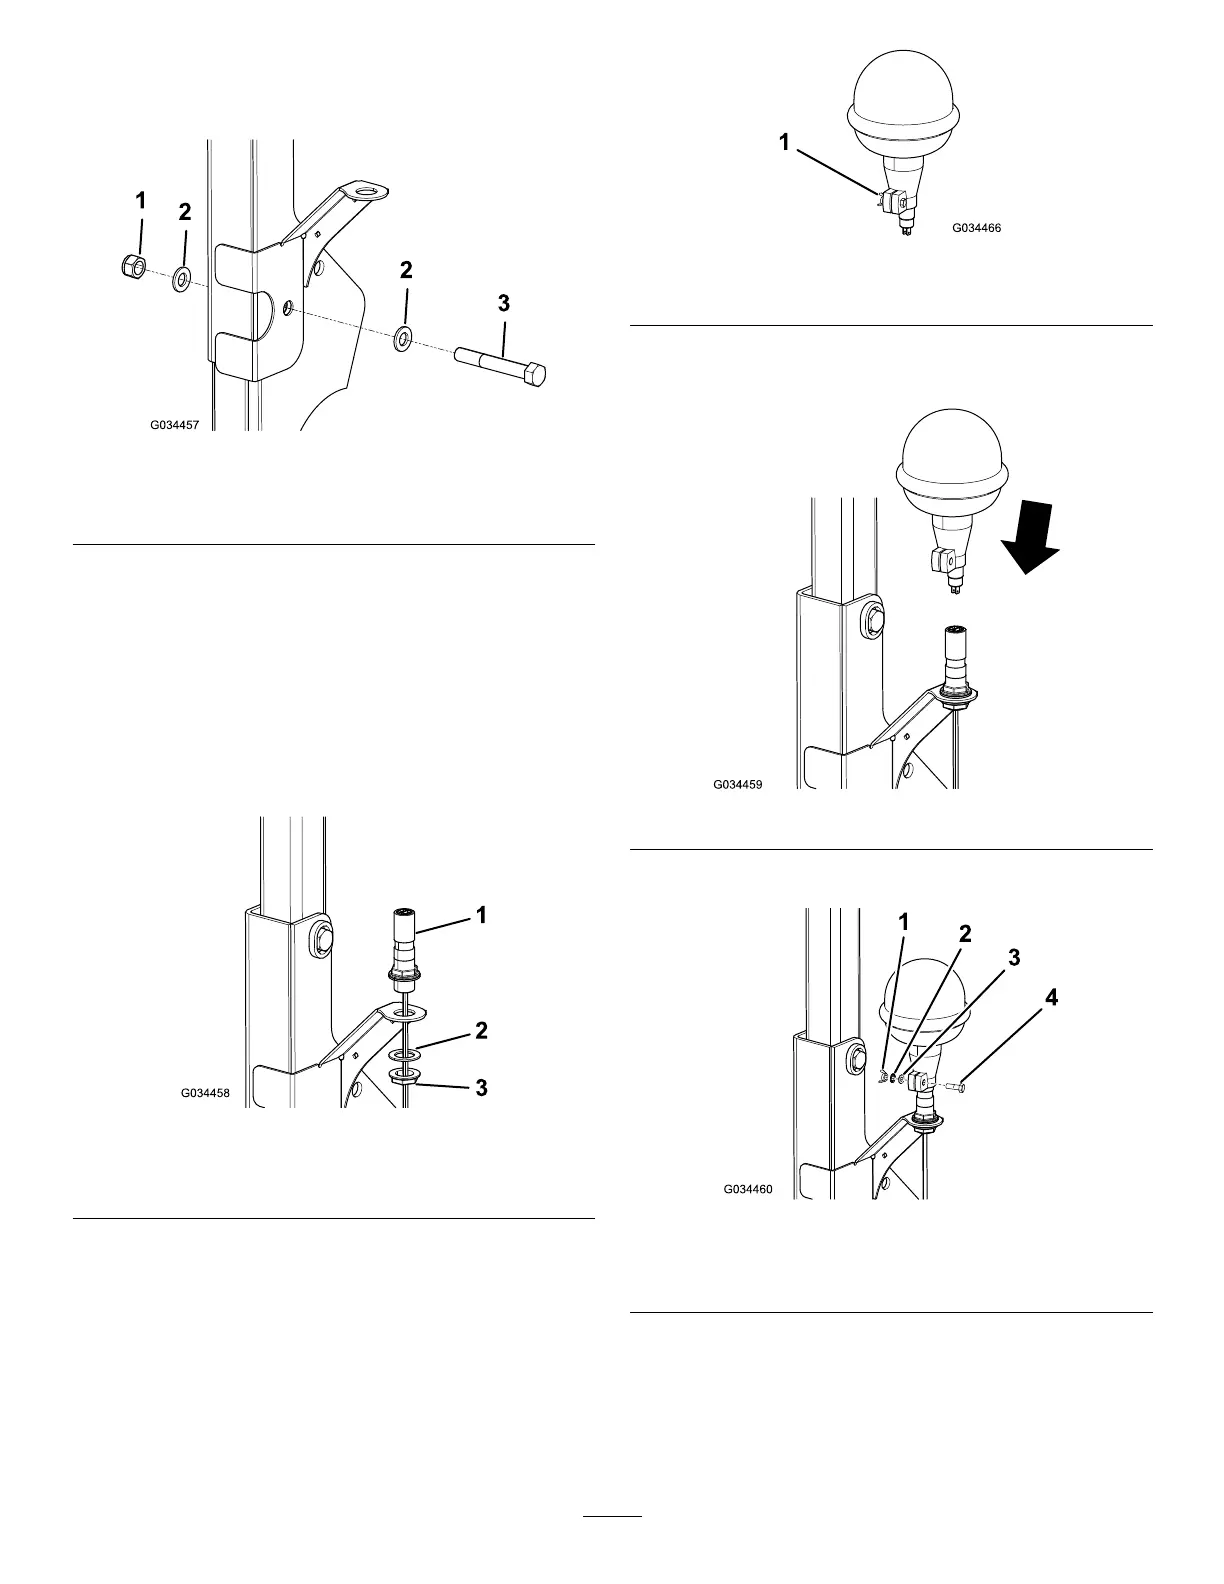
3.Aligntheholeinthebeaconbracketwiththeholein
theROPSandinstallthenewboltwithanexisting
washer(Figure2).
Figure2
1.Nut3.Bolt
2.Washer(existing)
4.Installthenewnutandanexistingwasher,andtighten
themtoatorqueof15N∙m(11ft-lb).
Note:Donotovertightenthem,asthiswillmakethe
ROPSdifculttofold.
5.Installthebeaconstandtothebeaconbracket(Figure
3).
Note:Rotatethecableasyouscrewintheconnector.
Thispreventsthecablefrombeingtwisted.
Figure3
1.Stand
3.Nut
2.Seal
6.Loosenthewingnutandremovethebeacon(Figure4).
Figure4
1.Wingnut
7.Plugthebeaconontothetopofthebeaconstand
(Figure5).
Figure5
8.Tightenthewingnutontheclamp(Figure6).
Figure6
1.Wingnut3.Washer
2.Starwasher
4.Bolt
9.RoutethecabledownthefrontoftheROPSframe,
ensuringthatitcannotbetrappedorchafed.
10.Connectthecabletothematingconnectoronthemain
wiringloom,situatednearthehorn,withtheorange
andblackwires.
2