g192116
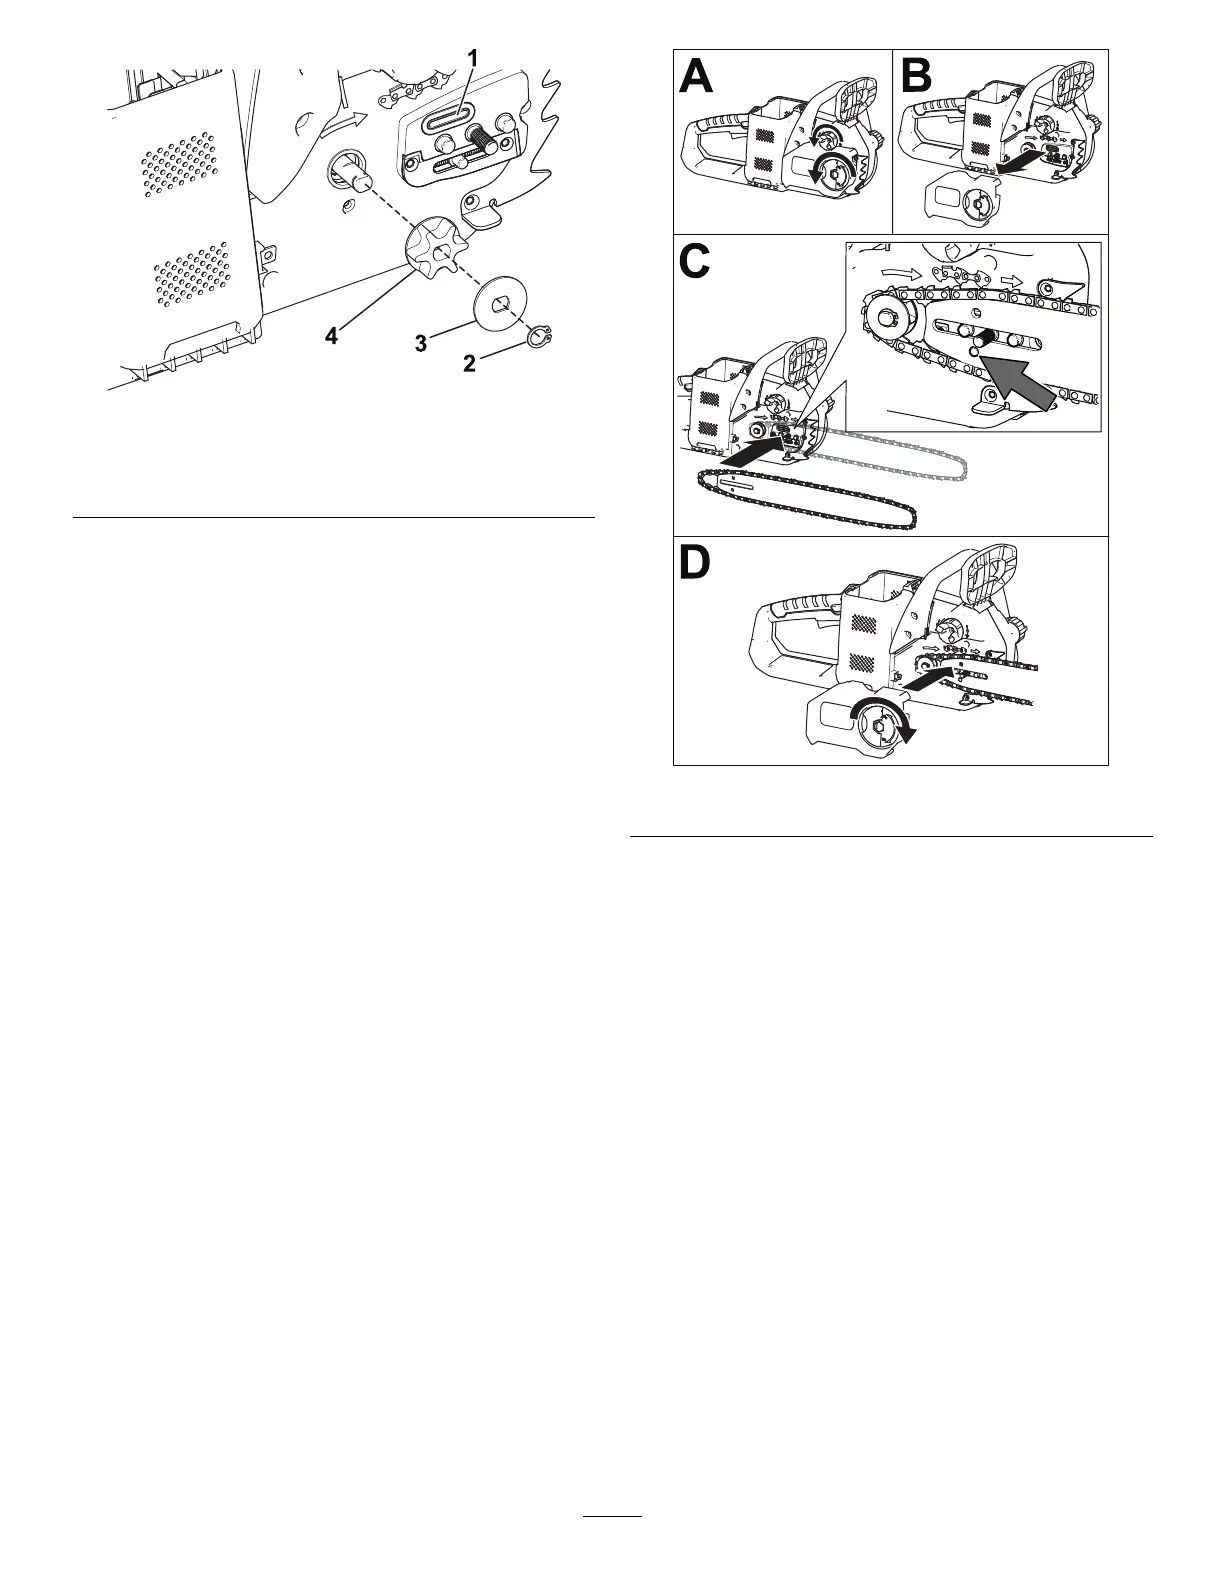
Figure30
1.Oilpassage3.Spacer
2.Clip
4.Drivesprocket
6.Inspectthedrivesprocket;ifitisexcessively
wornordamaged,replaceit.
7.Checktheoilpassage(Figure30)fordebrisand
cleantheareaifnecessary.
8.Installthedrivesprocket,spacer,andclip.
9.Cleantheguidebarandchain;useawireora
smallat-headscrewdrivertoremovedirtand
debrisfromthegroovealongtheedgeofthe
guidebar,startingfromthesprocketonthefront
endandmovingrearward.
Iftheguidebarorgroovesaredamagedorthe
sprocketonthefrontenddoesnotrotatefreely,
replacetheguidebar;ifthechainisexcessively
wornordamaged,replaceit.
10.Placethechainaroundthedrivesprocketon
thefrontendoftheguidebar,withthecutting
edgeofthechainteethonthetopofthebar
facingforwardasshowninthediagramonthe
sideofthechainsaw(Figure31C).
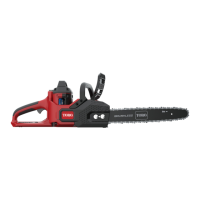
g192112
Figure31
11.Feedthechainaroundtheguidebarandalign
thechainteethintothegrooveofthebar.
12.Positiontheopenloopofthechain(notonthe
guidebar)aroundthedrivesprocketonthe
chainsawandinstalltheguidebarandattached
chainontothechainsawasshowninFigure31.
Important:Ensurethatthechainadjusting
studisinsertedintotheholeindicatedbythe
arrowinFigure31C.Youmayneedtorotate
thechaintensioningknobtotthestudinto
theholeintheguidebar.
13.Installthecoverandthewingnut,butdonot
fullytightenthewingnut(Figure31D).Foldthe
wing-nuttab.
14.Adjustthechaintension;refertoAdjustingthe
ChainT ension(page17).
18