g300383
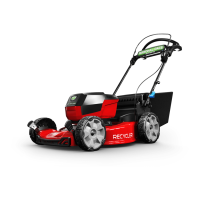
Figure57
1.Clutchpulley
3.Bolt
2.Washer
6.Insertadriveratchetinthesquareholeofthe
idlerarmtoreleasethebelttension(Figure58).
g308541
Figure58
1.Spring3.Squarehole
2.Idlerpulley
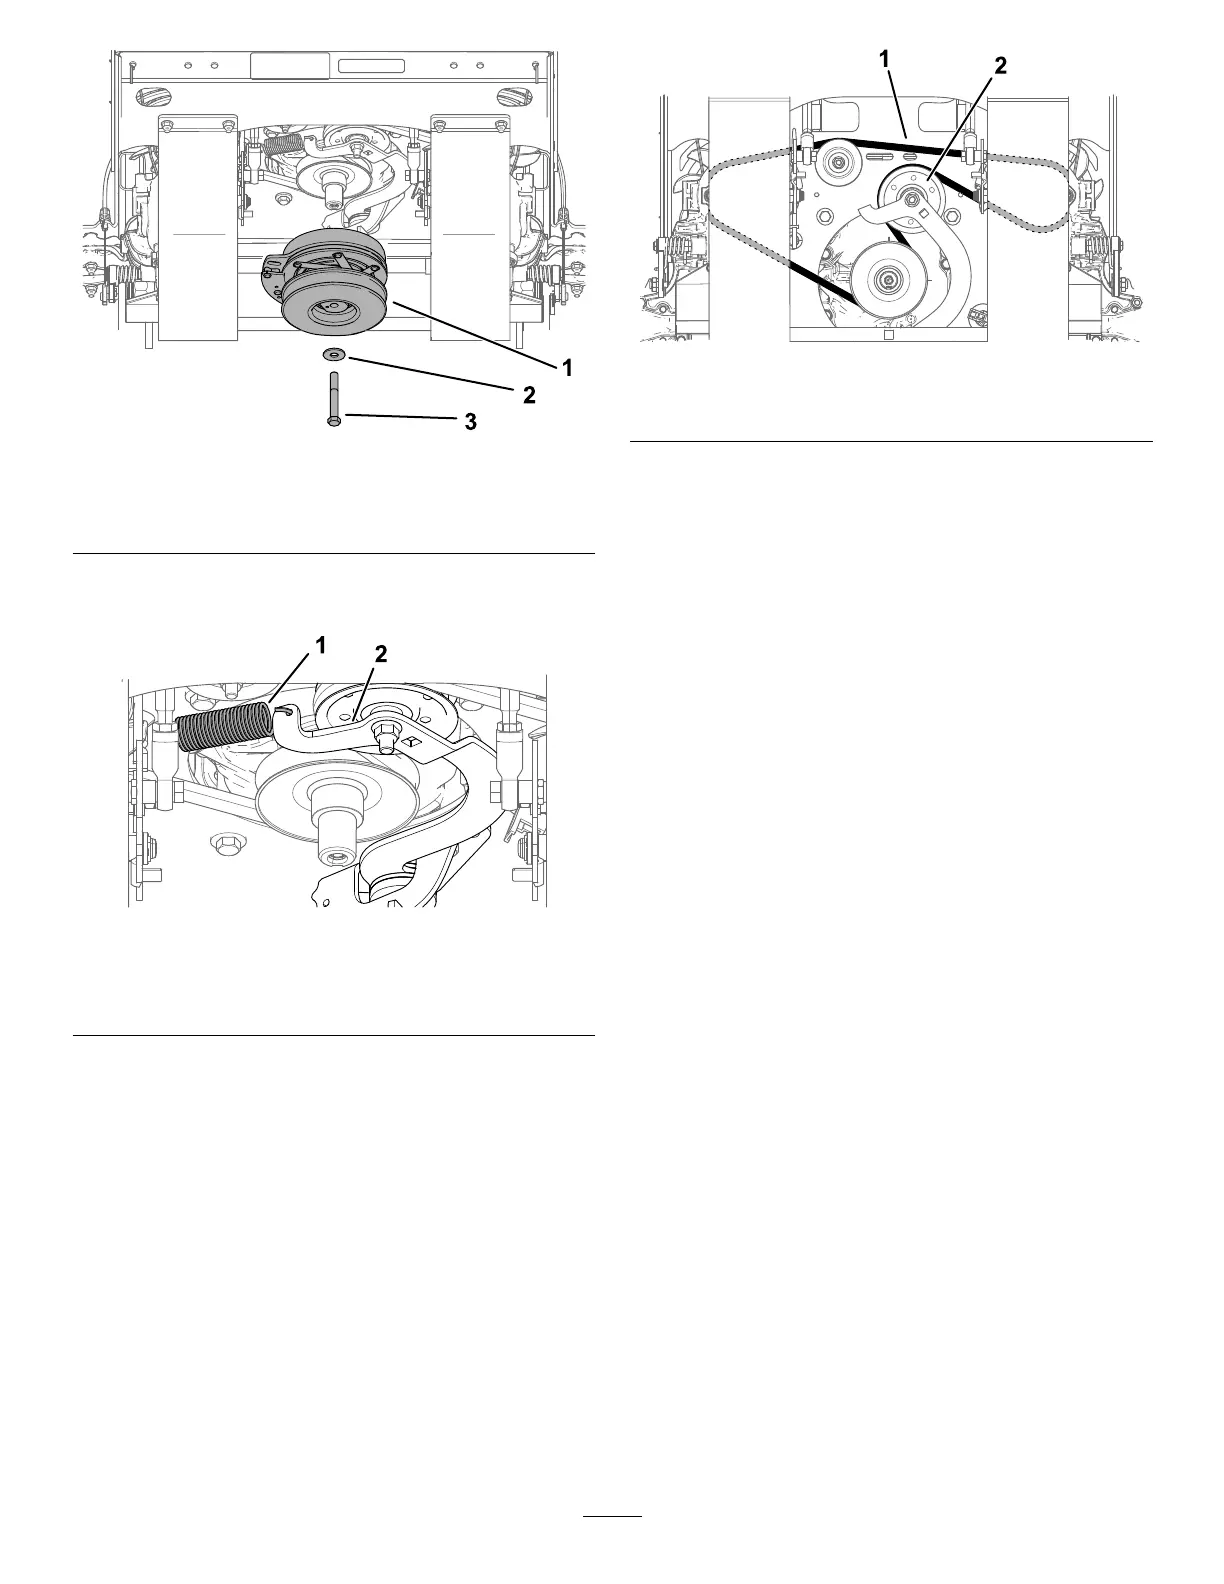
7.Removethebelt(Figure59).
8.Slowlyreleasethedrivertoreleasethespring
tension.Removethespringfromtheanchoron
theframe,ifneeded.
9.Installthenewbelt,routingitaroundthepulleys
asshowninFigure59.
g300384
Figure59
1.Belt2.Idlerpulley
10.Installthespringtothespringanchor.Usethe
driveratchettoapplytensiontothespringto
allowthebelttopassoverthelipoftheidler
pulley(Figure58).
11.Releasethetensioninthespringtoapply
tensiontothebelt.
12.Checkthatthebeltisseatedproperlyinallthe
pulleys.
13.Installtheclutchpulley(Figure57).T orquethe
boltto68to81N∙m(50to60ft-lb).
14.Installtheguardplate(Figure57).
15.Installthemower-deckbelttotheclutchpulley;
refertoReplacingtheMower-DeckBelt(page
39).
41