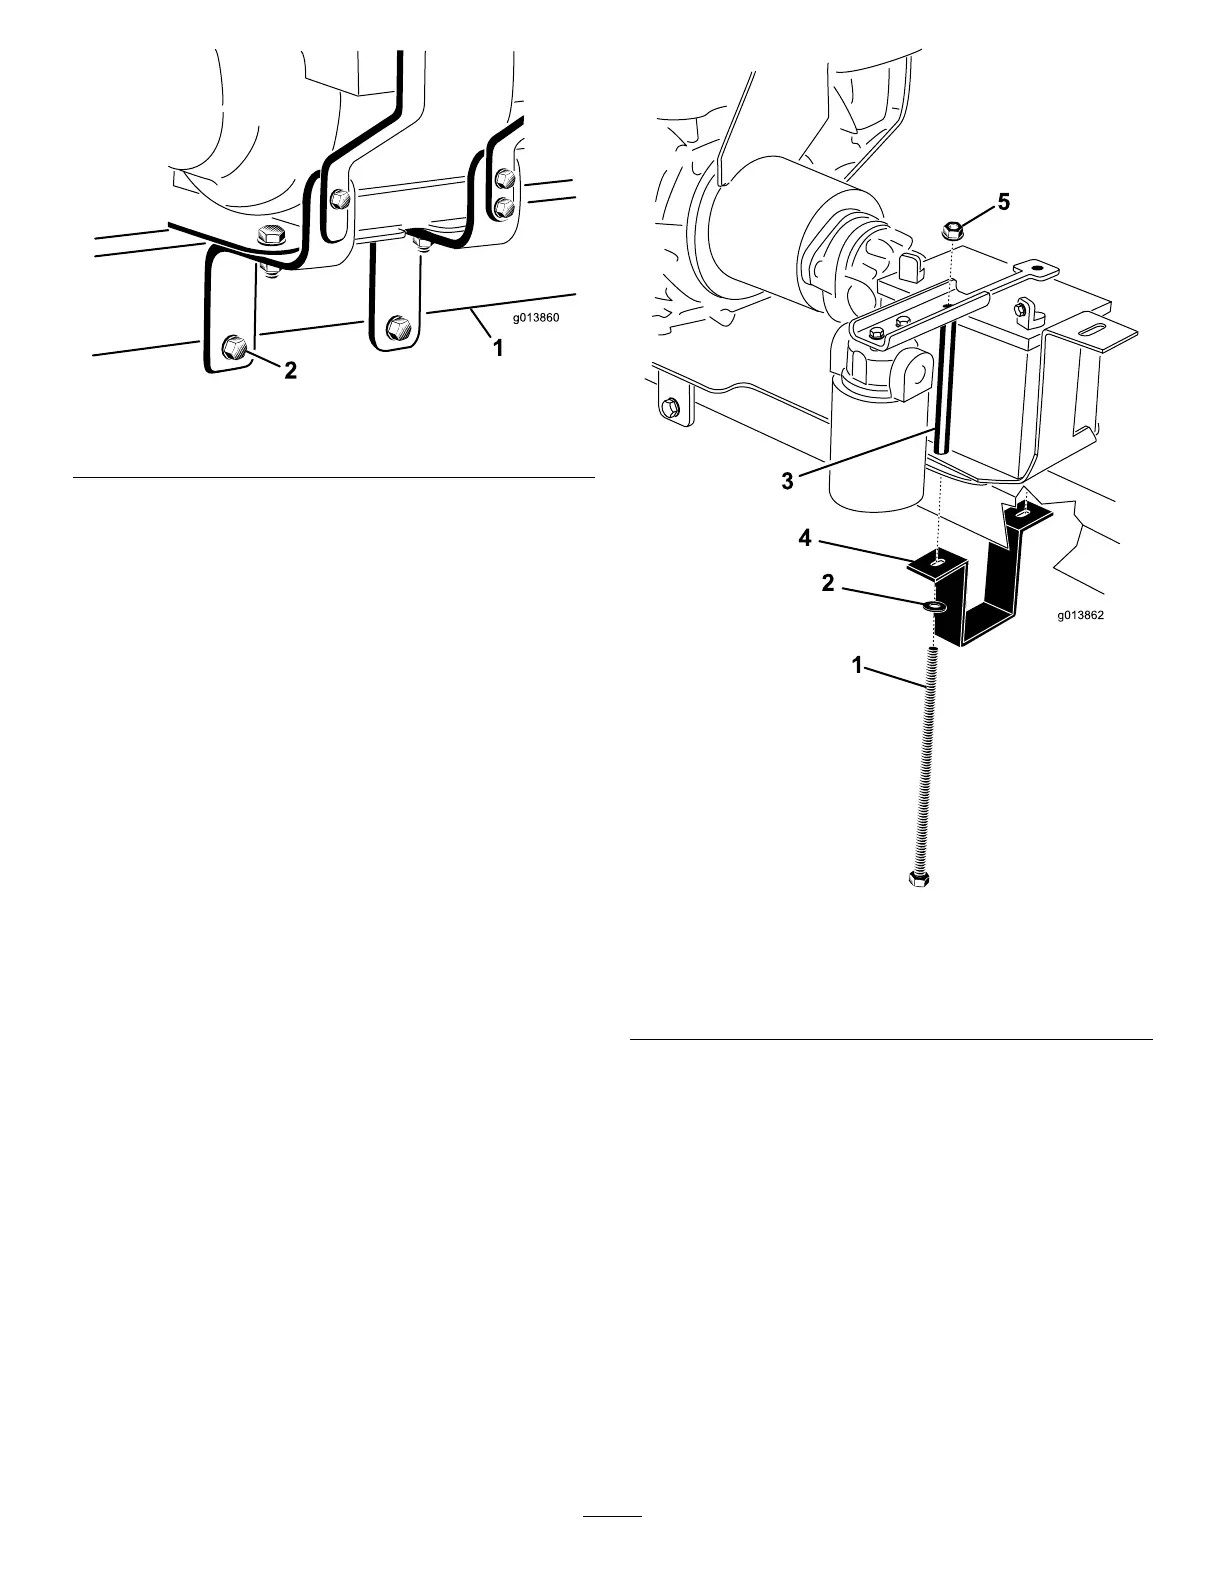
g013860
Figure7
1.Hitchtube
2.Mountingbolts(2)
22.Adjusttheenginemountbracketsothatitis
tighttothehitch.Fullytightenthetwobolts
securingtheenginemountbracketstothe
enginemountingplate(Figure8).
23.Checkthattheenginemountingplateislevel
andfullytightenthe2bolts(1/2x5inches)
throughtheenginemountbracketlowerholes.
24.Placethebatteryontothebatterytray,
positioningtheterminalsasshowninFigure8.
25.Positionthebatteryholddownonthebattery
(Figure8).
26.Holdthebatterymountstraparoundthe
undersideofthehitchtube(Figure8).
27.Ontherightside,installabatteryboltthrough
thewasher,batterymountstrap,enginemount
plate,batterytrayandholddown.Looselyinstall
aangenut(Figure8).
Note:Makesuretheboltsareinstalledfrom
thebottom.
28.Ontheleftside,installabatteryboltthrough
thewasher,batterymountstrap,enginemount
plate,batterytray,batterybolttube,andhold
down.Looselyinstallaangenut(Figure8).
29.Makesureeverythingisconcentricandtighten
thenuts
g013862
Figure8
1.Batterybolt(2)
4.Batterymountstrap
2.Washer(2)5.Flangelocknut(2)
3.Bolttube
30.Unpackthehoseguide,hydraulicreturnhose
(hose#3),hydraulicsuctionhose(hose#4),4
bolts(1/4x3/4inch)and4locknuts(1/4inch).
Note:Removethehosesecuredtothehose
guide,hydraulicreturnhoseandhydraulic
suctionhoseforshipping.
31.Using2bolts(1/4x3/4inch)andange
locknuts,attachthehoseguidetothebracket
onthehydraulictank(Figure9).
5
 Loading...