Charging the Battery
Batter y posts, ter minals, and r elated accessories
contain lead and lead compounds, chemicals
kno wn to the State of Calif or nia to cause cancer
and r epr oducti v e har m. W ash hands after handling
batter y .
Charg e the batter y for 24 hours initially , then monthly
(ev er y 25 star ts) or as needed. Alw a ys use the c harg er in a
sheltered area and c harg e the batter y at room ter mperature
(70 ° F or 22 ° C) whenev er possible .
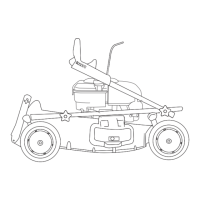
1. Connect the c harg er to the mo w er wire har ness located
belo w the ignition k ey ( Figure 39 ).
Figure 39
2. Plug the c harg er into a w all outlet.
Note: W hen the batter y no long er holds a c harg e , recycle
or dispose of the lead-acid batter y according to local codes .
Replacing the Fuse
If the batter y does not c harg e or the engine does not tur n
with the electric star ter , the fuse ma y be blo wn. R e place it
with a 40-amp plug-in type fuse . R efer to Installing the Fuse .
Lubricating the Wheel Gears
Lubricate eac h r ear wheel with g rease yearly .
1. Wipe the g rease fittings just inside the rear wheels with
a clean rag ( Figure 40 ).
Figure 40
2. Install a g rease gun onto eac h fitting and g ently apply 2
or 3 pumps of #2 m ulti-pur pose lithium-base g rease .
Replacing the Blade
Important: Y ou will need a torque wr ench to install
the blade pr oper l y . If y ou do not ha v e a torque wr ench
or ar e uncomf or ta ble perf or ming this pr ocedur e,
contact an Authoriz ed Ser vice Dealer .
Examine the blade whenev er y ou r un out of g asoline . If the
blade is damag ed or crac k ed, re place it immediately . If the
blade edg e is dull or nic k ed, ha v e it shar pened or re place it.
T he blade is shar p; contacting the blade can r esult
in serious per sonal injur y .
W ear g lo v es when ser vicing the blade.
1. Disconnect the spark plug wire from the spark plug .
R efer to Pre paring for Maintenance .
2. Tip the mo w er onto its side with the air filter up .
3. Use a bloc k a w ood to hold the blade steady ( Figure 41 ).
Figure 41
4. R emo v e the blade , sa ving all mounting hardw are .
5. Install the new blade and all mounting hardw are .
Important: P osition the cur v ed ends of the blade
to point to w ard the mo w er housing .
6. Use a torque wr ench to tighten the blade bolt to
60 ft-lb (82 N ⋅ m).
14

 Loading...