g294195
Figure63
8.Installthewasherandhairpincotter(Figure63).
9.Repeatsteps6through8fortheothersideof
themachine.
10.Checktheside-to-sidelevelagain;repeatthis
procedureuntilthemeasurementsarecorrect.
11.Continuelevelingthemowerdeckbychecking
thefront-to-rearbladeslope;refertoChecking
theFront-to-RearBladeSlope(page45).
AdjustingtheFront-to-RearBlade
Slope
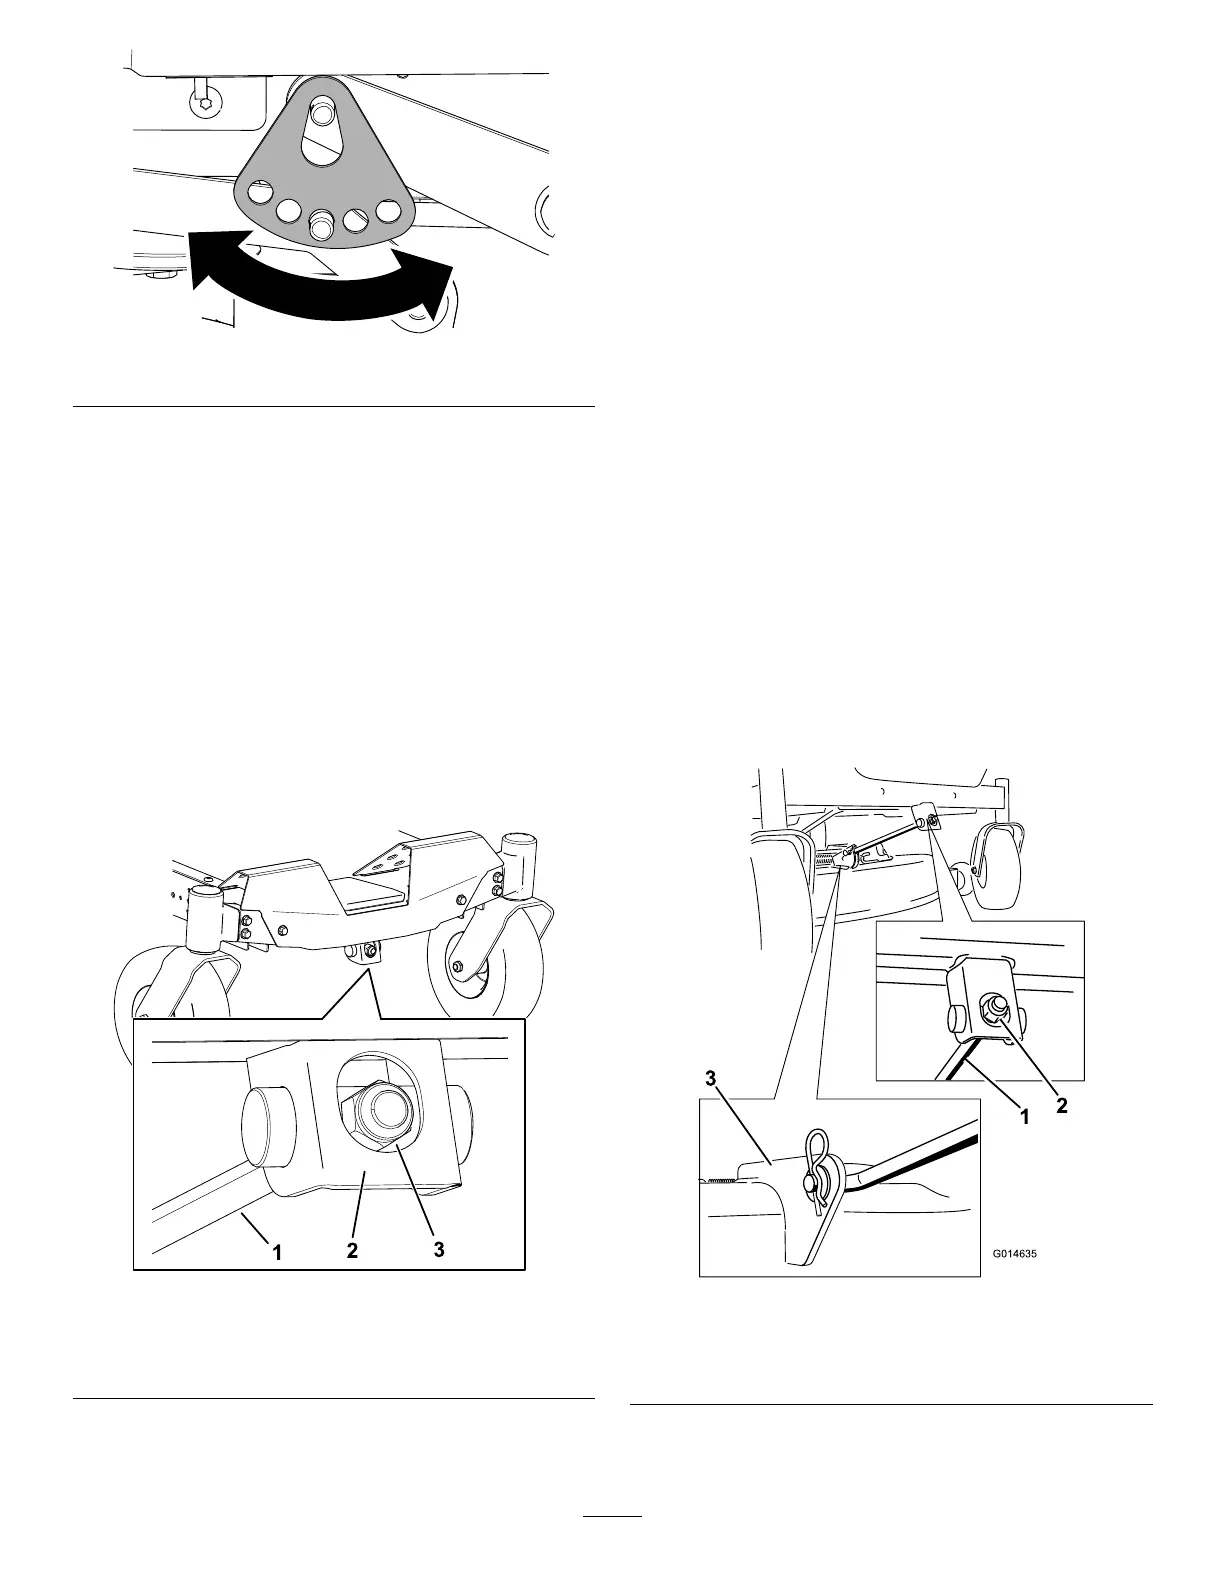
1.Rotatetheadjustmentnutinthefrontofthe
mower(Figure64).
g294471
Figure64
1.Adjustingrod3.Adjustmentnut
2.Adjustingblock
2.T oraisethefrontofthemower,tightenthe
adjustmentnut.
3.T olowerthefrontofthemower,loosenthe
adjustmentnut.
4.Afteradjustment,checkthefront-to-rearslope
again,continueadjustingthenutuntilthefront
bladetipis1.6to7.9mm(1/16to5/16inch)
lowerthantherearbladetip;refertoChecking
theFront-to-RearBladeSlope(page45).
5.Whenthefront-to-rearbladeslopeiscorrect,
checktheside-to-sidelevelofthemoweragain;
refertoCheckingtheSide-to-SideLevel(page
45).
RemovingtheMowerDeck
1.Parkthemachineonalevelsurface,disengage
theblade-controlswitch(PTO),andmovethe
motion-controlleversoutwardtothePARK
position.
2.Shutofftheengine,removethekey,andwait
forallmovingpartstostopbeforeleavingthe
operatingposition.
3.Lowertheheight-of-cutlevertothelowest
position.
4.Removethehairpincotterfromthefrontsupport
rod,andremovetherodfromthedeckbracket
(Figure65).
g014635
Figure65
1.Frontsupportrod3.Deckbracket
2.Lockingnut
5.Carefullylowerthefrontofthemowerdeckto
theground.
47
 Loading...