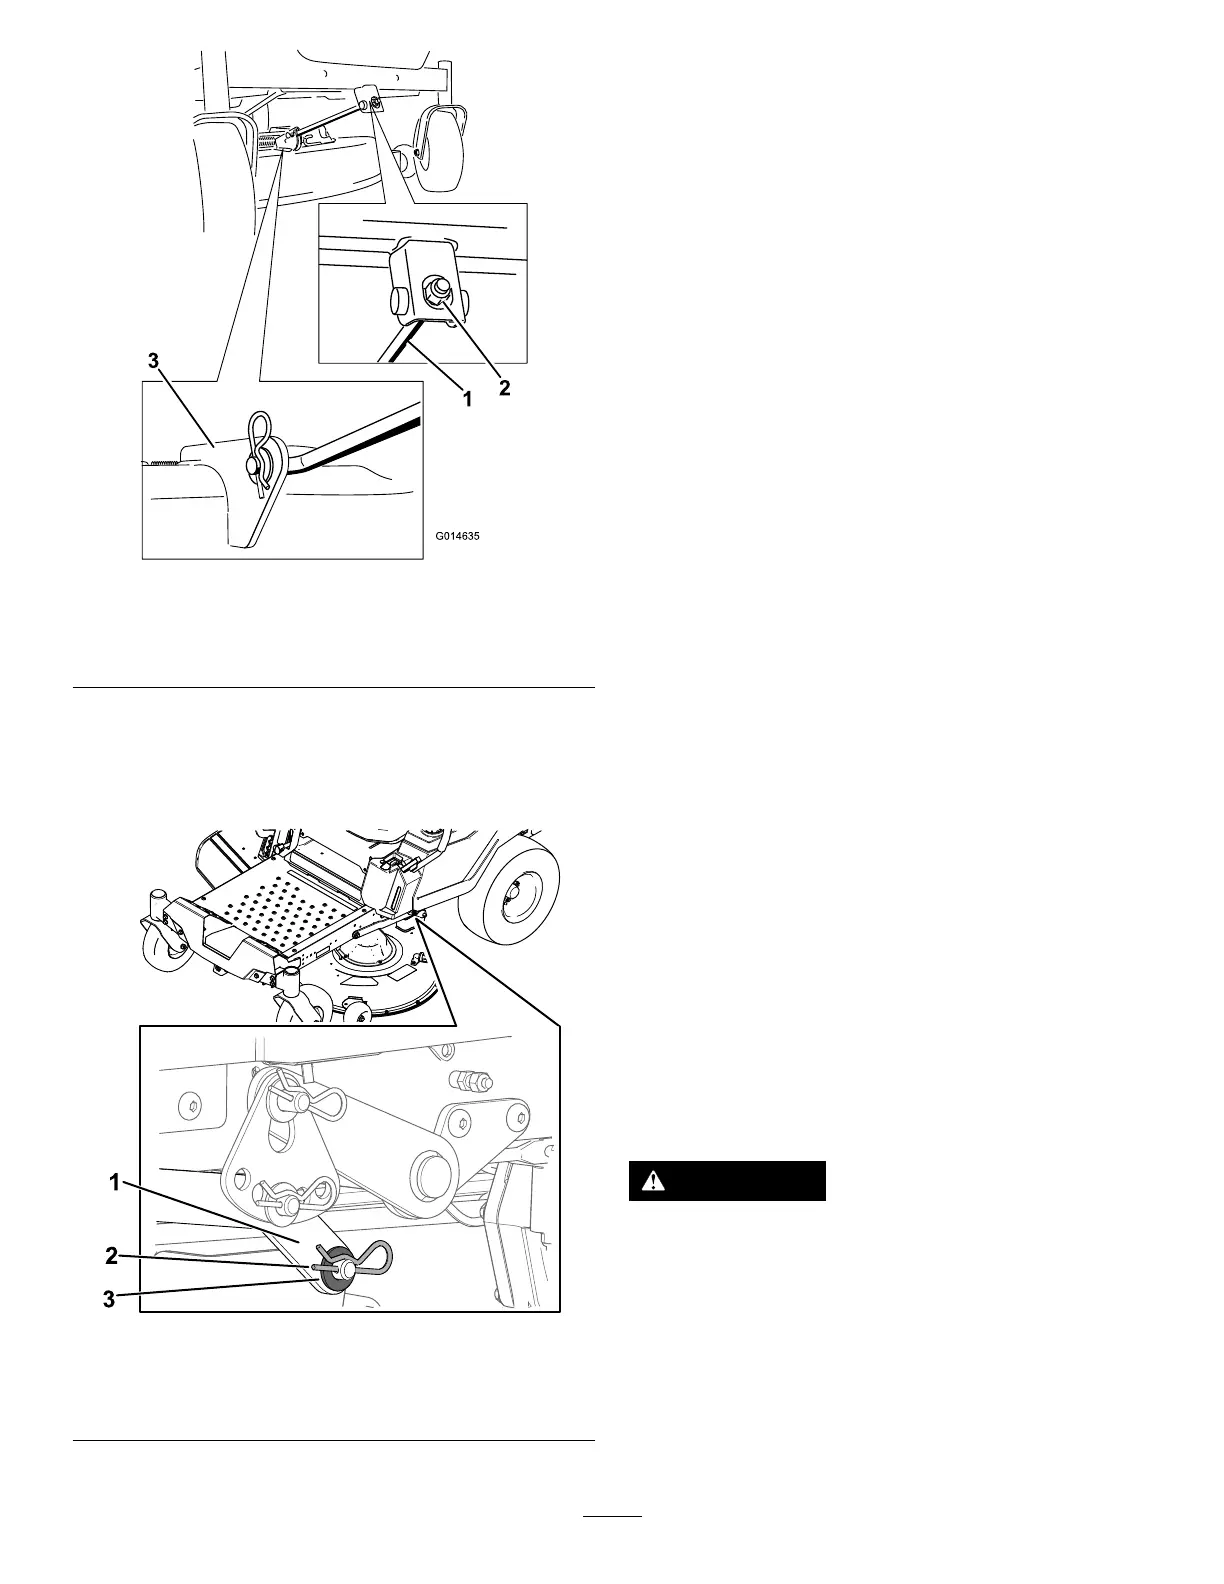
g014635
Figure65
1.Frontsupportrod3.Deckbracket
2.Lockingnut
5.Carefullylowerthefrontofthemowerdeckto
theground.
6.On1sideofthemachine,removethewasher
andhairpincotterfromthedeckpin(Figure66).
g295768
Figure66
1.Liftarm
3.Washer
2.Hairpincotter
7.Removetheliftarmfromthedeckpin(Figure
66).
8.Repeatsteps6and7fortheothersideofthe
machine.
9.Slidethemowerdeckrearwardtoremovethe
mowerbeltfromtheenginepulley.
10.Slidethemowerdeckoutfromunderneaththe
machine.
Note:Retainallpartsforfutureinstallation.
InstallingtheMowerDeck
1.Parkthemachineonalevelsurface,disengage
theblade-controlswitch(PTO),andmovethe
motion-controlleversoutwardtothePARK
position.
2.Shutofftheengine,removethekey,andwait
forallmovingpartstostopbeforeleavingthe
operatingposition.
3.Slidethemowerunderthemachine.
4.Lowertheheight-of-cutlevertothelowest
position.
5.On1sideofthemachine,lifttherearofthe
mowerdeckandinstalltheliftarmtothedeck
pin(Figure66).
6.Installtheliftarmusingthewasherandhairpin
cotter(Figure66).
7.Repeatsteps5and6fortheothersideofthe
machine.
8.Attachthefrontsupportrodtothemowerdeck
withtheclevispinandhairpincotter(Figure65).
9.Installthemowerbeltontotheenginepulley;
refertoReplacingtheMowerBelt(page41).
ReplacingtheGrass
Deector
ServiceInterval:Beforeeachuseordaily—Inspect
thegrassdeectorfordamage.
WARNING
Anuncovereddischargeopeningcouldallow
themachinetothrowobjectstowardyouor
bystanders,resultinginseriousinjury.Also,
contactwiththebladecouldoccur.
Neveroperatethemachinewithoutthe
grassdeector,thedischargecover,orthe
grass-collectionsysteminplace.
1.Removethenut(3/8inch)fromtherodunder
themower(Figure67).
48