Do you have a question about the Toro TIMECUTTER HD 75202 and is the answer not in the manual?
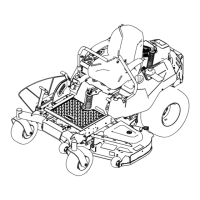
Provides introductory information about the service manual's purpose and scope.
Explains the meaning of symbols and icons used throughout the manual for clarity.
Essential safety guidelines and precautions to prevent injury and equipment damage.
Specific safety advice and warnings covering potential hazards during operation.
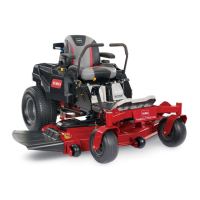
Key operational and dimensional data for various TIMECUTTER HD models.
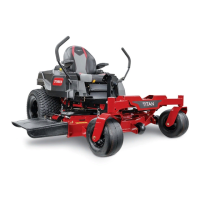
Physical measurements and weight of different TIMECUTTER HD models.
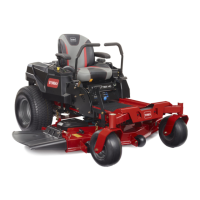
Specifications related to the mower deck, including width and configuration.
Specifications for models equipped with Toro and Kawasaki engines.
Further details on mower deck specifications for specific models.
Specifications for models equipped with Toro engines.
Additional mower deck specifications for specific models.
Detailed measurements and weight for all TIMECUTTER HD models.
Guidelines for applying torque to fasteners to ensure proper assembly and safety.
Identification of different grades and classes for bolts and screws.
Torque values for US standard fasteners, including various grades and thread sizes.
Torque values for metric fasteners, including various classes and thread sizes.
Torque specifications for wheel bolts, lug nuts, and thread cutting screws.
Tables for converting between decimal, millimeter, and fractional measurements.
Factors for converting linear, area, volume, weight, pressure, work, and liquid measurements.
Overview of maintenance tasks and their recommended service intervals.
Detailed chart outlining maintenance tasks based on operating hours or time intervals.
Procedures for maintaining the Toro engine, including air cleaner and oil servicing.
Steps for cleaning and replacing the air cleaner foam and paper elements.
Step-by-step instructions for removing the air cleaner foam and paper elements.
Methods for cleaning the foam and inspecting the paper air filter elements.
Procedures for checking and changing the engine oil and oil filter.
Instructions for checking the engine oil level before each use or daily.
Detailed steps for checking and adding engine oil to maintain proper levels.
Procedure for draining old oil and replacing the engine oil filter.
Steps for completing the oil filter change and filling with new oil.
Information on checking and replacing spark plugs at specified intervals.
Procedure for safely removing the spark plug from the engine.
Instructions for inspecting spark plug condition and gap.
Procedure for correctly installing a new or cleaned spark plug.
Steps for cleaning the engine's cooling system for optimal performance.
Procedures for maintaining the fuel system, including filter replacement.
Step-by-step guide for replacing the inline fuel filter.
Procedures for maintaining the electrical system, focusing on the battery.
Instructions for charging and testing the battery.
Procedures for inspecting and replacing mower and hydrostatic drive belts.
Guidelines for identifying worn or damaged belts.
Safety precautions and procedures for maintaining cutting blades.
Steps for inspecting cutting edges, curved areas, and checking for wear or cracks.
Method for checking if the cutting blades are bent using a level surface.
Procedure for removing and replacing mower blades.
Steps to safely remove the blade bolt, washer, and blade from the spindle.
Procedure for installing new mower blades, including torque specifications.
Instructions for sharpening and balancing mower blades for optimal performance.
A table listing common problems, their potential causes, and recommended solutions.
Troubleshooting steps for when the starter motor does not crank the engine.
Steps to diagnose why the engine fails to start or run smoothly.
Troubleshooting steps for when the engine experiences a loss of power.
Troubleshooting steps for an engine that is overheating.
Troubleshooting steps for producing an uneven cutting height.
Troubleshooting steps for when the mower blades fail to rotate.
Exploded view illustrating the components of the caster tire assembly.
Procedures for removing and installing the motion control assembly.
Detailed diagram of the caster tire and wheel assembly.
Instructions for removing and installing the caster assembly and its bearings.
Procedure for removing and installing the caster wheel bearing.
Procedure for removing the left console assembly from the machine.
Steps for reinstalling the left console assembly onto the machine.
Procedure for removing the right console assembly from the machine.
Continuation of steps for removing the right console assembly.
Steps for reinstalling the right console assembly onto the machine.
Procedure for removing the seat assembly from ZX model TIMECUTTER HD.
Procedure for installing the seat assembly onto ZX model TIMECUTTER HD.
Procedure for removing the seat and MyRIDE™ platform from MR models.
Continuation of steps for removing the seat and MyRIDE™ platform.
Further steps for removing the seat and MyRIDE™ platform assembly.
Final steps for removing the seat and MyRIDE™ platform assembly.
Final procedures for lifting the MyRIDE™ assembly off the machine.
Procedure for installing the seat and MyRIDE™ platform assembly onto the machine.
Continuation of steps for installing the seat and MyRIDE™ platform.
Final steps for connecting components and verifying function.
Procedure for removing the fuel tank assembly from the machine.
Procedure for installing the fuel tank assembly onto the machine.
Steps for removing the throttle control assembly from the console.
Steps for installing the throttle control assembly onto the console.
Continuation of steps for installing the throttle control assembly.
Steps for removing the choke control assembly from the console.
Steps for installing the choke control assembly onto the console.
Continuation of steps for installing the choke control assembly.
Procedure for removing the park brake handle assembly.
Procedure for installing the park brake handle assembly.
Continuation of steps for installing the park brake handle assembly.
Steps for removing the motion control assembly from the machine frame.
Final steps for disconnecting the motion control assembly from the frame.
Procedure for installing the motion control assembly and connecting linkage.
Instructions for adjusting the position of the motion control handles for operator comfort.
Exploded view of the engine mounting for Toro twin cylinder engines.
Diagram showing exploded view of Toro twin cylinder engine mounting components.
Steps for safely removing the Toro twin cylinder engine from the machine.
Continuation of steps for disconnecting electrical and fuel connections.
Final steps for disconnecting cables, removing clutch, pulley, and mounting bolts.
Procedure for preparing the frame and lowering the engine into place.
Steps for installing the clutch, washer, and clutch bolt, and torquing.
Connecting ground wire and starter wire for Toro engine installation.
Connecting wire harnesses and fuel/vent lines for Toro engine installation.
Final steps: installing belts, muffler, guard, filling oil, and verifying function.
Steps for safely removing the Kawasaki engine from the machine.
Procedure for preparing the frame and lowering the Kawasaki engine into place.
Final steps: connecting wiring, belts, muffler, guard, filling oil, and verifying function.
Exploded view of the hydrostatic drive system components.
Detailed diagram of the hydrostatic drive system components.
Instructions for using the bypass valves to allow manual movement of the machine.
Procedure for adjusting the neutral setting of the motion control levers.
Continuation of steps for adjusting the neutral setting and verifying.
Procedure for adjusting the machine's tracking to ensure straight-line movement.
Steps for changing the hydraulic oil in the hydrostatic drive system.
Procedure for removing air from the hydrostatic drive system after maintenance.
Steps for safely removing the hydrostatic drive belt.
Final steps for removing the drive belt from the pulleys.
Procedure for installing the hydrostatic drive belt around the pulleys.
Final steps for installing the idler spring and connecting the battery.
Procedure for removing the hydrostatic drive transmission from the right side.
Disconnection of bypass arm and brake linkage from the transmission.
Notes on overflow tubes and their orientation during transmission removal.
Steps for removing bolts securing the transmission to the frame.
Procedure for installing the hydrostatic drive transmission and its mounting hardware.
Connecting brake linkage and bypass arm to the transmission.
Connecting motion control linkage, installing drive belt, and drive wheel.
Adding hydraulic oil, purging air, and adjusting settings.
Exploded view of the mower deck components.
Detailed diagram of mower deck components and their labels.
Exploded view of the deck lift assembly components.
Procedure for replacing the mower deck belt.
Continuation of steps for routing and installing the new mower belt.
Steps for safely removing the mower deck from the machine.
Final steps for unhooking chains and sliding the deck out.
Procedure for positioning and attaching the mower deck to the machine.
Final steps for installing the mower belt, covers, and verifying function.
Steps for removing the mower spindle assembly.
Procedure for disassembling the mower spindle components.
Procedure for assembling the mower spindle components.
Procedure for leveling the mower deck for optimal cutting performance.
Continuation of steps for measuring and adjusting blade height for deck leveling.
Using blocks and adjustment bolts to level the mower deck.
Final checks and adjustments for mower deck leveling.
Steps for safely removing the electric PTO clutch.
Procedure for installing the electric PTO clutch.
Final steps for connecting wires and verifying PTO clutch function.
Exploded view of the electrical system components.
Diagram of the electrical system components and their connections.
General guidelines for electrical testing and troubleshooting.
Information about the fuse block, its function, and how to test fuses.
Description of the ignition switch function and wiring connections.
Procedure for testing the ignition switch continuity in different positions.
Description of the hourmeter's function and testing procedure.
Information on the seat switch function and testing its continuity.
Description and testing procedure for the neutral switches.
Description and testing procedure for the parking brake switch.
Description of the starter solenoid and procedure for testing it.
Description of the PTO switch function and its role in safety interlocks.
Procedure for testing the PTO switch continuity in different positions.
Description of the electric PTO clutch and its components.
Procedure for measuring the coil resistance of the electric PTO clutch.
Procedure to check for continuity to ground for the PTO clutch.
Procedure for measuring the current draw of the electric PTO clutch.
Information on the TVS Diode's function and testing.
Description of the kill relay's function in grounding the magneto.
Diagram illustrating the electrical system wiring and connections.
| Brand | Toro |
|---|---|
| Model | TIMECUTTER HD 75202 |
| Category | Lawn Mower |
| Language | English |