Figure39
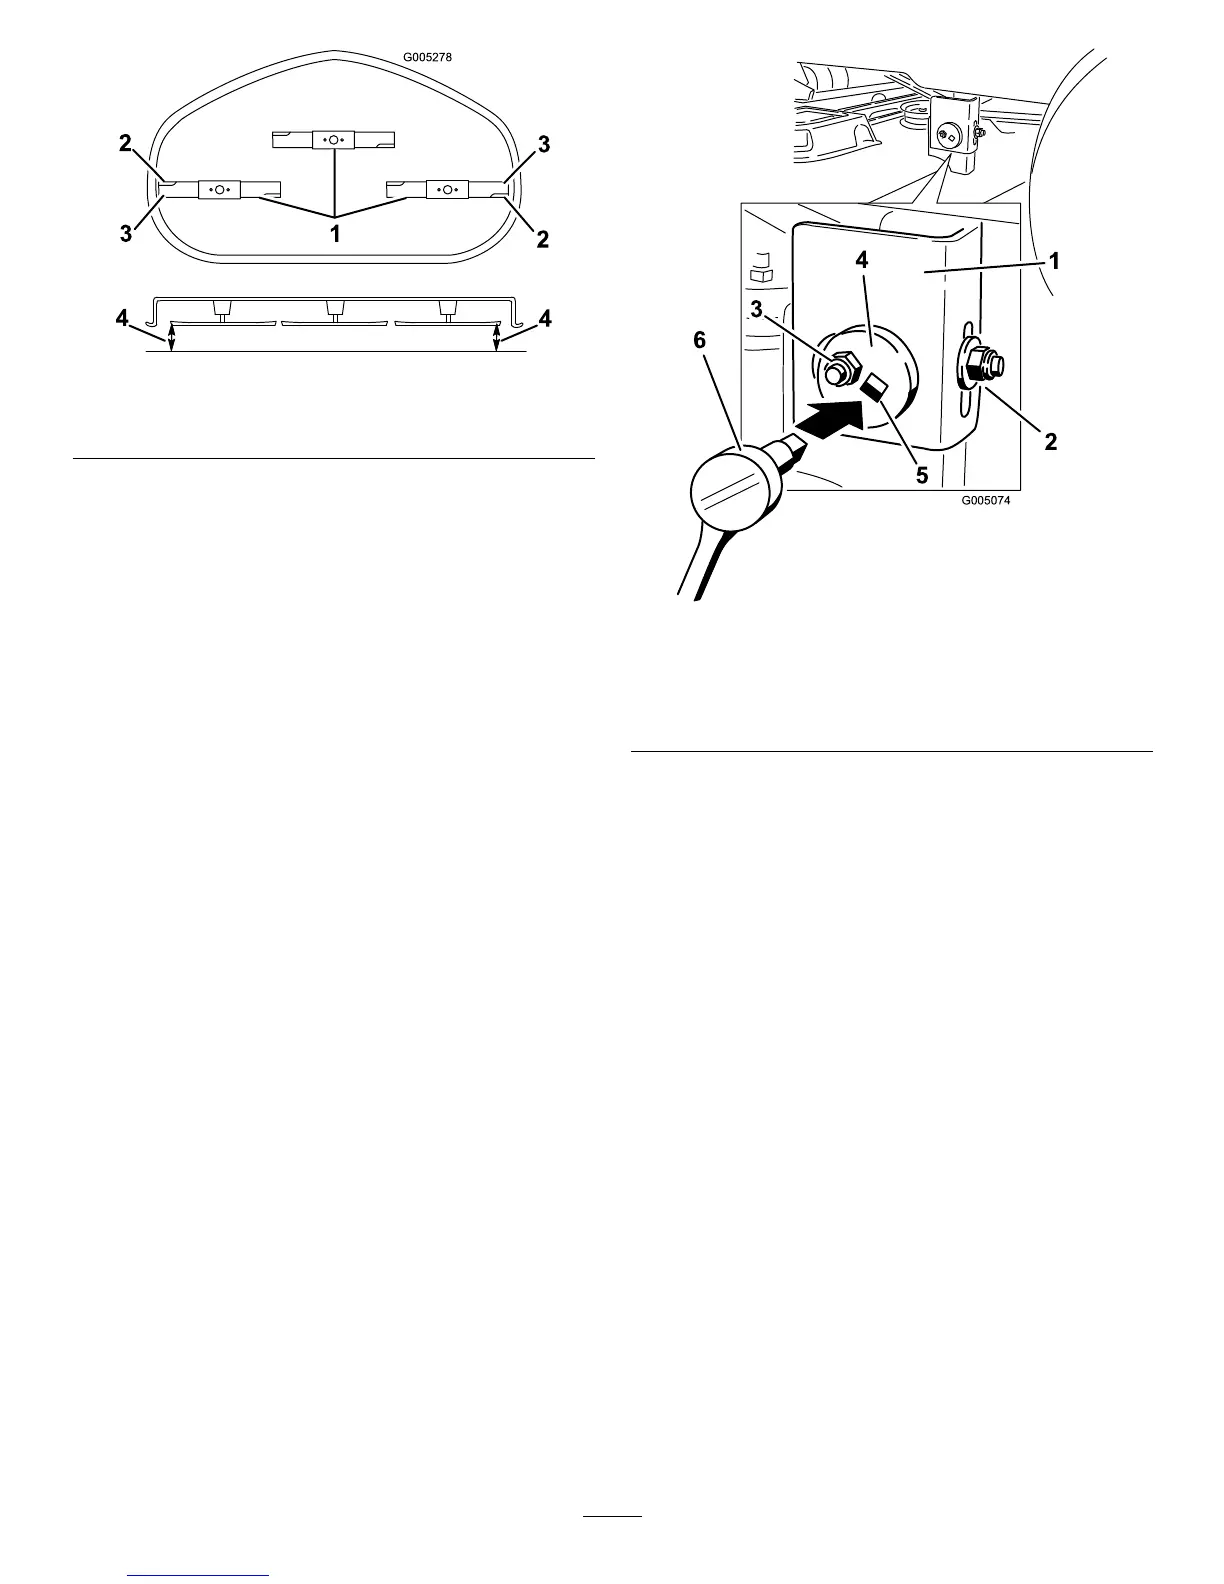
1.Bladessidetoside
3.Outsidecuttingedges
2.Sailareaofbladè
4.Measurehere
6.Measurebetweentheoutsidecuttingedgesand
theatsurface(Figure39).Ifbothmeasurements
arenotwithin3/16inch(5mm),anadjustmentis
required;continuewiththisprocedure.
7.Attheleftsideofthemachine.Loosen,butdonot
remove,therearlockingnutonthehangerbracket
(Figure40).
8.Loosenthesidelockingnutonthehangerbracket
justenoughtoallowthecentricplatetobeadjusted
(Figure40).Usea3/8inchdriveextensionona
socketwrenchtomanipulatethecentricplate.Use
thewrenchtorepositiontheheightofthemower
deckandadjusttothedesiredheight.
9.Stopthedeckattheadjustedpositionandtighten
thesidelockingnutonthehangerbrackettohold
thenewposition(Figure40).
10.Continuelevelingthedeckbycheckingthe
front-to-rearbladeslope;refertoAdjustingthe
Front-to-RearBladeSlope.
Figure40
1.Hangerbracket
4.Centricadjustmentplate
2.Rearlockingnut
5.Socketwrenchhole
3.Sidelockingnut6.Socketwrenchwith3/8
inchextension
AdjustingtheFront-to-Rear
BladeSlope
Checkthefront-to-rearbladelevelanytimeyouinstall
themower.Ifthefrontofthemowerismorethan
5/16inch(7.9mm)lowerthantherearofthemower,
adjustthebladelevelusingthefollowinginstructions:
1.Parkthemachineonalevelsurfaceanddisengage
thebladecontrolswitch.
2.Movethemotioncontrolleversoutwardtothe
parkposition,stoptheengine,removethekey,and
waitforallmovingpartstostopbeforeleavingthe
operatingposition.
3.Checktheairpressureofallfourtires.Ifneeded,
adjusttotherecommendedination;referto
CheckingtheTirePressureinDriveSystem
Maintenance,page31.
4.Checkandadjusttheside-to-sidebladelevelifyou
havenotcheckedthesetting;refertoLevelingthe
MowerfromSide-to-Side.
5.Settheheight-of-cutatposition3[3inch(76mm)]
andcarefullyrotatethebladessotheyarefacing
fronttorear(Figure41).
34

 Loading...