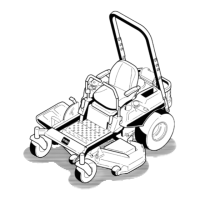
Figure63
1.Bladesfronttorear3.Measurefromthetipofthe
bladetotheatsurface
here
2.Outsidecuttingedges
LevelingtheMowerDeck
1.Setanti-scalprollerstotopholesorremovecompletely
forthisprocedure.
2.Settheheight-of-cutlevertothe76mm(3inch)
position.
3.Placetwo6.66cm(2-5/8inch)blocksundereach
sideofthefrontedgeofthedeck,butnotunderthe
anti-scalprollerbrackets.
4.Placetwo7.30cm(2-7/8inch)thickblocksunderthe
rearedgeofthecuttingdeckskirt;oneoneachside
ofthecuttingdeck.
Figure64
1.Woodblock,2-5/8inch
(6.66cm)thick
3.Frontedge
2.Woodblock,2-7/8inch
(7.30cm)thick
5.Loosenthelevelingadjustlockingnuts(item3)onall
fourcornerssothatthedeckissittingsecurelyonall
fourblocks.
Note:Makesurethatthedeckhangersarealltheway
down(atthetopoftheslot)andthedeckliftfootlever
ispushedbackagainstthestop(
Figure65).
6.Tightenthefourlevelingadjustlockingnuts(Figure65).
Figure65
1.Deckliftarm
3.Levelingadjustlockingnut
2.Deckhanger
4.Slotindeckhanger
7.Checkthattheblockstjustsnuglyunderthedeck
skirt.Makesureallattachmentboltsaretight
8.Verifythedeckislevelbycheckingtheside-to-side
levelandfront-to-rearbladeslope;repeatthedeck
levelingprocedureifnecessary.
InspectingtheBelts
ServiceInterval:Every50hours
Checkthebeltsforsquealingwhenthebeltisrotating,blades
slippingwhencuttinggrass,frayedbeltedges,burnmarksand
cracksaresignsofawornmowerbelt.Replacethemower
beltifanyoftheseconditionsisevident.
ReplacingtheMowerBelt
Squealingwhenthebeltisrotating,bladesslippingwhen
cuttinggrass,frayedbeltedges,burnmarksandcracksare
signsofawornmowerbelt.Replacethemowerbeltifanyof
theseconditionsisevident.
WARNING
Thespringisundertensionwheninstalledandcan
causepersonalinjury.
Becarefulwhenremovingthebelt.
47
 Loading...