g004203
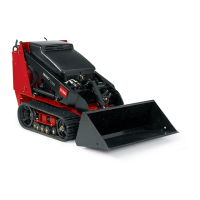
Figure46
1.Track5.Tracklug
2.Socketwrench(1/2inch)
6.Drivesprocket
3.Tensionwheel
7.Sprocketcog
4.Tensiontube8.Roadwheels
6.Pushthetensionwheeltowardtherearofthe
unittomovethetensiontubeagainsttheframe
(Figure46).
Ifitdoesnottouchtheframe,continueturning
thetensioningscrewuntilitdoes.
7.Beginremovingthetrackatthetopofthe
tensionwheel,peelingitoffthewheelwhile
rotatingthetrackforward.
8.Whenthetrackisoffthetensionwheel,remove
itfromthedrivesprocketandroadwheels
(Figure46).
9.Beginningatthedrivesprocket,coilthenew
trackaroundthesprocket,ensuringthatthelugs
onthetracktbetweenthecogsonthesprocket
(Figure46).
10.Pushthetrackunderandbetweentheroad
wheels(Figure46).
11.Startingatthebottomofthetensionwheel,
installthetrackaroundthewheelbyrotating
thetrackrearwardwhilepushingthelugsinto
thewheel.
12.Turnthetensioningscrewcounterclockwiseuntil
thedistancebetweenthetensionnutandthe
backofthetensiontube(Figure44)is7cm
(2-3/4inches).
13.Aligntheclosestnotchinthetensionscrewto
thelockingboltholeandsecurethescrewwith
thelockingboltandnut.
14.Lowerthetractionunittotheground.
15.Repeatsteps3through14toreplacetheother
track.
ReplacingWide-WidthTracks
Whenthetracksarebadlyworn,replacethem.
Note:Youhavewide-widthtracksifthefronttension
wheelsaremountedonthesidesoftheendofthe
tensiontube(Figure47).
1.Parkthemachineonalevelsurface,engagethe
parkingbrake,andlowertheloaderarms.
2.Shutofftheengineandremovethekey.
3.Lift/supportthesideoftheunittobeworkedon
sothatthetrackis8to10cm(3to4inches)
offtheground.
4.Removethelockingboltandnut(Figure45).
5.Usinga1/2-inchdriveratchet,releasethe
drivetensionbyturningthetensioningscrew
clockwise(Figure45andFigure47).
g004204
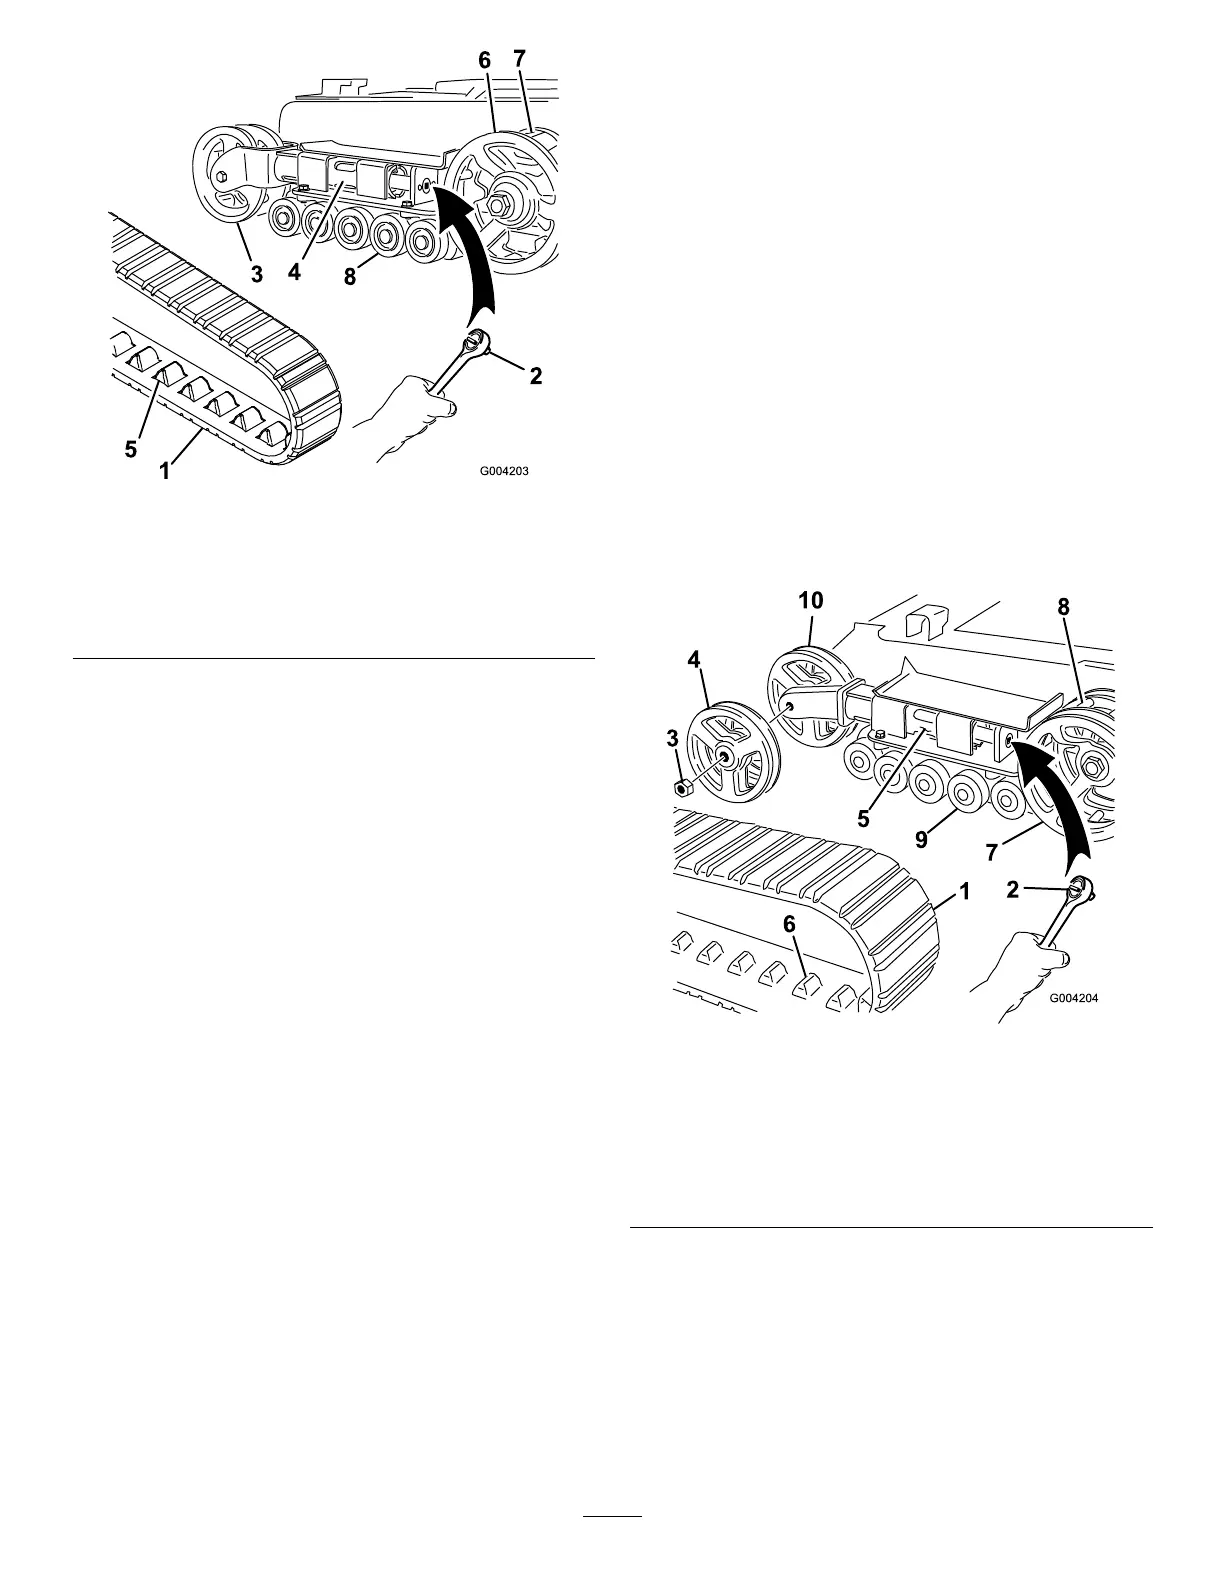
Figure47
1.Track6.Tracklug
2.Socketwrench(1/2inch)
7.Drivesprocket
3.Tensionwheelnut
8.Sprocketcog
4.Outertensionwheel
9.Roadwheels
5.Tensiontube10.Innertensionwheel
6.Pushthetensionwheeltowardtherearofthe
unittomovethetensiontubeagainsttheframe
(Figure47).
Ifitdoesnottouchtheframe,continueturning
thetensioningscrewuntilitdoes.
7.Removethenutsecuringtheoutertension
wheelandremovethewheel(Figure47).
8.Removethetrack(Figure47).
36