1 MANAGING ADDRESS BOOK (ADDRESS MENU)
12 MANAGING ADDRESS BOOK
4
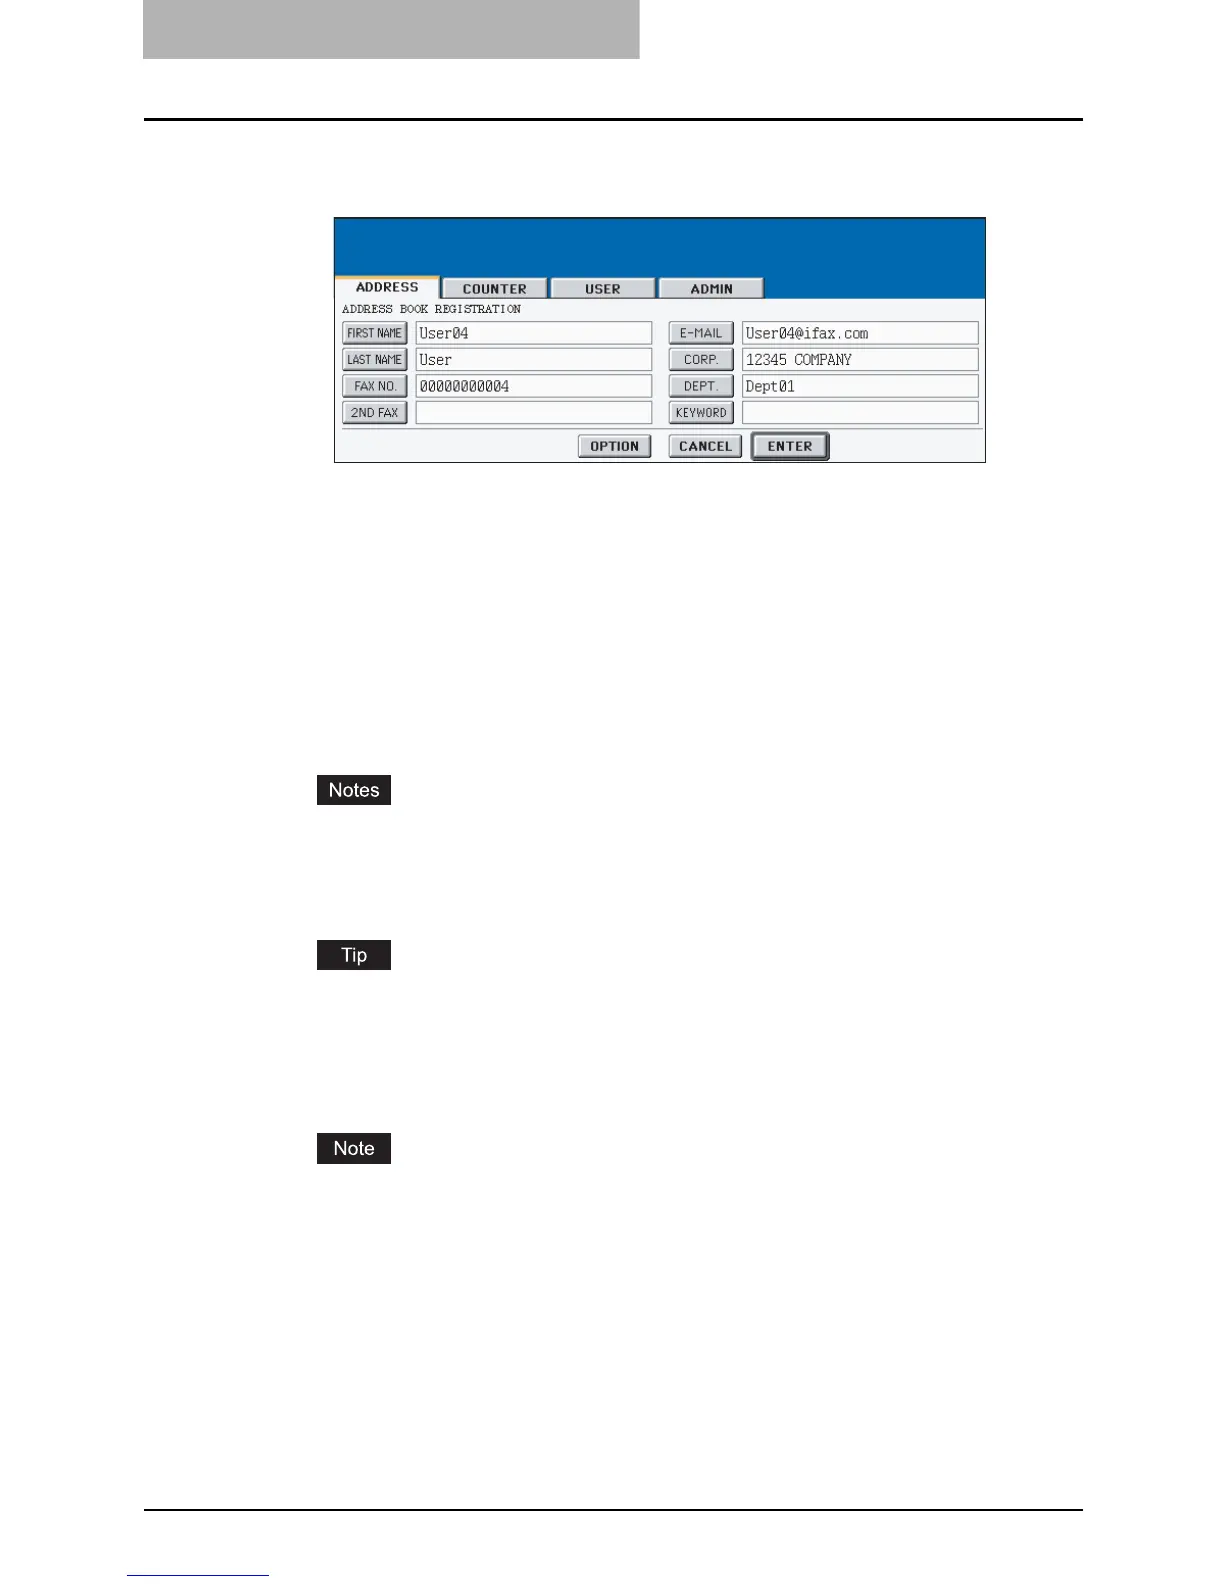
Press each button on the touch panel to enter following contact
information.
y [FIRST NAME] — Enter the first name of the contact. This name will appear in the
address book list on the touch panel.
y [LAST NAME] — Enter the last name of the contact. This name will appear in the
address book list on the touch panel.
y [FAX NO.] — Enter the fax number of the contact.
y [2ND FAX] — Enter the second fax number of the contact.
y [E-MAIL] — Enter the E-mail address of the contact.
y [CORP.] — Enter the company name of the contact.
y [DEPT.] — Enter the department name of the contact.
y [KEYWORD] — Enter the keyword of the contact. This keyword can be used to
search for this contact.
y You must at least enter either the [FIRST NAME] or [LAST NAME] button, and either
the [FAX NO.] or [E-MAIL] button to register the contact.
y If you enter “-” in the [FAX NO.] and [2ND FAX], three seconds pause is added for
dialing the fax number.
When you press each button, the input screen is displayed. Enter the value using the
keyboard and digital keys and press the [ENTER] button to set the entry.
5
Press the [OPTION] button to specify the default settings for a fax
transmission.
This is available only when the optional fax unit is installed.

 Loading...