O
ojordanAug 13, 2025
How to clean a contaminated filter in a Toshiba MMU-AP0242H?
- CcbeckerAug 13, 2025
If the filter of your Toshiba Air Conditioner is contaminated, wash it with water to remove the contamination.
How to clean a contaminated filter in a Toshiba MMU-AP0242H?
If the filter of your Toshiba Air Conditioner is contaminated, wash it with water to remove the contamination.
What to do if the filter of my Toshiba Air Conditioner is damaged?
If the filter of your Toshiba Air Conditioner is damaged, replace it with a new one.
What to do if there is dust/dirt clogging in the drain pan of my Toshiba Air Conditioner?
If the drain pan of your Toshiba Air Conditioner is clogged with dust or dirt, clean the drain pan. Also, make sure to check the downward slope to ensure smooth drainage.
How to clean dust/dirt clogging in the heat exchanger of Toshiba MMU-AP0242H Air Conditioner?
If the heat exchanger in your Toshiba Air Conditioner is clogged with dust or dirt, wash it to remove the blockage.
How to clean a contaminated fan in a Toshiba MMU-AP0242H?
If the fan of your Toshiba Air Conditioner is contaminated, brush or wash it to remove the contamination.
What to do if ornamental panel or louvers of Toshiba MMU-AP0242H Air Conditioner are contaminated?
If the ornamental panel or louvers of your Toshiba Air Conditioner are contaminated, wash them. Alternatively, you can apply a repair coating.
What to do if air inlet/outlet grilles of my Toshiba MMU-AP0242H Air Conditioner are deformed or damaged?
If the air inlet or outlet grilles of your Toshiba Air Conditioner are deformed or damaged, fix or replace them.
What to do if Toshiba MMU-AP0242H fan has vibration or balance issues?
If the fan of your Toshiba Air Conditioner has terrible vibration or balance issues, replace it.
| Brand | Toshiba |
|---|---|
| Model | MMU-AP0242H |
| Category | Air Conditioner |
| Language | English |
Describes critical safety warnings and precautions to prevent hazards during operation and maintenance.
Highlights safety measures and differences when using R410A refrigerant compared to R22.
Details specific cautions for installing and servicing units with R410A refrigerant.
Specifies required materials and considerations for refrigerant piping, including copper pipe and flare nuts.
Lists tools exclusively for R410A and interchangeable tools for installation.
Outlines the correct procedure for recharging refrigerant to ensure safety and performance.
Emphasizes using vacuum pump methods and avoiding refrigerant discharge to protect the environment.
Provides detailed technical specifications for indoor units, including capacity, power, and dimensions.
Displays external dimensions, installation space, and connection port locations for specific models.
Illustrates the electrical connections for the indoor unit and its components.
Lists the ratings and specifications for various internal parts of the air conditioner.
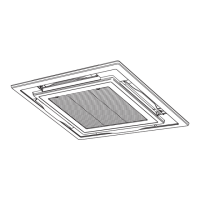
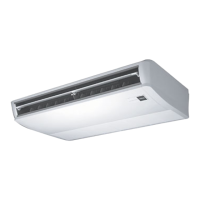
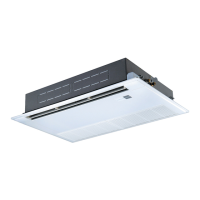
Identifies and labels key external and internal components of the unit.
Explains the function of each indicator and icon shown on the remote controller display.
Details the function of each button on the remote controller for selecting operations.
Provides a step-by-step guide for initial operation, mode selection, air volume, and temperature settings.
Explains the automatic operation mode for Super Heat Recovery models based on temperature.
Details how to adjust louvers for optimal cooling and heating performance, including cautions.
Describes how to start, stop, and set the swing and individual direction of the louvers.
Explains how to set OFF, Repeat OFF, and ON timers using the remote controller.
Advises on selecting appropriate installation locations and avoiding unsuitable environments.
Emphasizes essential safety precautions for electrical wiring, including grounding and leakage breakers.
Guides on cleaning air filters, panels, and discharge louvers for optimal performance.
Details cleaning remote controller, periodic checks, and storage procedures.
Recommends regular cleaning and maintenance to ensure efficient operation and longevity.
Advises on safe re-installation and proper cleaning methods for the heat exchanger.
Lists essential checks before operation and details system protections and operating conditions.
Lists common symptoms and their potential causes, distinguishing between normal operation and issues.
Explains how to confirm error codes and indoor unit addresses displayed on the remote controller.
Details the steps to access and review the stored error history for troubleshooting.
Lists accessory parts included with the unit and separately sold items required for installation.
Provides critical safety warnings and precautions related to the installation process.
Covers safety precautions specific to installing air conditioners with R410A refrigerant.
Specifies conditions and locations suitable for installing the air conditioner, ensuring safety and proper function.
Details the necessary clearances for installation and servicing, including for fresh-air inlets.
Explains settings related to ceiling height, high ceilings, and air discharge direction options.
Shows the external view and describes the process of installing hanging bolts for ceiling mounting.
Covers ceiling foundation reinforcement, hanging bolt types, and installation methods.
Details steps for creating ceiling openings and attaching hanging bolts and brackets for indoor unit mounting.
Guides on installing the ceiling panel and remote controller, including wireless types.
Specifies materials for drain piping and connection methods, including heat insulation.
Explains drain-up piping options and procedures for checking water drainage during installation.
Details requirements for copper pipe, flare nut works, and important points for piping work.
Lists pipe sizes and specifications for flaring, including differences for R410A.
Provides instructions and torque specifications for tightening flare pipe connections to prevent leaks.
Covers airtight testing, thermal insulation, electrical safety, and wiring specifications.
Details specifications and precautions for communication lines and remote controller wiring.
Guides on correctly connecting wires to terminal blocks and securing them with cord clamps.
Shows wiring diagrams for remote controllers and connections between indoor and outdoor units.
Illustrates wiring for optional flow selector units, ceiling panels, and system connections.
Explains the basic procedure for changing settings for applicable controls like filters and high ceilings.
Guides on setting the ceiling type when installing optional filters.
Details how to adjust settings for indoor units installed at higher than standard ceiling heights.
Explains wireless controller settings and filter sign lighting time adjustments.
Guides on improving heating, setting horizontal wind, and configuring louver swing types.
Explains dual swing, cycle swing, and how to lock louvers for specific air direction control.
Describes enabling the remote controller sensor and managing multiple units in group control.
Lists essential checks before performing a test run to ensure safety and proper operation.
Provides step-by-step instructions for conducting a test run using a wired remote controller.
Details the procedure for performing a test run using a wireless remote controller.
Guides on cleaning air filters, panels, and discharge louvers for optimal performance.
Provides a list of parts to check visually or audibly and their corresponding maintenance actions.
Explains how to confirm detected error codes and access the error history log.
Illustrates the refrigerating cycle and describes the function of key components like PMV and sensors.
Details how the unit behaves after power reset and outlines operation mode selections via remote control.
Specifies the adjustable temperature ranges for wired and wireless remote controllers in different modes.
Explains how to set louver positions and swing modes for 4-way discharge cassette units.
Details the selection of standard, dual, and cycle swing modes for louvers.
Describes how to lock louvers to specific positions for customized air direction.
Provides a block diagram illustrating the internal control circuit of the indoor unit.
Shows how to connect wired remote controllers and weekly timers to the indoor unit.
Illustrates the connection of the wireless remote controller kit to the indoor unit.
Details the connections for using both wired and wireless remote controllers simultaneously with the indoor unit.
Labels and describes the function of connectors and components on the indoor unit's P.C. board.
Provides step-by-step instructions for performing cooling and heating test runs using wired remote controllers.
Details the specific procedures for conducting test runs using a wireless remote controller.
Explains how to check indoor unit operation directly using short-circuiting pins on the P.C. board.
Lists specifications for optional connectors on the indoor unit's P.C. board, including HA and ventilation fan control.
Guides on how to set specific functions for indoor units using the wired remote controller.
Details the wiring and control items for the remote location ON/OFF control box.
Explains how to control ventilating fans remotely, including wiring and setup procedures.
Describes the function that prevents accidental leaving-ON of indoor units, often used with card switches.
Explains the power peak-cut function that triggers a forced thermostat-OFF operation.
Guides on manually setting indoor unit addresses, line addresses, and group addresses via remote controller.
Explains how to check the indoor unit number and its address recognition by the remote controller.
Details how to verify indoor unit numbers within a group control by their address.
Guides on performing function selection setup for indoor units using the remote controller's menu.
Explains how to check all indoor unit numbers and their piping positions using the wired remote controller.
Details the steps to change indoor unit addresses from an arbitrary wired remote controller.
Describes how to clear errors detected in the outdoor unit using the remote controller's service monitor.
Explains how to clear errors for the indoor unit using the ON/OFF button on the remote controller.
Guides on using the remote controller's monitoring function to check sensor temperatures and operating status.
Summarizes common issues, applicable models, required tools, and initial checks before troubleshooting.
Outlines a systematic procedure to follow when a trouble occurs for diagnosis.
Lists error codes detected by various devices and their corresponding main defective positions and descriptions.
Explains how to confirm error codes and navigate error history using a wired remote controller.
Provides guidance on interpreting the 7-segment display for check codes and monitor information.
Details how to confirm error codes and alarm histories using a central remote controller.
Lists error codes displayed on the wireless remote controller's receiving unit and their causes.
Provides a comprehensive list of check codes, detected positions, statuses, and error detection conditions.
Displays resistance versus temperature characteristics for indoor TA, TC1, TC2, and TCJ sensors.
Provides step-by-step instructions for detaching and attaching the suction grille for maintenance.
Details the procedure for removing and installing the electric parts cover.
Guides on how to detach and attach the adjust corner cap for panel access.
Provides detailed steps for removing and installing the ceiling panel, including connector disconnection.
Outlines the procedure for detaching and attaching the control P.C. board, including connector removal.
Details the procedure for removing and attaching the drain cap, including draining accumulated water.
Provides detailed steps for detaching and attaching the fan motor, including component removal and reassembly.
Guides on how to detach and attach the drain pump, including hose and connector management.
Details the procedure for removing and attaching the float switch assembly.
Explains how to remove and attach the drain pan, including fixing screws.
Provides instructions for removing and attaching the PMV motor, including torque control.
Details the steps for removing and attaching the heat exchanger, including refrigerant recovery.
Outlines procedures for replacing the indoor unit P.C. board, including data backup and restoration.
Explains how to read setting data from EEPROM using the remote controller before replacing the P.C. board.
Details the process of replacing the P.C. board and configuring system settings, including group operations.
Guides on writing setting data to EEPROM, including type, capacity, and address settings.
Provides an exploded view of the indoor unit components for specific models.
Lists parts numbers for sensors, terminals, and the P.C. board for specific models.
Shows an exploded view of indoor unit components for larger capacity models.
Lists part numbers for components in larger capacity indoor units.
Provides an exploded view and parts list for the RBC-U31 series remote controllers.
Displays an exploded view and parts list for the RBC-AX31U series remote controllers.