– 17 –
33-EN 34-EN
System Combination Charged refrigerant
Compensation by
System HP
HP HP kg kg
High-efficiency model
8HP 8HP – – 11.5 -1.5
10HP 10HP – – 11.5 -1.5
12HP 12HP – – 11.5 1.5
14HP 14HP – – 11.5 1.5
16HP 16HP – – 11.5 -5
18HP 10HP 8HP – 23 -3
20HP 10HP 10HP – 23 -3
22HP 12HP 10HP – 23 -3
24HP 12HP 12HP – 23 -3
26HP 14HP 12HP – 23 0
28HP 14HP 14HP – 23 3
30HP 16HP 14HP – 23 3
32HP 16HP 16HP – 23 3
34HP 12HP 12HP 10HP 34.5 -4.5
36HP 12HP 12HP 12HP 34.5 -4.5
38HP 14HP 12HP 12HP 34.5 -1.5
40HP 14HP 14HP 12HP 34.5 1.5
42HP 16HP 14HP 12HP 34.5 1.5
44HP 16HP 16HP 12HP 34.5 1.5
Table 2
Additional refrigerant charge amount Indoor unit
Standard Indoor
unit
Fresh Air Intake
Indoor Unit
Air to Air Heat
exchanger with
DX-coil
Additional refrigerant charge amount kg/HP 0.4 0.2 0.2
Table 3
Pipe dia. at liquid side mm Ø6.4 Ø9.5 Ø12.7 Ø15.9 Ø19.0 Ø22.2
Additional refrigerant amount/1m kg/m 0.025 0.055 0.105 0.160 0.250 0.350
Charging of refrigerant
• Keeping the valve of the outdoor unit closed, be sure to charge the liquid refrigerant into the service port at the
liquid side.
• If the specifi ed amount of refrigerant cannot be charged, fully open the valves of the outdoor unit at liquid and
gas sides, operate the air conditioner in COOL mode, and then charge refrigerant into service port at the gas
side. In this time, choke the refrigerant slightly by operating the valve of the canister to charge liquid refrigerant.
• The liquid refrigerant may be charged suddenly, therefore be sure to charge refrigerant gradually.
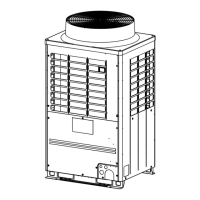
■ Full opening of the valve
Open the valves of the outdoor unit fully.
MAP080
MAP100
MAP120
MAP140
MAP160
MAP180
MAP200
MAP10A
MAP12A
MAP14A
MAP16A
Liquid side
Packed valve
Using a 4mm-hexagonal wrench,
fully open the valve rods.
Ball valve
Using a flathead screwdriver, turn it counterclockwise by 90° until it hits
the stopper. (Full open)
(1)
(2)
Valve unit
Flare nut
Service
port
Using fl athead
screwdriver, turn it
counterclockwise by
90° until it hits the
stopper. (Full open)
Position of screwdriver slot
Slot
Fully closed Fully opened
* When opened fully, do not apply excessive
torque after the screwdriver hits the
stopper; otherwise a problem may be
caused on the valve. (5 N•m or less)
Balance pipe
Balance packed valve
Using a 4mm-hexagonal wrench, fully open the valve rods.
Gas side
Balance valve
Using a wrench, turn it counterclockwise by 90° until it hits the stopper.
(Full open)
Fully closed Fully opened
1117101401-3_EN.indd 171117101401-3_EN.indd 17 1/12/16 3:18 PM1/12/16 3:18 PM
 Loading...


