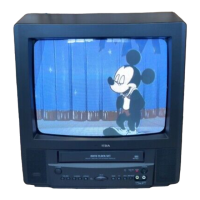
Do you have a question about the Toshiba MV13L3 and is the answer not in the manual?
Guides on maintaining notices and labels for safety.
Warning about high voltage parts and avoiding electric shock.
Emphasizes using parts with specific safety characteristics for replacements.
Instruction to return parts and wires to their original positions after assembly.
Cautionary advice for handling the cathode-ray tube safely.
Guidance on avoiding X-ray emission by using correct parts and not modifying circuits.
Procedure for ensuring safety and proper function after repair work.
Information required for ordering parts, including model and version.
Details needed for parts ordering, referencing the service manual.
Details of the television system specifications, including CRT and display.
Specifications related to the VCR system, including heads and tape format.
Information about the tuning system, channel reception, and frequency.
Specifications for audio and video signals, including input and output levels.
Power supply details, consumption, and protection features.
Regulatory compliance information (UL, FCC) and safety standards.
Operating and storage temperature ranges for the device.
Specification for the operating humidity range.
Features and functions available through the on-screen menu system.
Supported languages for the On-Screen Display (OSD).
Functionality related to clock, timer settings, and backup.
Specifications of the remote control unit, including keys and format.
Various operational features of the product, like auto functions and special modes.
List of included accessories and their specifications.
Details about input/output interfaces and connectors.
Physical dimensions of the product unit.
Weight specifications for the product.
Information regarding the product's carton and packaging.
Details about the materials used for the product's cabinet.
Procedures for removing major mechanical parts and printed circuit boards.
Step-by-step guide for removing the back cabinet.
Instructions for removing the CRT printed circuit board.
Guide for removing the combined TV/VCR block.
Steps to remove the deck chassis and the system control PCB.
Procedures for disassembling various parts of the VCR deck mechanism.
Instructions for removing the top bracket of the deck.
Guide for removing the flap lever and right tape guide.
Steps for removing the left tape guide.
Procedure for removing the cassette holder assembly.
Instructions for removing the left and right cassette sides.
Guide for removing the link unit assembly.
Steps to remove the loading motor assembly.
Procedure for removing the sensor cover L3.
Instructions for disassembling the tension assembly.
Guide for removing the T brake assembly.
Steps for removing the S reel and T reel components.
Procedure for removing pinch roller block and P5-3 arm assembly.
Instructions for removing the A/C head assembly.
Guide for removing the FE head, specific to recorders.
Steps to remove the AHC assembly and cylinder unit.
Procedure for removing the capstan DD unit.
Instructions for removing the middle gear and main cam.
Guide for disassembling the clutch assembly.
Steps for removing the loading gear S/T assembly.
Procedure for removing the inclined S/T assembly.
Detailed instructions for safely removing and installing the anode cap.
Explains how to enter and use various service modes for repair and adjustment.
How to check the total power-on and play/record hours of the unit.
Procedures for cleaning key components like audio heads, tape path, and cylinder.
Instructions on how to use servicing fixtures and prepare for maintenance.
General procedures for confirming and adjusting mechanical parts.
Steps to confirm and adjust the height of the reel disk.
Procedure to confirm and adjust the tension post position.
How to confirm playback and back tension torque during operation.
Procedure to confirm the VSR torque.
Steps to confirm the reel brake torque for S and T reels.
Procedures for confirming and adjusting the tape running mechanism.
Instructions for adjusting the guide roller.
Steps to confirm and adjust the audio/control head.
Procedure for tape running adjustment, specifically X value.
Diagram showing the location of parts for mechanism adjustment.
General precautions and preparation before performing electrical adjustments.
How to adjust settings displayed on the screen.
Core adjustments for the VCR section of the unit.
Procedure for adjusting the PG shifter automatically and manually.
Steps to adjust the VCO to its free-run state.
Procedure for adjusting the RF Automatic Gain Control.
How to set and adjust constant voltage levels.
Adjustment procedure for the cutoff settings.
Steps for adjusting the white balance of the display.
Procedure to adjust the focus of the display.
How to adjust the horizontal phase of the display.
Steps to adjust the vertical position of the display.
Procedure for adjusting the vertical size of the display.
Steps for fine-tuning the brightness setting.
Procedure for fine-tuning the contrast setting.
Steps for adjusting the tint color setting.
Procedure for adjusting the color saturation.
How to adjust the horizontal position of the OSD.
Procedures for adjusting screen purity and color convergence.
Initial steps for static convergence adjustment.
Procedure for adjusting the color purity of the display.
Further steps for static convergence adjustment.
Procedure for adjusting dynamic convergence settings.