– 9 –
CAUTION
Strictly comply with the following rules to prevent damage of the indoor units and human injury.
y Do not put a heavy article on the indoor unit or let a person get on it. (Even units are packaged)
y Carry in the indoor unit as it is packaged if possible. If carrying in the indoor unit unpacked by necessity, use
buffering cloth or other material to not damage the unit.
y To move the indoor unit, hold the hooking brackets (4 positions) only.
Do not apply force to the other parts (such as refrigerant pipe, drain pan, foamed parts, or resin parts).
y Carry the package by two or more persons, and do not bundle it with plastic band at positions other than
specified.
y To install vibration isolation material to hanging bolts, confirm that it does not increase the unit vibration.
■ External dimensions (Unit: mm)
180
275
750
0505
355
345
236
22
25
C
L
570
43
187.5
131
415
113.5
D
Hanging bolt pitch B
Air flow direction
Air
discharge
Hanging bolt pitch 650
Drain pan / Drain
pump check cover
Electrical
control box
345 or more
70 or more
Main unit dimension A
External dimensions of flange C
4 Dimension
Model ABCD
HM56 type 700 765 640 750
HM80 type 1000 1005 940 1050
HM90, HM110, HM140, HM160 type 1400 1465 1340 1450
■ Installation of hanging bolt
y Consider the piping / wiring after the unit is hung to
determine the location of the indoor unit installation
and orientation.
y After the location of the indoor unit installation has
been determined, install hanging bolts.
y For the dimensions of the hanging bolt pitches, refer
to the external view.
y When a ceiling already exists, lay the drain pipe,
refrigerant pipe, control wires, and remote controller
wires to their connection locations before hanging
the indoor unit.
Procure hanging bolts washer and nuts for installing
the indoor unit (these are not supplied).
Hanging bolt M10 or W3/8 4 pieces
Nut M10 or W3/8 12 pieces
Washer M10 8 pieces
Installation of hanging bolt
Use M10 hanging bolts (4 pcs, locally procured).
Matching to the existing structure, set pitch according
to size in the unit external view as shown below.
New concrete slab
Install the bolts with insert brackets or anchor bolts.
(Pipe hanging
anchor bolt)
(Blade type
bracket)
(Slide type
bracket)
Anchor bolt
Rubber
Steel frame structure
Use existing angles or install new support angles.
Hanging bolt
Hanging bolt
Support angle
Existing concrete slab
Use a hole-in anchors, hole-in plugs, or a hole-in bolts.
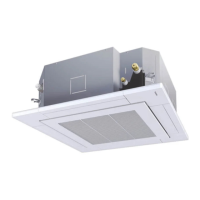
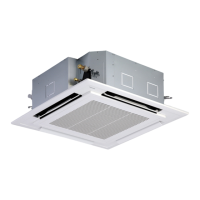
■ Installation of indoor unit
Treatment of ceiling
The ceiling differs according to structure of building.
For details, consult your constructor or interior finish
contractor.
In the process after the ceiling board has been
removed, it is important to reinforce ceiling foundation
(frame) and to keep horizontal level of installed ceiling
correctly in order to prevent vibration of ceiling board.
y Attach the nuts and the M10 flat washers to the
hanging bolt.
y Put washers at up and down of the hanging bracket
of the indoor unit to hang down the indoor unit.
y Check that four sides are horizontal with a level
gauge. (Horizontal degree: Within 5 mm)
M10 fl at washer
M10 fl at washer
Hanging bolt
(W3/8 or M10)
Nut
(W3/8 or M10)
Nut
(W3/8 or M10)
REQUIREMENT
y Hang the unit in a horizontal position.
When unit is hanged to slant, it may cause
overflow of drainage.
y Install the unit within the dimension according to
the figure below.
y Use level gauge to confirm whether the unit is
hang horizontally.
Front view
0 to 5 mm
±5 mm
Side view
Set the air intake and air discharge
sides are within 5 mm with each other.
Set the drain pipe connecting port side
within 5 mm lower than opposite side.
4 Installation
 Loading...