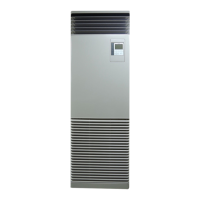
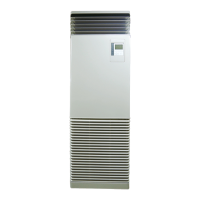
This document serves as the Owner's Manual for TOSHIBA Air Conditioners, specifically for Floor Standing type Indoor Units with model names RAV-HM561FT-E, RAV-HM801FT-E, RAV-HM901FT-E, RAV-HM1101FT-E, RAV-HM1401FT-E, and RAV-HM1601FT-E. These units utilize R32 refrigerant and are intended for commercial use. The manual emphasizes safety precautions, proper usage, and maintenance procedures.
General Safety Precautions
The manual stresses the importance of reading it thoroughly before operating the air conditioner to prevent injury or property damage. It highlights that installation, maintenance, repair, and removal must only be performed by a "Qualified installer" or "Qualified service person." Failure to do so can lead to fire, electric shock, injury, water leakage, noise, or vibration. The use of non-specified refrigerants is prohibited as it can cause abnormally high pressure, leading to product failure or explosion. The appliance is suitable for use by children aged 8 and above, as well as persons with reduced physical, sensory, or mental capabilities, provided they are supervised or instructed on safe use and understand the associated hazards. Children should not play with the appliance, nor should they perform cleaning or user maintenance without supervision.
Transportation and Storage
When transporting the air conditioner, protective gear such as toe caps and gloves should be worn. The packing carton bands should not be used for lifting to avoid injury. Precautions on packing cartons for stacking must be followed to prevent collapse. The unit should be transported in a stable condition, and if any part is broken, the dealer should be contacted. For manual transport, four or more people are recommended.
Installation Precautions
Electrical work must be carried out only by a Qualified installer or service person to prevent electric shocks or leaks. After installation, the installer should explain circuit breaker positions, and in case of trouble, the circuit breaker should be set to OFF before contacting service. If installed in a small room, measures must be taken to prevent refrigerant concentration from exceeding limits, as this can cause oxygen deficiency. Installation in locations prone to combustible gas leaks is prohibited due to fire risk. Only company-specified parts should be used for separately purchased components to avoid fire, electric shock, or water leakage. Correct earthing is essential. The drain hose must be properly laid for perfect draining to prevent flooding. The outdoor unit must be fixed securely to its base. Installation in areas with steam or high humidity should be avoided to prevent dew formation and unit malfunction.
Operation Precautions
Before opening the intake grille or service panel, the circuit breaker must be set to OFF to prevent electric shocks. Only Qualified installers or service persons should remove these panels. High-voltage areas and rotating parts inside the unit pose risks of electric shock or physical injury, so service panels should not be removed by unauthorized individuals. Users should not attempt to move or repair the unit themselves. Touching the aluminum fins of the outdoor unit can cause injury; if necessary, a Qualified installer or service person should be contacted. Climbing or placing objects on the outdoor unit is prohibited to prevent falls and injury. Combustion appliances should not be placed where they are directly exposed to the air conditioner's wind, as this can cause imperfect combustion. When operating the air conditioner with a combustion appliance in the same room, adequate ventilation is crucial to prevent oxygen shortage. Prolonged direct exposure to cool air or excessive cooling should be avoided to prevent health issues. Fingers or sticks should not be inserted into air intake or discharge vents due to the high-speed rotating fan. If the air conditioner is not performing properly (cooling/heating), refrigerant leakage might be the cause, and a Qualified service person should be consulted for repairs. The circuit breaker should not be turned off unless there is a burning smell or the unit is being checked, as this can disable the refrigerant leak detection sensor, posing a fire risk if refrigerant leaks. If check codes "J29" or "J31" appear, the refrigerant leak detection sensor should be replaced by the dealer. If there is a risk of R32 refrigerant leak (check code "J30" appears, and the fan operates automatically even when the unit is off), combustion appliances should not be used near the unit; the room should be ventilated, and the dealer contacted without turning off the circuit breaker.
The air conditioner should not be used for special purposes like preserving food, precision instruments, or breeding animals. Switches should not be touched with wet fingers. The unit should be operated within specified temperature ranges to ensure original performance and prevent malfunction or water leaks. Liquids should be kept away from the remote controller. The air conditioner should not be washed. Installation bases and equipment should be checked for deterioration over time. Flammable sprays or materials should not be left or sprayed near the unit. Installation in areas with smoke, chemical agents, or organic solvents is prohibited, as these can cause the refrigerant leak detection sensor to malfunction. Caution is advised regarding indoor unit fan operation when the circuit breaker is on, as the fan may operate automatically if the refrigerant leak detection sensor is triggered. When changing room layout or relocating the unit, ensure the floor area remains above the minimum specified in the Installation Manual. Cleaning should be performed by the dealer to avoid damage or malfunction. Water containers should not be placed on the unit. The refrigerant leak detection sensor should be replaced every five years.
Repairs
In case of trouble (check display, burning smell, abnormal sounds, failure to cool/heat, water leakage), the user should not touch the unit but set the circuit breaker to OFF and contact a Qualified service person. Steps should be taken to prevent accidental power-on until repairs are complete. Damaged fan grilles or risks of the indoor/outdoor unit falling should prompt setting the circuit breaker to OFF and contacting a Qualified service person for repairs or refitting. Customizing the unit is prohibited.
Relocation
Relocation should only be performed by a Qualified installer or service person to prevent electric shocks or fire.
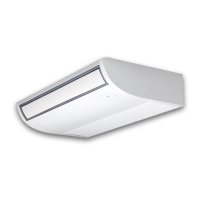
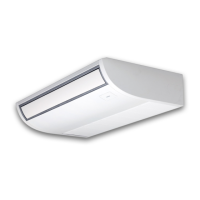
Part Names
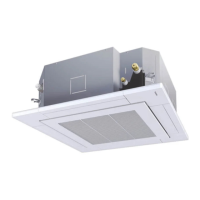
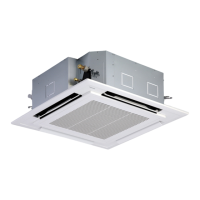
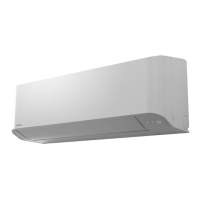
The Indoor Unit features a Louver for manual up/down airflow adjustment, a Vertical Louver for left/right swing operation controlled by the remote, a Refrigerant Leak Detection Sensor in the electrical part box, a Remote Controller, a Drain Pan for water collection, an Air Filter, an Air Intake, and Earth Screws on the electrical control box.
Remote Controller (RBC-AMSU5)*
The remote controller allows selection of desired operations. Commands are saved, so initial settings only need to be changed if desired. The [ON/OFF] button starts/stops the air conditioner. The display section shows various icons, with a normal display mode (factory default) and a detailed display mode. Icons include Energy saving, Soft cooling, Saving, Preparing to heat (or operate), and various ventilation icons (Automatic, 24-hour, Bypass, Total heat exchange, Nighttime purge).
Correct Usage
Before first use or after settings changes, the remote controller should be operated as follows:
- Turn on the circuit breaker. "Setting" will appear on the remote controller display.
- Push the [ON/OFF] button to start.
- Push the "Mode" [F1] button to select the operation mode (Auto, Heat, Dry, Cool, Fan).
- Push the [ON/OFF] button to stop.
The manual advises against turning off the circuit breaker during the season and recommends turning it on 12 hours or more before starting the unit after extended periods of disuse, and not turning it off for long periods to detect refrigerant leaks.
Changing Fan Speed
Push the "Fan speed" [F2] button to cycle through fan speeds (Auto, Low, Low+, Med, Med+, High). The "" icon is unavailable in "Fan" mode.
Changing Temperature
Use the [^^] / [√ √] buttons to adjust the temperature. Temperature cannot be adjusted in "Fan" mode.
Auto Changeover
In Auto Mode, the unit selects cooling, heating, or fan only based on the set point. If uncomfortable, manual selection is possible.
Cooling
Cooling starts about 1 minute after mode selection. When the room temperature reaches the set temperature, the outdoor unit stops, and the indoor fan runs at a very low speed.
Heating
Heating starts about 3 to 5 minutes after mode selection. After heating stops, the fan may run for about 30 seconds. When the room temperature reaches the set temperature, the outdoor unit stops, and the indoor fan runs at a very low speed. During defrost, the fan stops, and the "Preparing to heat" icon is displayed.
Restarting after Stop
If the unit is stopped and immediately restarted, it will not start for about 3 minutes to protect the compressor.
8°C Operation (For Object Pre-heating)
This mode allows the air conditioner to control heating temperature to about 8°C. It requires settings with the wired remote controller.
To start:
- Set displayed temperature to 18°C in heating mode using the [✓] button.
- Set displayed temperature to 8°C using the [✓] button for at least four seconds.
To stop:
- Set displayed temperature to 18°C using the [^] button. The unit returns to normal Heat mode.
Notes: Discharged air temperature is lower than normal heating. Room temperature may not be evenly heated or reach 8°C depending on installation. Fan speed setting is available. This operation is canceled if the unit is stopped, another mode is selected, or temperature/mode is changed by another controller. Periodic maintenance is recommended.
Off Reminder Timer
This function sets a length of time after which the air conditioner automatically stops.
To set:
- Push [MENU].
- Select "4.Off reminder timer" and push "Set" [F2].
- Select "1. Off reminder timer" using [^^] / [√ √].
- Push "←" [F1] to turn off the timer or "→" [F2] to turn it off.
- Select "2. Timer setting" using [^^] / [√ √].
- Push "+" [F1] / "-" [F2] to set the time (in 10-minute intervals).
- Push [MENU] to return to the menu.
Notes: The timer stops the unit after the set time. It appears on the detailed display. It does not work if deactivated, during trouble, test operation, function setting, or when central control is used. Time can be set from 30 to 240 minutes. [CANCEL] stops the setting procedure.
Adjustment of Wind Direction
Vertical Wind Direction: Louvers can be manually adjusted. For cooling, point horizontally; for heating, point downward. The louvers have 8 phases and link with 5 louvers; adjust slowly near the center.
Horizontal Wind Direction: Lift vertical louvers slightly and point them in desired directions. Do not use swing function in this case.
Setting/Releasing Horizontal Air Flow Direction:
To swing:
- Push [MENU].
- Select "1. Wind direction" and push "Set" [F2].
- Push "Swing ON" [F2] on the "Wind direction" screen.
- Push [CANCEL] to return.
To stop:
- Push "Swing OFF" [F2] on the "Wind direction" screen.
- Push [CANCEL] to return.
Notes: Pointing louvers downward for cooling can cause dew. Pointing horizontally for heating can cause uneven room temperature. Do not manually change louvers during swing operation. Stop the air conditioner before changing louver position.
Group Control
"Swing operation" can be set individually for each unit in group control.
To set:
- Push [MENU].
- Select "1. Wind direction" and push "Set" [F2].
- Push "Unit" [F1] to select the unit.
- Push "Set" [F2].
- Push "Swing ON" [F2] on the "Wind direction" screen.
- Push [CANCEL] to return.
Energy Saving Operation
To perform power saving:
- Push [MENU].
- Select "9.Energy saving" and push "Set" [F2].
- Select "1. Energy saving operation" and push "Set" [F2].
- To start: Push "←" [F1] to select "ON", then [MENU]. To stop: Push "→" [F2] to select "OFF", then [MENU].
Energy Saving Ratio
This setting is done while the indoor unit is stopped.
To set:
- Push [MENU].
- Select "2. Energy saving ratio" and push "Set" [F2].
- Push "%+" [F1] / "%-" [F2] to set the ratio (50% to 100% in 1% increments). Lower ratio means higher saving.
- Push [MENU].
Notes: Performance may be slightly reduced. The operation cannot be set on sub remote controllers in a two-remote system.
Maintenance
WARNING: Daily maintenance, including air filter cleaning, must be done by a qualified service person.
Cleaning Air Filters: Clogged filters reduce performance. Refer to the Installation Manual for cleaning.
Filter Sign Reset: The "!" (filter sign) appears on the detailed display when cleaning is needed.
To reset:
- Select "Filter sign reset" on the menu screen and push "Set" [F2].
- Push "Reset" [F2].
When the Unit Will Not Be Used for a Long Time:
- Perform fan operation for a few hours to dry the inside.
- Press [ON/OFF] to stop, then turn off the circuit breaker.
- Clean and reinstall air filters.
- Turn on the circuit breaker to detect refrigerant leaks.
Check Periodically: Parts may deteriorate over time, leading to malfunction or poor drainage. Regular checks and maintenance by a dealer are recommended. For environmental conservation, regular cleaning and maintenance (at least every 3 months, or annually for long-term operation) are strongly recommended. This extends product life but involves owner expense. Failure to clean can lead to poor performance, freezing, water leakage, and compressor failure.
Maintenance List:
- Heat exchanger: Check for dust/dirt clogging, scratches. Wash when clogged.
- Fan motor: Check for abnormal sound. Take appropriate measures.
- Filter: Check for dust/dirt, breakage. Clean with water or vacuum; replace if damaged.
- Fan: Check for vibration, balance, dust/dirt, appearance. Replace if terrible; brush or wash if contaminated.
- Air intake/discharge grilles: Check for dust/dirt, scratches. Wipe with a soft cloth.
- Drain pan: Check for dust/dirt clogging, drain contamination. Clean and check downward slope.
- Front panel, louvers: Check for dust/dirt, scratches. Wash or apply repair coating.
- Exterior: Check for rust, peeling of insulator/coat. Apply repair coating.
Replacing a Refrigerant Leak Detection Sensor:
WARNING: If check codes "J29" or "J31" appear, replace the sensor. Contact the dealer. Continuing to use without replacement can cause fire. "J29" indicates sensor trouble; "J31" indicates end of product life. Check period is one year, maintenance period (replacement) is five years. Periodic maintenance may be required in places with many siloxanes (e.g., hair salons).
Troubleshooting:
The manual provides a table of symptoms, causes (not malfunctions), and actions to take.
- White, misty, cold air or water: Outdoor unit defrosting.
- Noise of air leaking/swishing/clacking: Solenoid valve operation, outdoor unit preparing, refrigerant flow, expansion/contraction of heat exchanger.
- Discharged air smells unusual: Smells from walls, carpet, clothes, cigarettes, cosmetics adhering to the unit.
- Unit does not run: Blackout, circuit breaker blown, protective device activated.
- Room does not cool/warm up: Clogged outdoor unit, open door/window, clogged air filter, low fan speed, "Fan" mode, inappropriate temperature setting.
- Indoor fan does not stop when OFF button pushed: Refrigerant leak (J30). Ventilate, do not turn off circuit breaker, contact dealer. Do not use gas equipment/sprays near unit.
- Check code "J29": Refrigerant leak detection sensor trouble. Contact dealer.
- Check code "J31": Refrigerant leak detection sensor exceeds life. Contact dealer.
If unusual conditions persist, stop the unit, turn off the circuit breaker, and contact the dealer with the product number and symptom. Do not repair yourself.
Confirmation and Check:
If a check code and unit number appear on the remote controller display, it indicates a malfunction. The check code appears only while the unit is running. Push [MONITOR] or [CANCEL] to display the check information screen. While on this screen, push "Contact" [F1] for service contact number, or "Information" [F2] for model name and serial number. If "J31" appears, contact the dealer to replace the sensor.
Check before running: Earth wire connected, air filter installed, circuit breaker on 12+ hours before operation.
3 minutes protection function: Prevents immediate restart after power-on.
Power failure: Unit stops. Push ON/OFF to restart. Lightning or wireless phone interference can cause malfunction; turn off/on circuit breaker, then push ON/OFF.
Defrosting operation: Automatic (2-10 minutes) if outdoor unit is frosted during heating. Fans stop. Defrosted water drains from outdoor unit.
Heating capacity: Heat pump system absorbs heat from outside. If outside temperature is too low, supplementary heating is recommended.
Attention to snowfall and freeze: Snow/freeze can cover outdoor unit intake/discharge, causing failure or poor warming. In cold areas, ensure drain hose drains perfectly to prevent freezing and unit failure.
Protective device: Stops operation if overloaded. Operation indicator and check indicator blink. If activated, turn off circuit breaker and check air filter.
During cooling: Clogged outdoor unit intake/discharge, strong wind against discharge.
During heating: Clogged air filter, clogged indoor unit intake/discharge.
Do not turn off circuit breaker: Leave on during season; use ON/OFF button. Leave on for long periods to detect refrigerant leaks.
Refrigerant leak detection sensor: If R32 leak (J30), fan operates at high speed. Ventilate, do not turn off circuit breaker, contact dealer. If J31 (end of life) or J29 (trouble) appears after turning on circuit breaker, contact dealer.
Air Conditioner Operating Conditions:
For proper performance, operate within specified temperature conditions.
- Cooling: Room temperature 21-32°C (dry bulb), 15-24°C (wet bulb). Room relative humidity less than 80% (dewing may occur above this).
- Heating: Room temperature 15-28°C (dry bulb).
Operating outside these conditions may trigger safety protection.
Installation Restrictions:
Do not install within 1m of TV, stereo, or radio. Avoid high-frequency appliances. Avoid humid, oily, steamy, sooty, corrosive, or salty places. Avoid areas with machine oil or strong winds. Avoid sulfurous gas areas, vessels, or mobile cranes. Avoid acidic/alkaline atmospheres or areas with combustion emissions. Avoid obstacles that disturb discharge air. Do not use for special purposes (food, precision instruments, breeding animals). Do not install over objects that must not get wet. Avoid places with organic solvents. Avoid near doors/windows exposed to humid outside air. Avoid places with frequent special sprays. Avoid locations with iron or metal dust. Avoid places with smoke, chemical agents, or organic solvents, as these can cause the refrigerant leak detection sensor to malfunction.
Noise and Vibrations:
Avoid installing where outdoor unit noise or hot air annoys neighbors. Install on a solid, stable foundation to prevent resonance, operation noise, and vibration. Some sound may be audible from other indoor units in group control.