Do you have a question about the Toshiba REGZA AV Digital Series and is the answer not in the manual?
Ensure adequate ventilation and avoid extreme temperatures to prevent overheating and damage.
Use correct voltage, do not modify the plug, and ensure proper connections for safe operation.
Follow operating instructions, consult dealer if unsure, and handle with care.
Position the TV away from direct sunlight on a stable, level surface.
Use a soft, dry cloth; avoid proprietary polishes to prevent damage.
Be aware of image retention, use curtains, and understand Toshiba's liability.
Check your local area's digital TV switchover date via Digital UK.
Your TV has a digital tuner; re-tuning is necessary for continuous reception.
Step-by-step guide on using the Auto Tuning function to update channels.
Overview of buttons for input selection, text, volume, and menu navigation.
Instructions for battery installation and understanding the remote's effective range.
Guide to connecting aerial cables, SCART leads, and media recorders.
Details on connecting HDMI, component video, and digital audio outputs.
Procedure for powering the television on and putting it into standby.
How to use the remote control to access and navigate TV menus.
Guide to changing volume, programme position, and selecting input sources.
Steps for initial setup: language, country, and aerial/cable connection.
How to automatically scan for available DTV and ATV channels.
Guide to re-tuning for new services and updating the channel list.
How to select programmes and display information like channel and time.
Adjusting volume, mute, and selecting external input sources.
Access quick features and adjust sound settings like Stable Sound and Audio Languages.
Modify picture quality with Black/White Level, Cinema Mode, Resolution+, and display formats.
Utilize the Programme Guide, Subtitles, and Favourite Programmes.
How to access and display information about current and upcoming programmes.
Explanation of icons for service type, audio, video format, and timer status.
Instructions for utilizing digital interactive services for up-to-date information.
Solutions for common problems like no sound/picture or poor colour.
Addressing issues with the remote, media playback, or black/white video.
Troubleshooting DTV menu, subtitles, and digital text service availability.
Lists supported DVB-T and broadcast systems by country.
Details screen size, display, power consumption, dimensions, and weight.
Lists accessories and provides information on software licenses.
Directory of telephone numbers for customer support in various countries.
Instructions for the proper disposal of the television and batteries in EU member states.
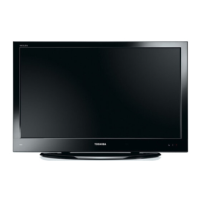
This manual describes the Toshiba REGZA AV/RV Digital Series television, focusing on its core functionalities, setup, and maintenance. It is designed to guide users through connecting and tuning the television, as well as operating its most commonly used features. For advanced functions, users are directed to an online manual at www.toshiba-om.net, an initiative by Toshiba to reduce paper consumption.
The television is designed and manufactured to meet international safety standards. Users are advised to read the following precautions to ensure safe operation and prevent damage.
Air Circulation: To prevent overheating, ensure at least 10cm of clear space around the television for adequate ventilation. Avoid placing the TV in dusty areas.
Heat Damage: Do not expose the television to direct sunlight or near a heater. Avoid locations with extremely high temperatures or humidity. The recommended operating temperature range is 5°C (41°F) to 35°C (94°F).
Mains Supply: The television requires a 220-240V AC 50/60Hz power supply. Always ensure the mains plug is fully inserted into the socket. If using a decoder or media recorder, ensure the mains plug is connected through these devices first. In the UK, the fuse fitted in the plug is approved by ASTA or BSI to BS 1362. If the fuse needs replacement, use an approved type and rating. If in doubt, consult a competent electrician.
General Do's and Don'ts:
Where to Install: For comfortable viewing, place the television away from direct sunlight and strong lights. Soft, indirect lighting is recommended. Use curtains or blinds to prevent direct sunlight on the screen. The TV should be placed on a stable, level surface capable of supporting its weight. For added safety, secure the TV to the surface or a wall using a sturdy strap. LCD display panels are manufactured with high precision, but some parts of the screen may have missing picture elements or luminous spots. This is not a malfunction. Ensure the television is in a position where it cannot be pushed or hit by objects, and that small items cannot be inserted into slots or openings.
Cleaning the Screen and Cabinet: Turn off the power, then clean the screen and cabinet with a soft, dry cloth. Do not use proprietary polishes or solvents as they may cause damage.
Important Notes: The digital reception function is effective only in countries listed in the "COUNTRY SET UP" section of the "DIGITAL MENU". Some functions may not be available depending on the country/area. Reception of future additional or modified services is not guaranteed. If stationary images (e.g., 4:3 broadcasts, text services, channel identification logos, computer displays, video games, on-screen menus) are left on the screen for extended periods, they could become conspicuous. It is advisable to reduce both brightness and contrast settings. Very long, continuous use of a 4:3 picture on a 16:9 screen may result in some image retention at the 4:3 outlines. This is not a defect and is not covered under warranty. Regular use of other size modes (e.g., Superlive) and varying the "side panel" brightness (if available) will prevent permanent retention.
Exclusion Clause: Toshiba is not liable for loss or damage caused by fire, earthquake, accidental damage, intentional misuse, improper conditions, loss/damage while in third-party possession, failure to follow manual instructions, or misuse/malfunction with associated equipment. Toshiba is also not liable for consequential loss/damage, including loss of profit, business interruption, or loss of recorded data. NOTE: A Toshiba wall bracket or stand, where available, must be used to maintain the product's BEAB approval.
When Does Switchover Happen? The exact switchover date depends on the transmitter serving your area. Users can check their specific date on www.digitaluk.co.uk. The UK is transitioning to digital television services between late 2007 and 2012, region by region. Digital UK is an independent, non-profit organization providing impartial information on preparing for the digital TV switchover.
How Switchover Affects Your TV Equipment: This new TV has a built-in digital tuner, allowing it to receive Freeview signals by simply plugging in an aerial. Check if you can get digital TV through your aerial now, or if you need to wait until switchover. During the switchover in your area, you will need to re-tune your TV at least twice to continue receiving existing channels and pick up new ones. Digital UK will advise when to re-tune. If you connect your TV to satellite or cable with a digital box, it will not be affected by switchover, and you won't need to re-tune.
How to Re-tune: As new services are broadcast, re-tuning is necessary. Auto tuning will completely re-tune the television and update the channel list.
The remote control provides simple at-a-glance access to various functions:
Inserting Batteries and Effective Range: Remove the back cover to access the battery compartment. Ensure AAA, IEC R03 1.5V batteries are inserted correctly. Do not mix used/old batteries with new ones or different types. Remove dead batteries immediately to prevent acid leakage. Do not expose batteries to excessive heat. The remote control performs optimally within five meters and an angle of 30 degrees from the center of the television. Reduced range indicates batteries may need replacing.
Before connecting any external equipment, turn off all main power switches or remove the mains plug from the wall socket.
Connections:
Important Notes on Connections:
All necessary adjustments and controls are made using the remote control, but some functions can be accessed via buttons on the television.
Switching On: If the RED LED is unlit, check the mains plug and press the POWER button on the left side of the television. If no picture appears, press the On/Standby button on the remote control. The GREEN LED will light up. To put the television into Standby, press the On/Standby button on the remote. To view the television again, press On/Standby. NOTE: When the POWER switch is turned off, the digital channel position previously viewed may not be memorized.
Using the Remote Control: Press the MENU button to see the menus. The menu appears as a list of five topics. Use the navigation ring (up, down, left, right) to select symbols and their respective options. IMPORTANT: A bar at the bottom of the screen displays control functions like Select, Watch, Back, Watch TV. NOTE: The same menu is displayed in DTV and ATV modes. Items unavailable in a mode will be greyed out. Use the up/down arrows to move through options and OK or right arrow to select. Follow on-screen instructions. To return to the previous programme, press RETURN.
Using the Controls (Sound and Picture):
Before switching on, ensure your decoder and media recorder are in Standby and the aerial is connected.
How to Add New Services (Auto Tuning): Auto tuning completely re-tunes the television and updates the channel list. It is recommended to run DTV Auto tuning periodically to ensure new services are added. All current programmes and settings (favourites, locked programmes) will be lost.
Selecting Programme Positions:
Sound Controls:
Input Selection: At any time, pressing the input selection button displays a list of modes and stored external equipment. Use up/down arrows to highlight and OK to select.
This section provides a brief description of some key features. Full details are available in the enhanced Owner's Manual online.
Quick Menu: Provides fast access to features like Picture Mode, Picture Size, Sleep Timer, Media Player. Availability depends on the current mode and input source.
Stable Sound®: Limits high volume levels on TV speakers, preventing extreme volume changes when switching channels or during commercials.
Advanced Sound Settings: Includes Stereo Extension, Voice Enhancement, and Dynamic Bass Boost to create an intense pseudo surround sound experience, making the audio richer and fuller.
Black/White Level: Increases the strength of dark areas in the picture, improving definition.
Cinema Mode: Helps correct lines or jagged edges in films or programmes by smoothing out the picture.
Base Colour Adjustment: Allows adjustment of individual colours to suit personal preference, useful with external sources.
Static Gamma: Allows adjustment of black levels in the picture.
Resolution +: Modifies SD quality pictures to HD quality levels. Levels can be selected for personal preference.
Programme Guide: Provides access to details and times for programmes currently showing and for the next seven days on all available channels.
Automatic Format (Widescreen): When a true Widescreen picture is received and Auto Format is On, it will automatically display in Widescreen format, regardless of previous settings.
Side Panel Adjustment: Lightens or darkens the bands on each side of the screen in 4:3 or 14:9 format. This helps prevent image retention and makes viewing more comfortable in bright or dark conditions.
Favourite Programmes: Allows creation of up to four lists of most-watched digital channels, including a mixture of television and radio programmes.
Subtitles: In digital mode, this feature displays subtitles on the screen in the selected language, provided they are being broadcast.
Audio Languages: Allows viewing a programme or film with a choice of soundtrack language, provided they are being broadcast.
Information: Select information by pressing i+. The information screen displays details about the channel and programme currently being viewed. To see details of the next programme, select Next. To see details of all programmes, select Also. Use up/down arrows or left/right arrows to change the display. To set a reminder for a programme, select Now then press OK. The SET TIMER screen appears. The details of the programme have been added to the timer. Press OK to save. The timer icon appears on the information screen. To record the programme, use up/down arrows or left/right arrows to change the Timer Type to Record. This allows more options. Press up/down arrows or left/right arrows to select options. Press OK to save.
On-Screen Information Icons: Icons on the Information screen give details about broadcast programmes.
Interactive Services: The digital interactive services are up-to-date, computer-style formats, incorporating pictures and interactive views. They offer high-quality on-screen images with multi-colour graphics, and are user-friendly. These services are free to anyone with a digital television; however, they are not available for all digital programmes and depend on the broadcaster.
Q: Why is there no sound or picture? A: Check if the TV is in standby mode. Check the mains plug and all mains connections.
Q: There is a picture, but why is there little or no colour? A: When using an external source (e.g., poor quality video tape), improvements may be achieved. The colour is factory set to Auto to automatically display the best colour system. To check, with the external source playing, select Manual Setting from the SETUP menu. Use up/down arrows or left/right arrows to choose between Auto, PAL, SECAM, NTSC 4.43 or 3.58.
Q: Why doesn't the media being played show on screen? A: Ensure the media player is connected to the TV as shown on page 6, then select the correct input by pressing the input selection button.
Q: Why is the media picture in black and white? A: Check the correct input has been chosen (S-VIDEO or AV). See Input selection on page 9.
Q: Why doesn't the remote control work? A: Check if batteries are dead or inserted incorrectly.
Q: Why is there a message permanently on the screen? A: Remove it by pressing i+.
Q: Why is the DTV main menu unavailable? A: Another mode is selected. Press ATV/DTV to select DTV.
Q: Why is there incorrect or no sound when in DTV mode? A: Press I/II to check if the hard of hearing option has been selected.
Q: Why, when digital subtitles have been selected, are they not showing on screen? A: Subtitles are not currently being transmitted by the broadcaster.
Q: Why is there no digital text service? A: The digital programme being viewed is not broadcasting digital text. Try another digital programme.
Q: Why is there no sound or picture when in HDMI mode? A: Ensure the cables used have the HDMI logo on them. Some early HDMI equipment may not work properly with the latest HDMI television products due to new standard adoption. Try setting Lip Sync, Instaport and RGB Range to Off.
| Display Technology | LCD |
|---|---|
| Built-in Speakers | Yes |
| Remote Control | Yes |
| Aspect Ratio | 16:9 |
| Component Input | Yes |
| Composite Input | Yes |
| Tuner | Analog/Digital |
| Screen Size | 32 inches |
| Brightness | 450 cd/m² |
| Response Time | 8 ms |
| Input Ports | HDMI, Component, Composite, PC Input |
| Weight | 12 kg |