3
BEFORE INSTALLATION
Read these instructions thoroughly before beginning work.
Please leave instructions for customers. These instruction contain maintenance
and warranty information.
If necessary, remove the existing toilet.
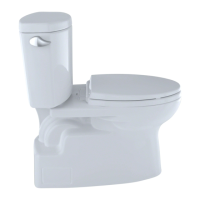
In order for your new TOTO toilet to fit correctly, check the dimensions below:
1) The distance between
the finished wall to
the center of the toilet
outlet, rough-in "RI":
Supply
Valve
Finished Wall
"RI"
C/L
Closet
Flange
“RI” Outlet Connection Part No.
12”
TSU01W.12R / TSU03W.12R
(Supplied)
10”
TSU01W.10R / TSU03W.10R
(Optional - Must be purchased separately)
14”
TSU01W.14R / TSU03W.14R
(Optional - Must be purchased separately)
12” TSU02W.12 (Supplied for CST794SF/CST794EF)
9"
7
"
11"
Please make sure that you have the correct outlet connection part:
IMPORTANT!
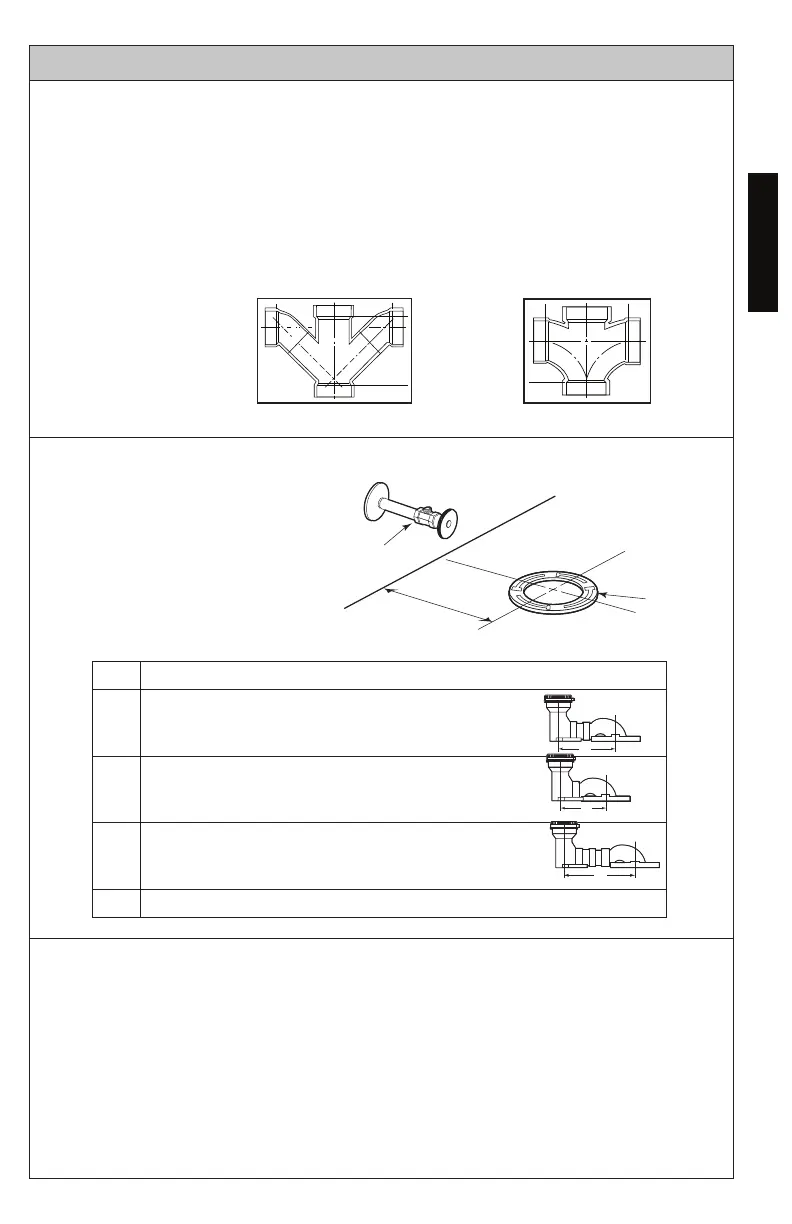
Due to the powerful performance of our Cyclone, G-Max, E-Max and Power Gravity
ushing systems, they are not specied for back-to-back installations. The only
means of installing these toilets in a back-to-back situation is when the toilet drain
connections incorporate a WYE tting. Please contact your builder or contractor prior
to this installation.
Double Combination WYE / 1/8 Bend
YES
Double Sanitary Tee / Sanitary Cross
NO
Removing Existing Toilet (if necessary)
1) Turn off water supply
2) Flush the toilet, remove any remaining water from tank and bowl.
3) Disconnect water connector.
4) Remove tank and bowl.
5) Remove old wax seal and mounting bolts.