63
Chapter 12
Customize Your Network Settings
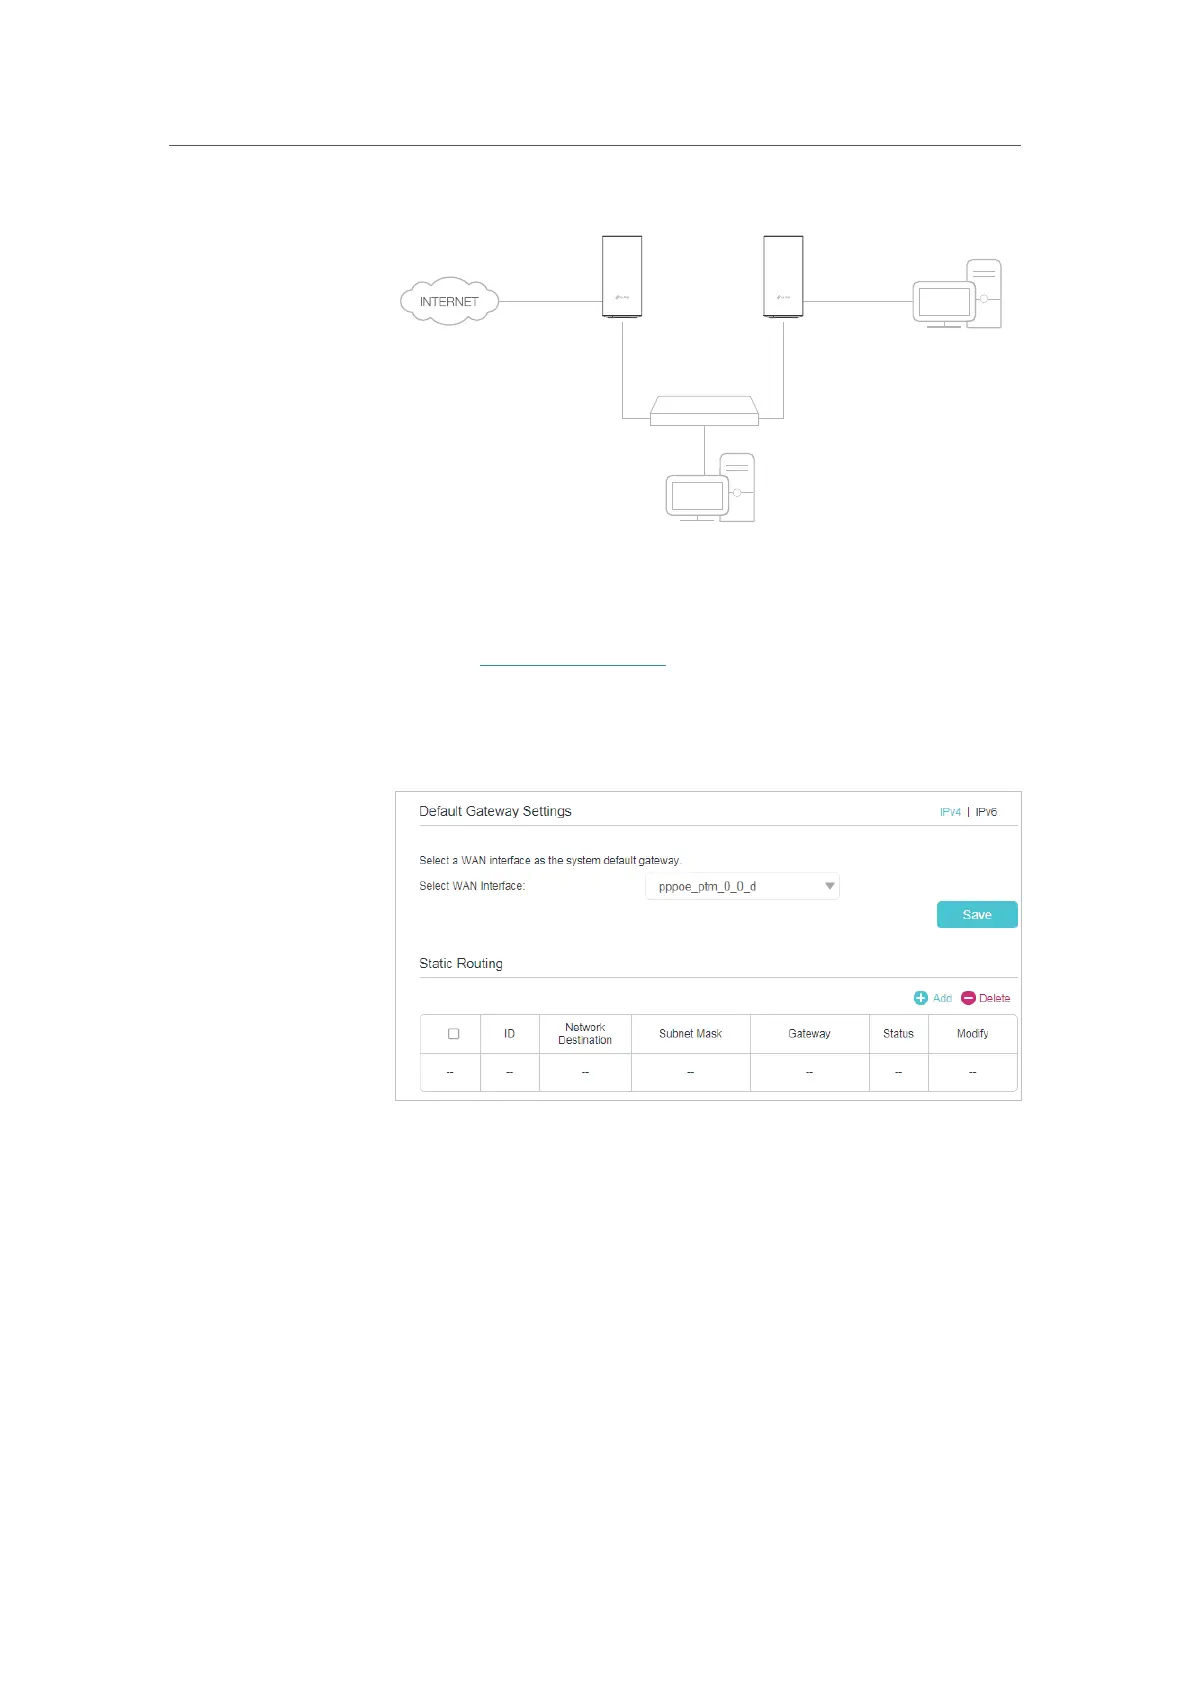
Company’s server
PC
Router BRouter A
Switch
LAN: 192.168.0.1
192.168.0.100
LAN: 192.168.0.2
WAN: 172.30.30.100
172.30.30.1
1. Make sure the routers use different LAN IP addresses on the
same subnet. Disable Router B’s DHCP function.
2. Visit
http://tplinkwifi.net, and log in with the password you
set for Router A.
3. Go to
Advanced > Network > Static Routing. Select your
current
WAN Interface and click Save.
4. Click Add to add a new static routing entry. Finish the settings
according to the following explanations:
How can I
do that?