8
Φ=6 mm (15/64 in.)
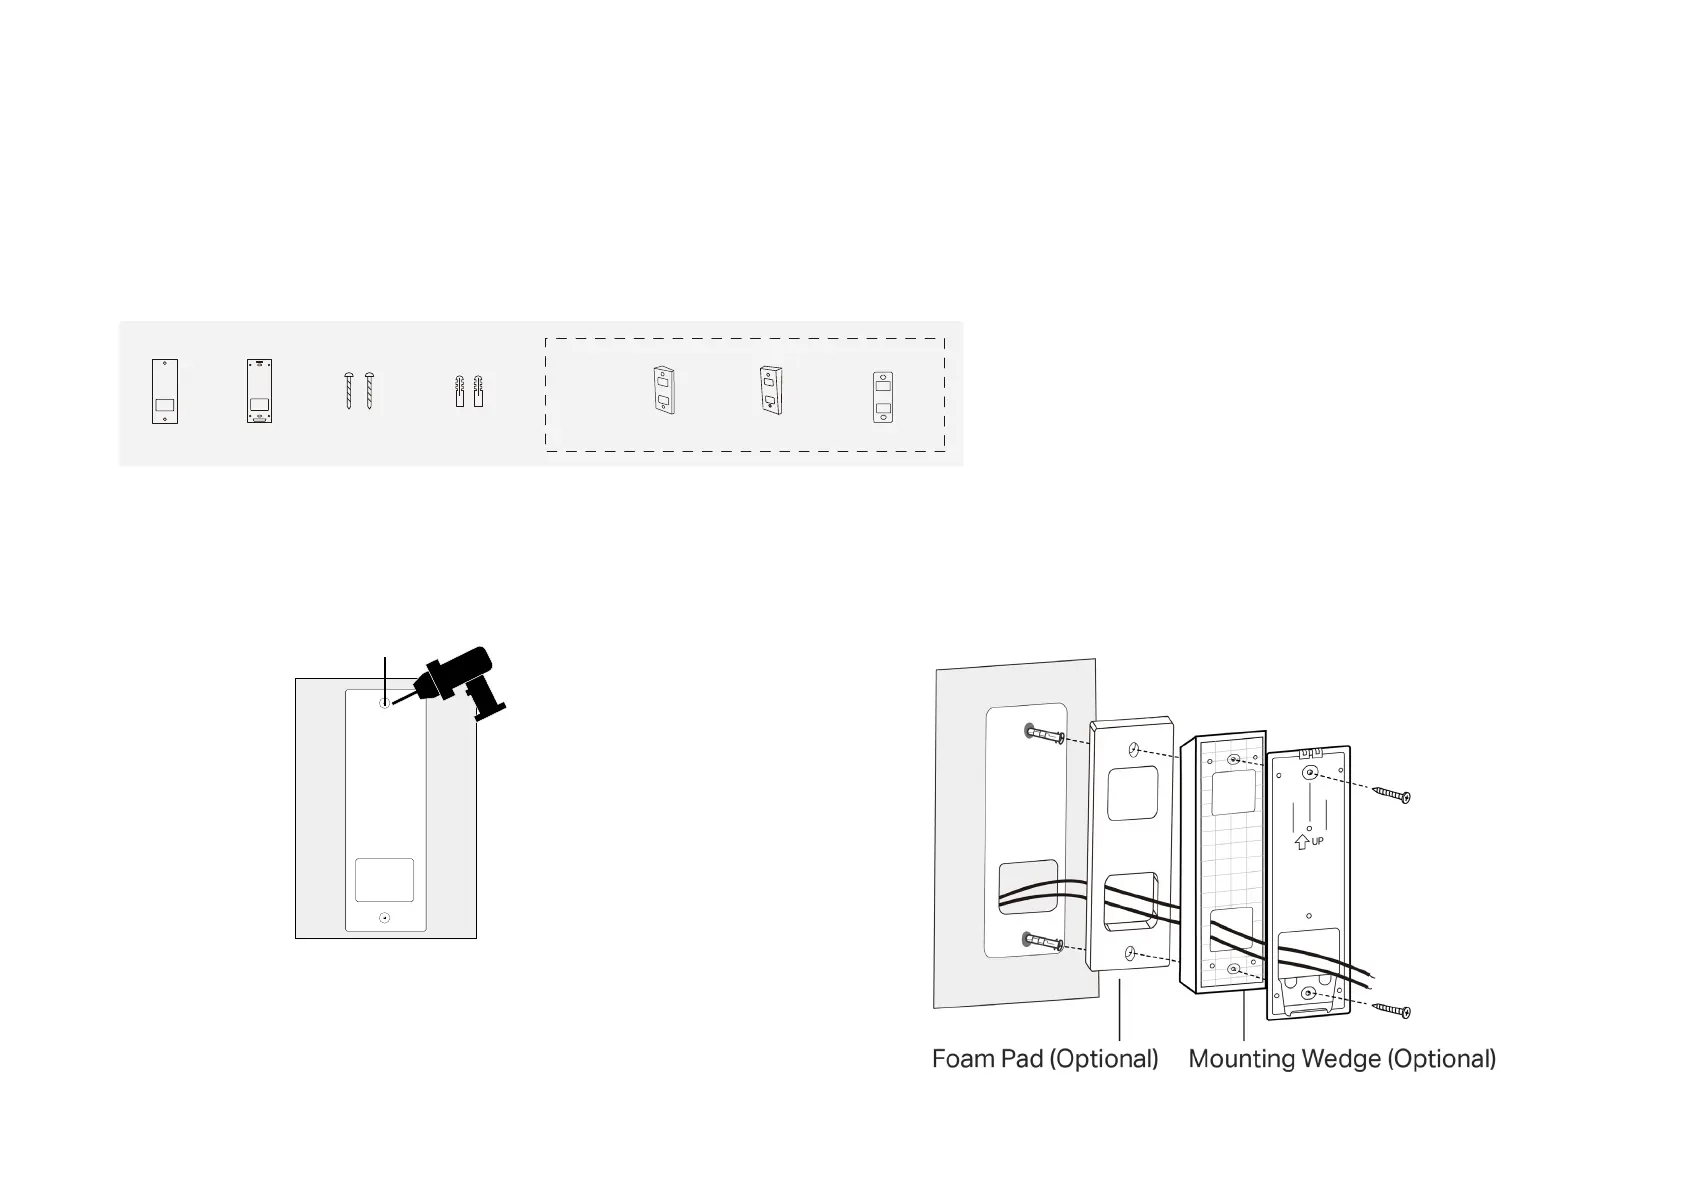
Option 2. Mount to the wall
1. Stick the mounting template to the desired place. Drill two holes
according to the template.
2. Route the wires (if there are existing wires) through the bracket.
Insert two anchors into the holes and use the screws to ax the
bracket over the anchors.
Note: When mounting to uneven walls, stick the foam pad on the back of the
wedge.
Install Your Doorbell
Follow the steps below to install your new doorbell.
Required Accessories:
Mounting
Bracket
Mounting
Screws ×2
Anchors ×2Mounting
Template
Optional
Foam Pad
Horizontal Mounting
wedge
Vertical Mounting
wedge