14
Install Waterproof Items
When the camera is installed outdoors, please install waterproof items to waterproof your camera. Make sure each part is securely attached and the
water-proong rings are ush to keep out water.
Follow the steps below to install waterproof items, or follow the installation video at https://www.tp-link.com/support/setup-video/.
• The Ethernet port connects to a network device.
Install the waterproof cable attachments for the network interface when the camera is installed outdoors.
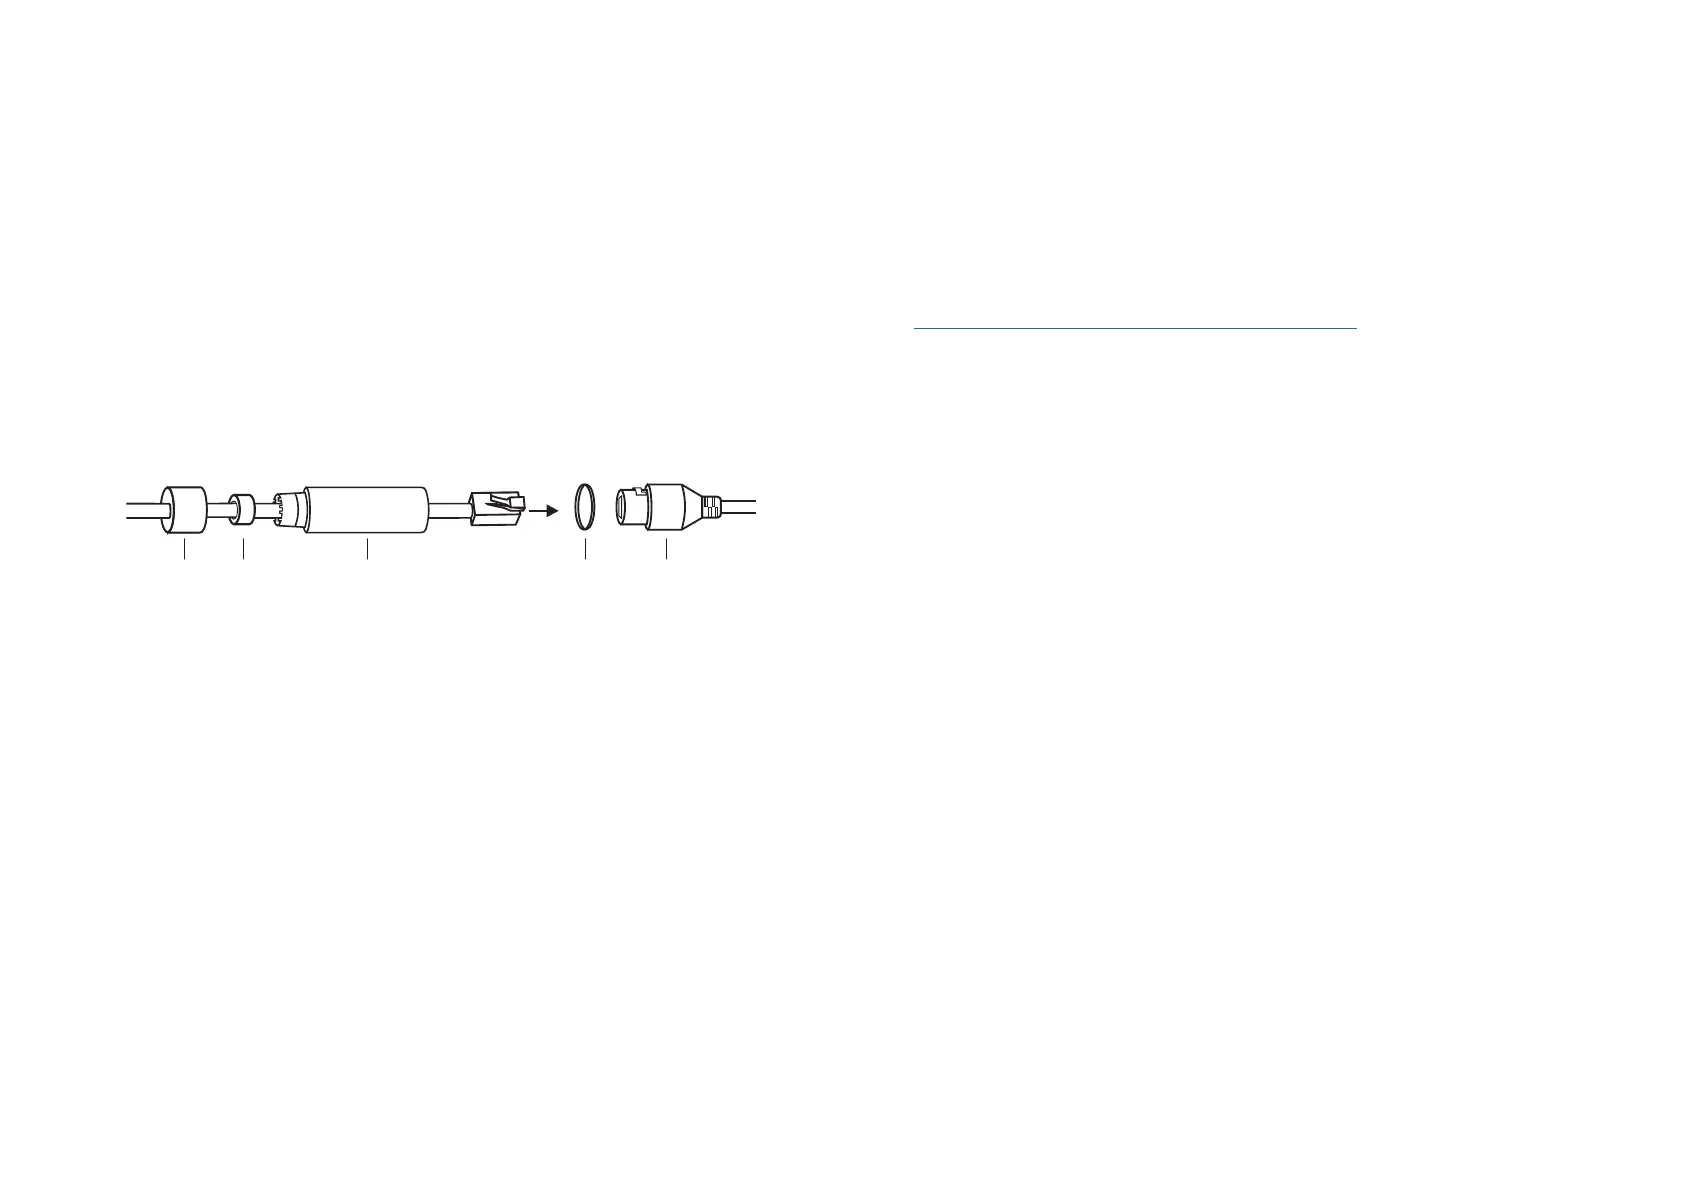
Fix Nut
Waterproof
Ring
O-ring
Network
Interface
Waterproof
Jacket
1. Route the network cable through the following components in order: x nut, waterproof ring, and then the waterproof jacket.
2. Insert the waterproof ring into the waterproof jacket.
3. Fix the O-ring to the network interface of the camera and connect the network cables.
4. Attach the network interface with the waterproof jacket, then twist to lock. Rotate the x nut to secure it to the waterproof jacket.
Done! The network interface is now waterproof.