Do you have a question about the TP-Link TL-SG1005P and is the answer not in the manual?
This document outlines the wall mounting procedure and specifications for a range of TP-Link wall-mountable switches. It serves as a comprehensive guide for users looking to securely install their network switches in an upright position on a wall, ensuring optimal performance and space utilization. The guide emphasizes the importance of proper preparation and adherence to specific measurements to achieve a stable and reliable installation.
The primary function of this guide is to provide clear, step-by-step instructions for wall mounting TP-Link switches. It addresses the practical aspects of installation, from preparing the necessary tools to the final mounting of the device. The document is designed to be user-friendly, breaking down the process into easily digestible steps, making it accessible even for individuals with limited technical expertise. By following these instructions, users can ensure their switches are mounted correctly, preventing potential damage or instability.
One of the key usage features highlighted in the guide is the flexibility it offers in terms of device placement. Wall mounting allows users to free up desk space, reduce cable clutter, and position the switch in an optimal location for network coverage and accessibility. This is particularly beneficial in environments where space is at a premium or where a clean, organized setup is desired. The guide also subtly implies that proper mounting can contribute to better airflow around the device, potentially aiding in heat dissipation and prolonging the life of the switch.
The guide begins by detailing the necessary preparations, which include gathering a screwdriver and two screws that comply with the specified standards. This initial step is crucial for a smooth installation process, as having the right tools on hand prevents delays and ensures the integrity of the mounting. The emphasis on using compliant screws underscores the importance of safety and stability, ensuring that the switch remains securely attached to the wall over time.
The wall mounting procedure itself is broken down into four distinct steps. First, users are instructed to determine the desired location on the wall for the switch. This step encourages thoughtful planning, allowing users to consider factors such as proximity to power outlets, network cables, and other devices. Proper placement can significantly impact network performance and convenience.
Second, the guide instructs users to mark the wall where the two mounting holes will be. This step is critical for accurate alignment, as the distance between these marks must precisely match the distance between the mounting holes on the switch. The document refers to a detailed specification table for these measurements, ensuring precision and preventing misaligned installations. This attention to detail is a hallmark of effective installation guides, as it minimizes the chances of errors and rework.
Third, users are advised to drive the screws into the wall at the marked locations using a screwdriver. The guide provides a specific minimum distance for the screw head to the wall, which is essential for allowing the switch to slide onto the screws securely without being too loose or too tight. This measurement ensures that the switch can be easily mounted and removed if necessary, while still maintaining a firm hold.
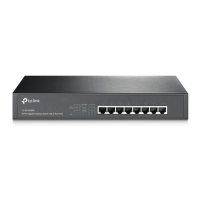
Finally, the guide instructs users to mount the switch on the wall. It also includes an important note regarding the orientation of specific models (TL-SF1008P/TL-SF1008LP/TL-SF1009P/TL-SG1008P), specifying that these switches should be mounted with the ports facing downward and the LEDs facing upward. This detail is crucial for proper functionality and visibility of the status indicators, ensuring that users can easily monitor the switch's operation. This specific instruction highlights the manufacturer's consideration for user experience and device performance.
While the document does not explicitly detail maintenance features, the act of wall mounting itself can be seen as a form of preventative maintenance. By securing the switch to a wall, it is less susceptible to accidental bumps, spills, or disconnections that might occur if it were placed on a desk or floor. This reduces the risk of physical damage and ensures continuous operation, thereby minimizing the need for repairs or replacements. The stable installation also contributes to a cleaner environment around the device, which can prevent dust buildup in critical areas, further enhancing its longevity.
The "Wall Mounting Specification" table is a central component of this guide, providing precise measurements for various TP-Link switch models. This table includes the screw standard (ANSI B1.1), minimum length of screw, screw-head-to-wall minimum distance, and wall-mounting-holes distance for each model. This detailed information is indispensable for users to select the correct screws and ensure accurate placement, making the installation process straightforward and error-free. The inclusion of ANSI B1.1 screw standards indicates a commitment to widely recognized industrial specifications, ensuring compatibility and reliability.
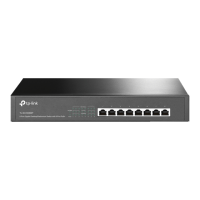
The extensive list of models covered in the specification table demonstrates the broad applicability of this guide across a wide range of TP-Link switches. From compact 5-port switches like the DS105G to larger 16-port models like the S4500-16GP, the guide provides tailored information for each device. This comprehensive coverage ensures that users of various TP-Link switches can find the specific details relevant to their model, making the document a valuable resource for a diverse user base.
In summary, this wall mounting guide is a practical and essential resource for TP-Link switch users. It simplifies the installation process, promotes proper device placement, and contributes to the overall longevity and performance of the network switch. By adhering to the detailed instructions and specifications provided, users can confidently and securely mount their switches, creating an organized and efficient network environment. The guide's focus on clarity, precision, and user-friendliness makes it an effective tool for ensuring successful installations.
| Installed SFP modules quantity | 0 |
|---|---|
| Basic switching RJ-45 Ethernet ports type | Gigabit Ethernet (10/100/1000) |
| Basic switching RJ-45 Ethernet ports quantity | 5 |
| 10G support | No |
| Auto MDI/MDI-X | Yes |
| Networking standards | IEEE 802.1p, IEEE 802.3, IEEE 802.3af, IEEE 802.3u, IEEE 802.3x |
| Cable types supported | Cat3, Cat4, Cat5, Cat5e, Cat6 |
| Copper ethernet cabling technology | 10BASE-T, 100BASE-TX, 1000BASE-T |
| Total Power over Ethernet (PoE) budget | 56 W |
| Power over Ethernet (PoE) ports quantity | 4 |
| Maximum cable length | 100 m |
| Power source | DC/PoE |
| Input current | 1.25 A |
| DC input voltage | 48 V |
| Power consumption (max) | 64.44 W |
| Forwarding rate | 7.44 Mpps |
| MAC address table | 2000 entries |
| Product color | Black |
| Switch type | Unmanaged |
| Heat dissipation | 219.87 BTU/h |
| Storage temperature (T-T) | -40 - 70 °C |
| Operating temperature (T-T) | 0 - 40 °C |
| Storage relative humidity (H-H) | 5 - 90 % |
| Operating relative humidity (H-H) | 10 - 90 % |
| Package type | Box |
| Package depth | 196 mm |
| Package width | 131 mm |
| Package height | 121 mm |
| Package weight | 800 g |
| Harmonized System (HS) code | 85176990 |
| Sustainability certificates | CE, Federal Communications Commission (FCC), RoHS |
| Depth | 98 mm |
|---|---|
| Width | 99.8 mm |
| Height | 25 mm |