- 21 -
Use this method if your client device has a Wi-Fi Protected Setup button.
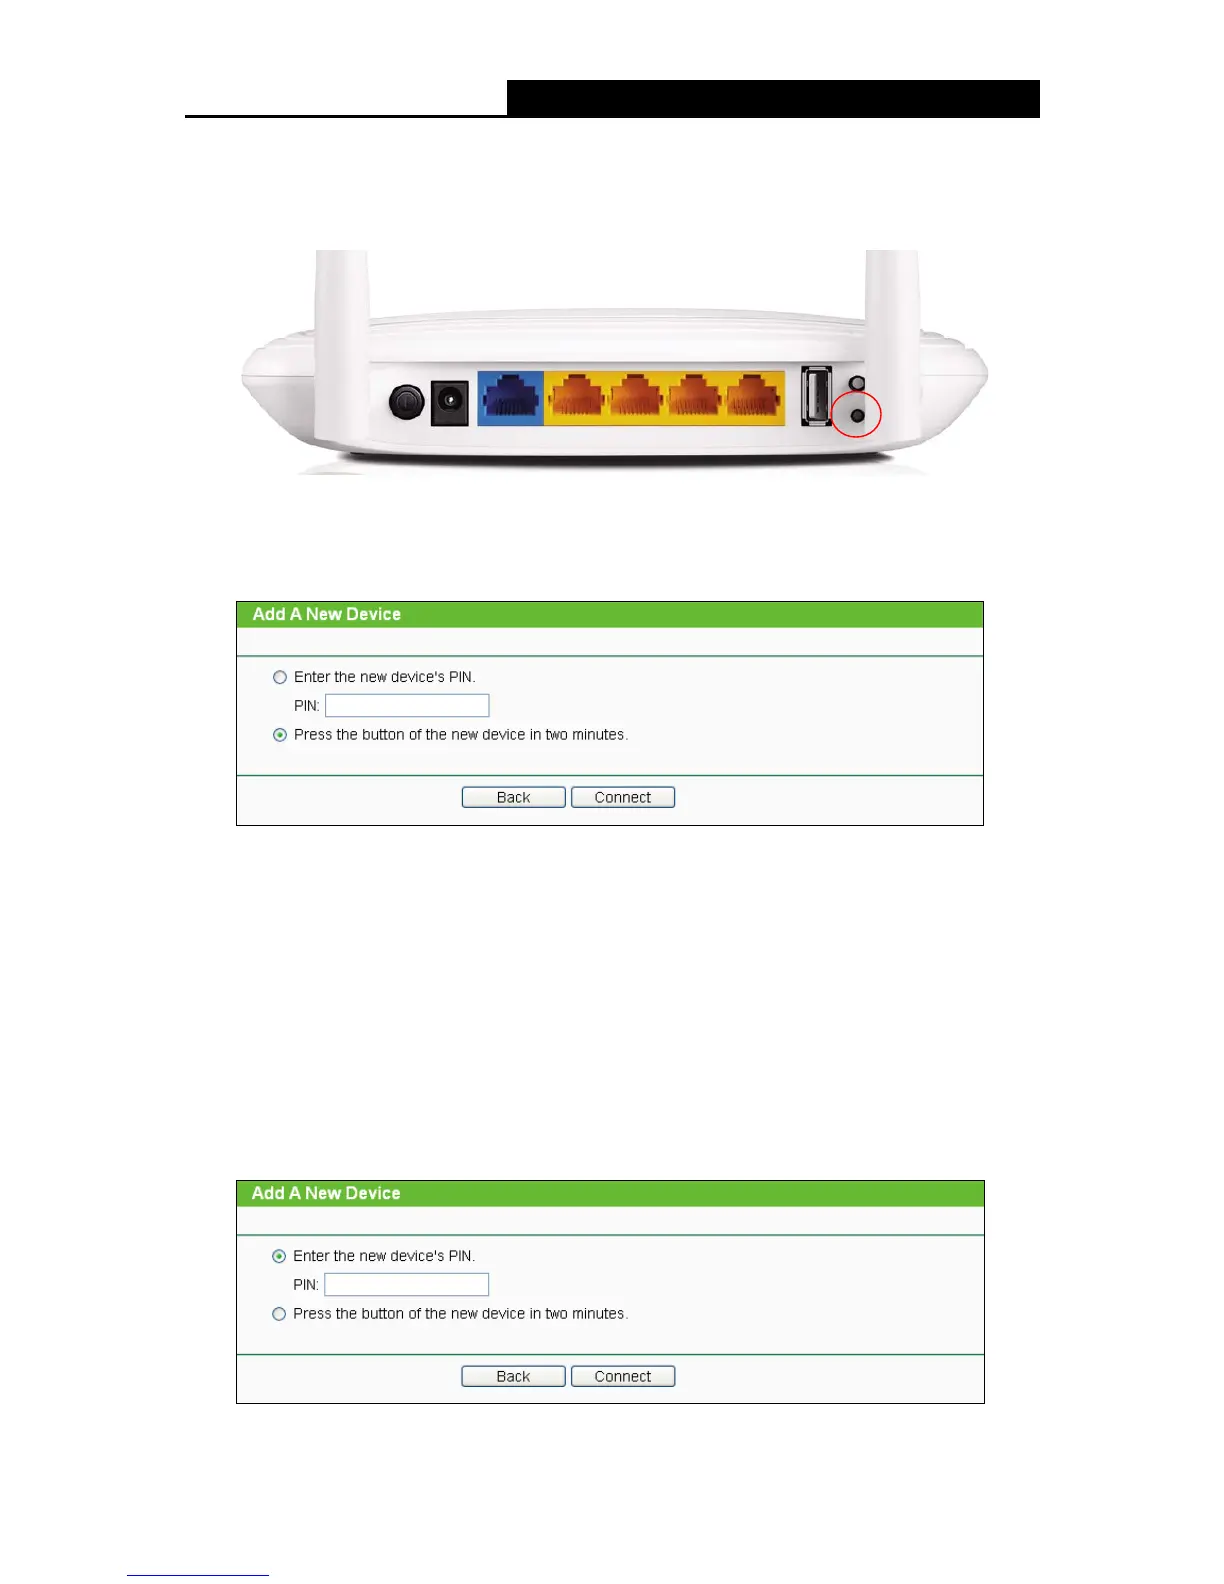
Step 1: Press the WPS/RESET button on the back panel of the Router, as shown in the following
figure.
You can also keep the default WPS Status as Enabled and click the Add device button
in Figure 4-2, then Choose “Press the button of the new device in two minutes” and
click Connect. (Shown in the following figure)
Figure 4-3 Add A New Device
Step 2: Press and hold the WPS button of the client device directly.
Step 3: The Wi-Fi Protected Setup LED flashes for two minutes during the Wi-Fi Protected Setup
process.
Step 4: When the WPS LED is on, the client device has successfully connected to the Router.
Step 5: Refer back to your client device or its documentation for further instructions.
II. Enter the client device’s PIN on the Router
Use this method if your client device has a Wi-Fi Protected Setup PIN number.
Step 1: Keep the default WPS Status as Enabled and click the Add device button in Figure 4-2,
then the following screen will appear.
Figure 4-4 Add A New Device
 Loading...