EasyManua.ls Logo

Traeger TFB52QCC - User Manual

Traeger TFB52QCC
20 pages
Print Icon
To Next Page IconTo Next Page
Loading...
OWNER’S MANUAL
TFB52QCC
RESIDENTIAL PELLET GRILL
FOR OUTDOOR USE ONLY!
“TASTE THE DIFFERENCE”
Please read this entire manual before assembly, installation of your Traeger Pellet Grill.
Failure to follow these instructions could result in property damage, bodily injury or even
death. Contact your local building or fire official about restrictions and installation
inspection requirements in your area.
SAVE THESE INSTRUCTIONS
Question and Answer IconNeed help?

Do you have a question about the Traeger TFB52QCC and is the answer not in the manual?

Summary

Safety and Clearance Guidelines

Clearance Requirements for Combustibles

Maintains minimum distances from grill to combustible materials during operation.

Danger of Hazardous Voltage

Warns about electrical shock hazard and necessity of disconnecting power before servicing.

Owners Manual Introduction

Component Identification and Listing

Lists all parts included with the grill and their reference numbers for assembly.

Assembly Steps Overview

Outlines the sequence of steps needed to complete the grill assembly.

Section One: Assembly Instructions

Mounting the Legs

Provides detailed steps and diagrams for attaching the leg assemblies to the grill frame.

Attaching Chrome Door Handle

Guides on how to install the chrome door handle onto the grill door.

Attaching Flue Pipe and Chimney Cap Assembly

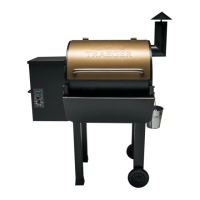
Instructions for connecting the flue pipe and chimney cap assembly to the grill.

Positioning the Heat Baffle

Details on correctly placing the heat baffle over the firepot.

Positioning the Grease Drain Pan

Explains how to correctly position the grease drain pan for grease management.

Positioning Porcelain Grills and Warming Shelf

Instructions for placing the porcelain grills and warming shelf onto their respective supports.

Installing the Front Shelf

Steps for attaching the front shelf to the grill body using screws.

Hanging the Grease Bucket

Guide on how to hang the grease bucket onto the designated hook.

Hanging Grill Hooks to Pegboard

Instructions for attaching grill hooks to the pegboard for storage.

Section Two: Initial Firing Instructions

Preparing for First Firing

Steps for initial setup, including checking components and preparing for first ignition.

Section Three: Subsequent Start-Up

Control Shutdown Cycle

Explains the automatic shutdown sequence that burns excess pellets and powers off the fan.

Control Safety Features

Details the grill's safety features, including low and high-temperature alarms.

Section Four: Operating Tips

Temperature Dial and Control Functions

Explains how to use the temperature dial for grilling, slow cooking, and smoking.

Carbon Monoxide Safety Precautions

Provides critical safety guidelines to prevent carbon monoxide poisoning.

Section Five: Maintaining Your New Grill

Creosote and Grease Management

Discusses the formation of creosote and grease and the need for their removal.

Cleaning the Flue (Smoke Stack)

Instructions for cleaning the smoke stack, including removing the chimney cap.

Cleaning Grease from Grill Components

Guides on cleaning the grease drain, tube, and bucket to prevent fires.

Cleaning Outside Surfaces

Recommends methods for cleaning the exterior surfaces of the grill.

Outside Storage and Protection

Advice on protecting the grill from weather when stored outdoors.

Cleaning Porcelain Grill Grates

Best practices for cleaning the porcelain grill grates while they are warm.

Cleaning Ash from Firepot Area

Steps for safely removing ash from the firepot and surrounding areas.

Safe Ash Disposal Procedures

Safe methods for disposing of collected ashes from the grill.

Section Six: Frequently Asked Questions (FAQs)

Grill Ignition Troubleshooting Guide

Addresses common issues preventing the grill from igniting and provides solutions.

Pellet Delivery Troubleshooting

Explains why pellets might not be delivered to the firepot and how to resolve it.

Auger Jam Resolution

Guides on how to diagnose and clear jams in the pellet auger system.

Fire Extinguished on Smoke Setting

Provides steps to take if the grill fire goes out unexpectedly during smoke setting.

Digital Control Starting Settings

Recommendations for dial settings when starting the grill with digital controls.

Protecting the Grills Paint Finish

Advice on how to maintain the grill's exterior paint finish.

Obtaining Replacement Grill Parts

Information on where and how to order replacement parts for the grill.

Overview

This document is the Owner's Manual for the Traeger Wood Pellet Grill, Model TFB52QCC. It provides comprehensive instructions for assembly, operation, maintenance, and troubleshooting of the grill.

Function Description:

The Traeger TFB52QCC is a residential wood pellet grill designed for outdoor use only. Its primary function is to cook food using wood pellets, offering various cooking methods such as grilling, slow cooking, and smoking. The grill is designed to provide a distinct "Taste the Difference" experience through its wood-fired cooking.

Important Technical Specifications:

  • Pellet Type: Uses ONLY Traeger Brand BBQ Wood Pellets.
  • Pellet BTU Rating: Traeger wood pellets are rated for 8500 BTU per LBS.
  • Ash Content: Traeger wood pellets have an ash content of 2%.
  • Minimum Clearances:
    • Minimum distance from the back and ends of the grill to combustible materials: 12 inches.
    • Minimum overhead clearance to combustible materials: 40 inches.
  • Temperature Control: Digital thermostat control with settings for Smoke, 180, 225, 275, 325, 375, and High.
  • Smoke Mode Temperature: Factory pre-set to develop a smoking temperature of 150 to 180 degrees F.
  • Auger Cycle (Smoke Mode): Auger cycles on for 15 seconds and off for 65 seconds.
  • Shutdown Cycle: Automatic 10-minute shutdown cycle where the Draft Induction Fan runs to burn off excess pellets.
  • Safety Features:
    • Low temperature alarm ("LEr") if the grill stays below 125 degrees for 10 minutes, shutting off power.
    • High temperature alarm ("HEr") if the grill reaches 550 degrees, shutting off power.
  • Power: Requires a grounded electrical outlet.

Usage Features:

  • Assembly: The manual provides step-by-step instructions for assembling the grill, including mounting legs, attaching the chrome door handle, flue pipe, chimney cap, positioning the heat baffle, grease drain pan, porcelain grills, front shelf, grease bucket, and grill hooks. Tools (open-end wrenches and hex key) are supplied.
  • Initial Firing: Detailed instructions for the first use or when the grill runs out of pellets, including "charging" the auger tube with pellets, checking components, and seasoning the grill. It emphasizes starting on the SMOKE setting with the door open until pellets ignite, then closing the door and setting the desired temperature.
  • Subsequent Start-Up: Instructions for regular use, starting on the SMOKE setting, allowing pellets to ignite, and pre-heating.
  • Temperature Settings: The temperature dial can be adjusted at any time. HIGH/HIGHER settings are for grilling, MEDIUM/MID RANGE for slow cooking, and SMOKE for smoking or holding food at 180-200 degrees F.
  • Digital Thermostat Control: The auger operates continuously until the selected temperature is reached (except in Smoke mode), then cycles on/off to maintain temperature.
  • Door Operation: The grill is designed to operate with the door closed; cooking with the door open significantly lengthens cooking time.
  • Pellet Handling: Always store wood pellets in a dry location, away from heat-producing appliances and other fuel containers. Never add pellets by hand to a hot firepot.
  • Safety Warnings: Numerous warnings are provided throughout the manual, including:
    • Hazardous voltage can shock, burn, or cause death; disconnect power before servicing.
    • Never use or store flammable liquids near the grill.
    • Never use gasoline or lighter fluid to manually light the grill; use ONLY Alcohol Gel.
    • Never use heating fuel pellets.
    • Many parts become very hot; avoid burns and never leave unattended with children present.
    • Never move the grill when operating or hot.
    • Never put water into the firepot.
    • Ensure the heat baffle is properly seated to prevent grease fires.
    • Carbon monoxide warning: symptoms, risks, and prevention.
    • Instructions for handling grease fires (turn off, keep door closed, use baking soda if needed).
  • Troubleshooting: A "Frequently Asked Questions" section addresses common issues like grill ignition failure, no pellet delivery, and fire going out on "Smoke" setting, providing diagnostic steps and solutions, including how to remove a jammed auger.

Maintenance Features:

  • Creosote and Grease Removal: Regular inspection and removal of creosote and grease buildup from the flue exhaust, grease drain pan, V-shaped grease drain, grease drain tube, and grease bucket are crucial to reduce fire risk.
  • Cleaning the Flue (Smoke Stack): Instructions for removing and cleaning the chimney cap assembly and scraping creosote/grease from the flue pipe using a stiff, non-metallic tool.
  • Cleaning Grease from Grill: Periodically clean the V-shaped grease drain and grease drain tube. Recommendations include lining the grease drain pan and bucket with heavy-duty aluminum foil for easy clean-up.
  • Cleaning Outside Surfaces: Use a disposable rag or cloth dampened with warm soapy water; avoid oven cleaner, abrasive cleansers, or pads.
  • Outside Storage: Recommend using a Traeger Grill Cover to protect against water, which can jam the auger if it gets into pellets.
  • Cleaning Porcelain Grill: Best done while still warm with a long-handled cleaning brush.
  • Cleaning Ash from Firepot: Crucial for proper operation, especially in "SMOKE" setting. Must be done when the grill is COLD. Instructions for using a whisk broom and metal fireplace shovel, or a utility-type vacuum cleaner (with specific safety precautions for bagless or disposable bag models).
  • Ash Disposal: Ashes must be placed in a metal container with a tight-fitting lid, on a non-combustible surface, away from combustible materials, until thoroughly cooled.
  • Paint Finish Protection: Recommend using a protective cover and touch-up paint. Apply high-quality car wax to outside surfaces every 90 days when the grill is COLD.
  • Parts and Support: Information on where to obtain new parts and contact Traeger Technical Support, Parts Department, and Sales/Order Desk via phone and email.

Traeger TFB52QCC Specifications

General IconGeneral
BrandTraeger
ModelTFB52QCC
CategoryGrill
LanguageEnglish

Related product manuals