EasyManua.ls Logo

Trane 4PXCBU36BS3HAC User Manual

Trane 4PXCBU36BS3HAC
8 pages
To Next Page IconTo Next Page
Page #1 background imageLoading...
Page #1 background image
Installer’s Guide
ALL phases of this installation must comply with NATIONAL, STATE AND LOCAL CODES
IMPORTANT — This Document is customer property and is to remain with this unit. Please return to service information pack
upon completion of work.
2. INDOOR UNIT AIRFLOW
Indoor unit must provide the required airflow for the heat
pump or cooling combinations approved for this coil.
IMPORTANT: Review your installation requirements. Check
the table on the outline drawing and note all dimensions for
your coil before beginning the installation.
Table of Contents
General .................................................................................1
Application Information ......................................................1
Recommendation ................................................................2
Furnace in Upow Position ................................................2
Furnace in Downow Position ...........................................2
Installing / Brazing Refrigerant Lines ................................3
Leak Check...........................................................................3
Condensate Drain Piping ....................................................4
Cleaning the Coil .................................................................4
Outline Drawing ...................................................................5
Troubleshooting Indoor TXV / Cooling Mode ...................6
Figure 1
18-AD43D1-1A-EN
Cased Aluminum Coil "Dedicated Upow"
Convertible to horizontal with separately purchased kit
Upow model:
4PXCBU36BS3HAC
NOTE:
OPTIONAL DOWNFLOW GASKET INSTALLATION: For
unusually humid applications that expect prolonged
operation above 70% RH, it is recommended to use the
BAYGSKT001A0 gasket kit to prevent water from forming
on the bottom of the drain pan and dripping into the
supply ductwork.
NOTE: 4PXC upow coils may be installed in Upow, Down-
ow, Horizontal Right with kit, and Horizontal Left with kit.
1. FURNACE AND COIL
The coil MUST BE installed downstream (in the outlet air)
of the furnace.
WARNING
!
This product can expose you to chemicals including
lead, which are known to the State of California to case
cancer and birth defects or other reproductive harm.
For more information go to www. P65Warnings.ca.gov
A. GENERAL
This coil is designed for use in combination with a heat pump or
cooling outdoor section using R-410A REFRIGERANT.
The 4PXC equipment has been evaluated in accordance with
the Code of Federal Regulations, Chapter XX, Part 3280 or the
equivalent. “Suitable for Mobile Home use” The height of the
Furnace, Coil and discharge duct work must be 7 ft. or less.
Inspect the coil for shipping damage. Notify the transportation
company immediately if the coil is damaged.
B. APPLICATION INFORMATION
WARNING (Medium/high pressure)
Contains Refrigerant!
System contains oil and refrigerant under high pressure.
Recover refrigerant to relieve pressure before opening the
system. See unit nameplate for refrigerant type. Do not
use non-approved refrigerants, refrigerant substitutes, or
refrigerant additives.
Failure to follow proper procedures or the use of non-
approved refrigerants, substitutes, or refrigerant additives
could result in death, serious injury, or equipment damage.
WARNING
!
Question and Answer IconNeed help?

Do you have a question about the Trane 4PXCBU36BS3HAC and is the answer not in the manual?
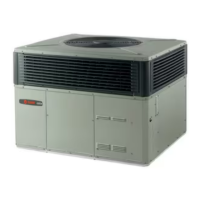
Trane 4PXCBU36BS3HAC Specifications

General IconGeneral
Model Number4PXCBU36BS3HAC
CategoryChiller
Cooling Capacity36, 000 BTU/H
Refrigerant TypeR-410A
Compressor TypeScroll
Phase1
Voltage208-230V

Summary

General Coil Information and Application

General Coil Description

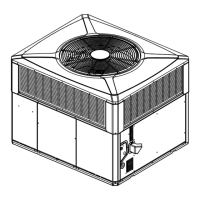
This coil is designed for use with a heat pump or cooling outdoor section using R-410A REFRIGERANT.

Application Guidelines

The 4PXC equipment has been evaluated for "Suitable for Mobile Home use". Height of Furnace, Coil, and duct work must be 7 ft. or less.

Furnace and Coil Installation Sequence

The coil MUST be installed downstream (in the outlet air) of the furnace.

Installation Recommendations and Positions

System Component Recommendations

Use Installer's Guide packaged with furnaces, outdoor sections, and thermostat for physically installing those components.

Furnace in Upflow Position Installation

This coil is pressurized with 8-12 psig of dry air. Do not stand directly in front of coil connections when removing sealing plugs.

Furnace in Downflow Position Installation

When used with a downflow furnace, a subbase is not required between the coil case and combustible flooring.

Optional Downflow Gasket Installation

Recommended for humid applications to prevent water formation on the bottom of the drain pan.

Refrigerant Lines and Leak Checks

Refrigerant Line Installation and Brazing

Do NOT open refrigerant valve until lines and coil are brazed, evacuated, and leak checked to prevent contamination.

Brazing Best Practices

Flow nitrogen during brazing, use good technique, minimize sharp bends, insulate suction line, protect TXV bulb.

Leak Check Procedure

Pressurize lines and coil to 150 PSIG with nitrogen, leak check with soap bubbles, repair leaks.

Drainage and Coil Maintenance

Condensate Drain Piping

Drain hole must be cleared of insulation. Insulate primary drain line to prevent sweating.

Coil Cleaning

Wipe down foil-covered insulation. Use water to wash away debris; remove coil for heavy contamination.

Troubleshooting Cooling Mode

Indoor TXV and Cooling Mode Diagnostics

Flowchart to diagnose issues with superheat, subcooling, airflow, and TXV performance in cooling mode.

Related product manuals