Installation
10 CLCH-SVN05C-EN
Assembly and Installation
The following procedure explains how to assemble and
install roof curbs provided by Trane. An attachment
specific to your roof curb is shipped with your Trane-
ordered roof curb. See typical exploded view and parts list
in Figure 22, p. 15 and Tabl e 4, p. 16. In order to properly
locate the duct supports (if required) and external piping
cabinet (if ordered), it is recommended that you have a
copy of the as-built curb drawings from the submittal
package. For specialty or field-fabricated roof curbs please
see the section entitled “Specialty Roof Curbs,” p. 12 for
important information.
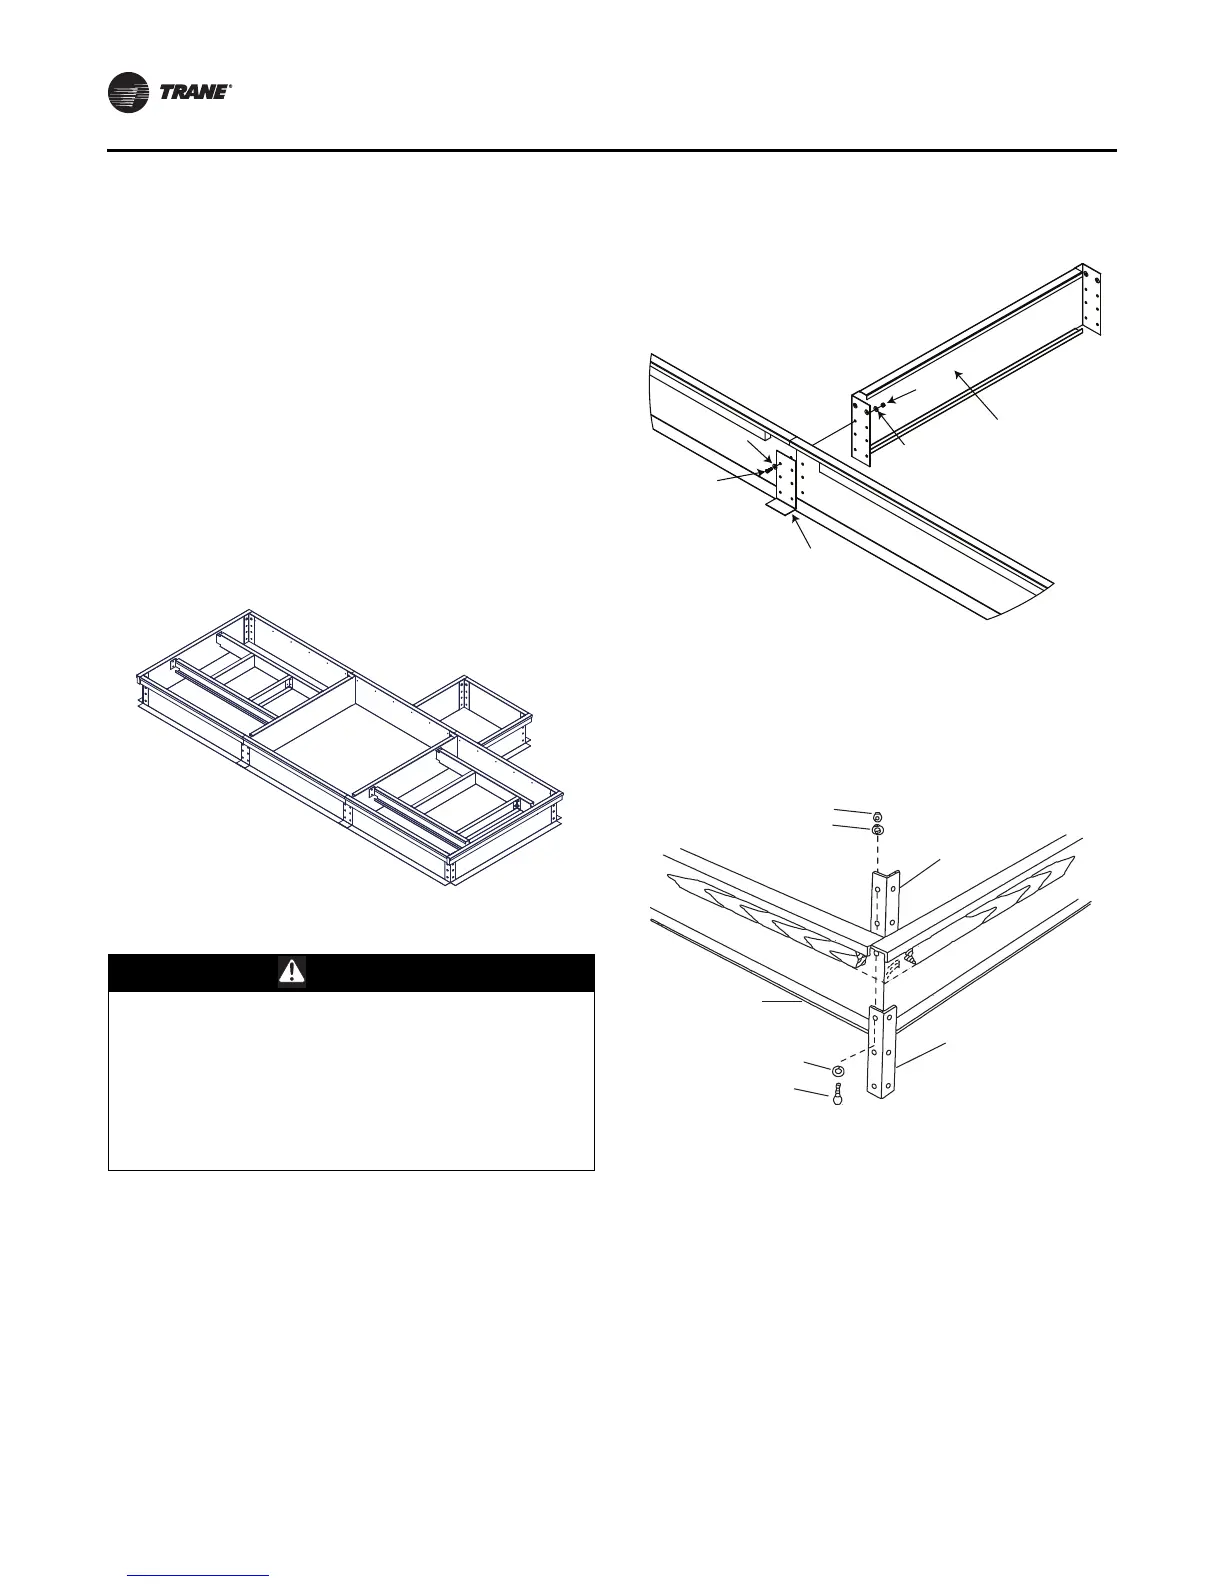
Unit Roof Curb
1. Attach cross brace and outer side splice plates at splice
locations (refer to the following figure).
2. Attach outer and inner corner splice plates (4 places) as
shown in the figure below.
Figure 9. Typical roof curb provided by Trane
WARNING
Risk of Roof Collapsing!
Failure to ensure proper structural roof support could
cause the roof to collapse, which could result in death
or serious injury and property damage. Confirm with a
structural engineer that the roof structure is strong
enough to support the combined weight of the roof
curb and the unit. Refer to “Dimensions and Weights,”
p. 7 for typical curb weights.
Figure 10. Side splice detail
Figure 11. Corner splice detail
Washer
Bolt
Splice
plate
Washer
Nut
Cross brace
Nut
Washer
Inner corner
angle
Roof curb
Washer
Bolt
Outer corner
angle
 Loading...