Installation
RT-SVX35H-EN 41
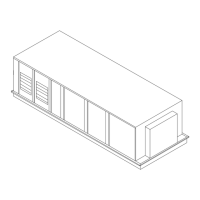
Chilled Water Units
Chilled water coils are factory installed inside the cooling
section of the unit. Once the unit is set into place, the
chilled water piping and the appropriate modulating valve
(factory provided, field installed) must be installed. Two
access holes are provided in the unit base as shown in
Figure 4, p. 19 - Figure 8, p. 23. Chilled Water coil inlet and
outlet connecti
ons are 2 1/2 inch male NPT.
Su
pport all field-installed piping independently from the
chilled water coil.
Important: The valve actuators are not waterproof.
Failure to protect the valve from moisture
may result in the loss of cooling control.
When applying air handlers with a chiller water coil and an
economizer, the coil should be completely drained for
winter operation. If the coil can not be completely drained,
th
e coil should be filled with a glycol mixture that will
protect the solution from freezing to design winter
ambient temperatures.
Disconnect Switch External Handle
(Factory Mounted Option)
Units ordered with the factory mounted disconnect switch
comes equipped with an externally mounted handle. This
allows the operator to disconnect power from the unit
without having to open the control panel door. The handle
loca
tions and its three positions are shown below;
"ON" - Indicates that the disconnect switch is closed,
allowing the main power supply to be applied at the unit.
"OFF" - Indicates that the disconnect switch is open,
interrupting the main power supply to the unit controls.
"OPEN COVER/RESET" - Turning the handle to this position
releases the handle form the disconnect switch, allowing
th
e control panel door to be opened.
Once the door has been opened, it can be closed with the
handle in any one of the three positions outlined above,
provided it matches the disconnect switch position.
The handle can be locked in the "OFF" position. While
holding the handle in the "OFF" position, push the spring
loaded thumb key, attached to the handle, into the base
slot. Place the
lock shackle between the handle and the
th
umb key. This will prevent it from springing out of
position.
An overall layout of the field required power wiring is
illustrated in Figure 27, p. 44. To insure that the unit's
supply power wiring is properly sized and installed, follow
the guidelines outlined below.
Figure 25. Steam coil piping configuration for W_HE casings 4, 5, 6 and 9
 Loading...