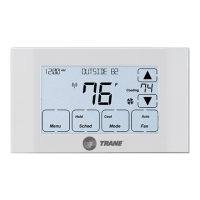
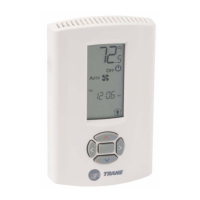
EasyManua.ls Logo

Trane TZEMT524AA21MA User Manual

Trane TZEMT524AA21MA
20 pages
To Next Page IconTo Next Page
Page #1 background imageLoading...
Page #1 background image
Touchscreen
Comfort Control
Model TZEMT524AA21MA
Installation Instructions and User Guide
18-HD46D1-1
Tools Needed
1/8”
#2
Customer Service: (877) 288-7707
The Trane TZEMT524 Touchscreen Comfort Control is
compatible with single and multistage forced air systems,
including:
• Gas furnace systems
• Oil furnace systems
• Electric furnace systems
• Heat pump systems
• Air conditioning systems
The Trane TZEMT524 Touchscreen Comfort Control may
be compatible with some other system types, including:
• Boiler systems
• Geothermal systems
• Multi-zoned systems
Call (877) 288-7707 to verify compatibility.
The Trane TZEMT524 Touchscreen Comfort Control is not
compatible with the following system types:
• Radiant floor systems
• Wall heating systems
Î NOTE: A 24 Volt common and hot wire
MUST be connected to the control for
operation.
CAUTION: ELECTRICAL HAZARD
Can cause electrical shock or equipment damage. Disconnect power to heating and cooling equip-
ment before beginning installation.
MERCURY NOTICE
When this Comfort Control is replacing an old thermostat that contains mercury in a sealed tube, do not
dispose of your old thermostat in the trash. Dispose of properly. Contact your local waste management
authority for instructions regarding recycling and proper disposal of the old thermostat.
A listing of heating, ventilating and air conditioning wholesalers that participate in the Thermostat Recycling
Corporation’s recycling program are available at www.thermostat-recyle.org.

Questions and Answers:

Trane TZEMT524AA21MA Specifications

General IconGeneral
TypeThermostat
DisplayTouchscreen
Wi-Fi EnabledYes
Energy Saving FeaturesYes
ProgrammableYes
Product TypeThermostat
SeriesComfortLink II
ColorWhite
ConnectivityWi-Fi
Voltage24V
Control TypeDigital
Stages2
Communication ProtocolProprietary

Summary

Installation Guide: Initial Steps

Prepare for Installation

Unpack the control and gather necessary components for installation.

Disconnect Power and Remove Cover

Safely disconnect power and carefully remove the existing thermostat cover.

Determine 24V Common Wire

Identify if a 24V common wire is connected or needs to be established.

Connecting 24V Common Wire

Steps to connect the 24VAC common wire to the HVAC system.

Installation Guide: Wiring and Mounting

Label and Remove Old Wires

Label existing thermostat wires and disconnect them carefully.

Remove Existing Wall Plate

Detaching the old thermostat's wall plate from the wall.

Installation Guide: System Identification

Identify Your HVAC System Type

Determine indoor unit type, heat stages, and outdoor unit type.

Installation Guide: Control Mounting

Prepare and Mount Base Plate

Position, mark, and attach the new base plate to the wall securely.

Review Wiring Chart

Consult the chart to connect wires to the corresponding terminals on the new control.

Installation Guide: Final Connections

Attach Wires and Face Plate

Securely connect wires and attach the control's face plate to the base plate.

Power Up and Program Settings

Turn on the system and program the equipment settings for proper operation.

Installer Settings: Equipment Configuration

Configure Equipment Type

Set outdoor/indoor unit types, heat stages, and reversing valve energization.

Configure Equipment Settings

Define minimum runtimes and off times for compressor and heat stages.

Configure Sensor Settings

Calibrate the indoor temperature sensor for accurate readings.

Installer Settings: Advanced Configuration

Configure Comfort and Airflow

Adjust comfort settings like temperature deltas and airflow delays.

Restore Default Settings

Reset all user and installer settings to factory defaults.

User Guide: Operation Basics

Home Screen and Controls

Overview of the main display, clock, and dynamic function buttons.

Thermostat Modes and Fan Control

Explanation of system modes (Heat, Cool, Auto, Off) and fan settings.

User Guide: Personalizing Settings

Thermostat User Preferences

Customize temperature scale, fan circulation, and setpoint limits.

Energy Save Mode Setup

Configure desired setpoints for Energy Savings Mode (ESM).

Display and Security Settings

Adjust screen brightness, timeouts, buzzer, and access security levels.

User Guide: Time, Date, and Reminders

Set Time and Date

Configure the current hour, minute, day of week, year, month, and date.

Manage Reminders

Enable or disable filter and system maintenance reminders.

User Guide: Scheduling

Program Daily Schedules

Set up 4 distinct periods (Wake, Day, Eve, Night) for each day of the week.

Copy Schedules Between Days

Efficiently copy programmed schedules from one day to others.

Nexia Web Portal Scheduling

Update and manage schedules remotely via the Nexia web portal.

User Guide: Z-Wave Connectivity

Prepare and Enroll Nexia Bridge

Set up the Nexia Bridge and enroll the 524 Control into the Z-Wave network.

Verify Z-Wave Enrollment

Confirm successful pairing of the 524 Control with the Nexia Bridge.

Configure for Nexia Home Intelligence

Connect the control to your Nexia account for remote management.

User Guide: Z-Wave Management and Maintenance

Exclude from Z-Wave Network

Remove the 524 Control from the Nexia Home Intelligence account.

Z-Wave Information and Screen Cleaning

View Z-Wave details and learn how to clean the thermostat screen.

Troubleshooting: System Operation

Display and Temperature Issues

Diagnose problems like no display or incorrect indoor temperature readings.

Setpoint and Mode Malfunctions

Address issues with temperature overshooting, cooling/heating not engaging.

Fan, Communication, and Reversing Valve

Resolve fan operation, Z-Wave communication, and reversing valve direction errors.

Troubleshooting: Remote Operation and Specifications

Intermittent Remote Operation

Troubleshoot issues with unreliable remote control via Nexia.

Product Features and Specifications

Review the thermostat's key features and technical specifications.

Warranty Information

Limited One-Year Warranty Terms

Details Trane's one-year limited warranty for the purchased product.

Warranty Exclusions and Limitations

Outlines what is not covered and limitations of the warranty.

Regulatory Compliance

FCC Compliance Statement

Information regarding FCC rules and potential interference.

Industry Canada IC Notice

Compliance statement for Industry Canada regulations.

Related product manuals