VariTrac Installation
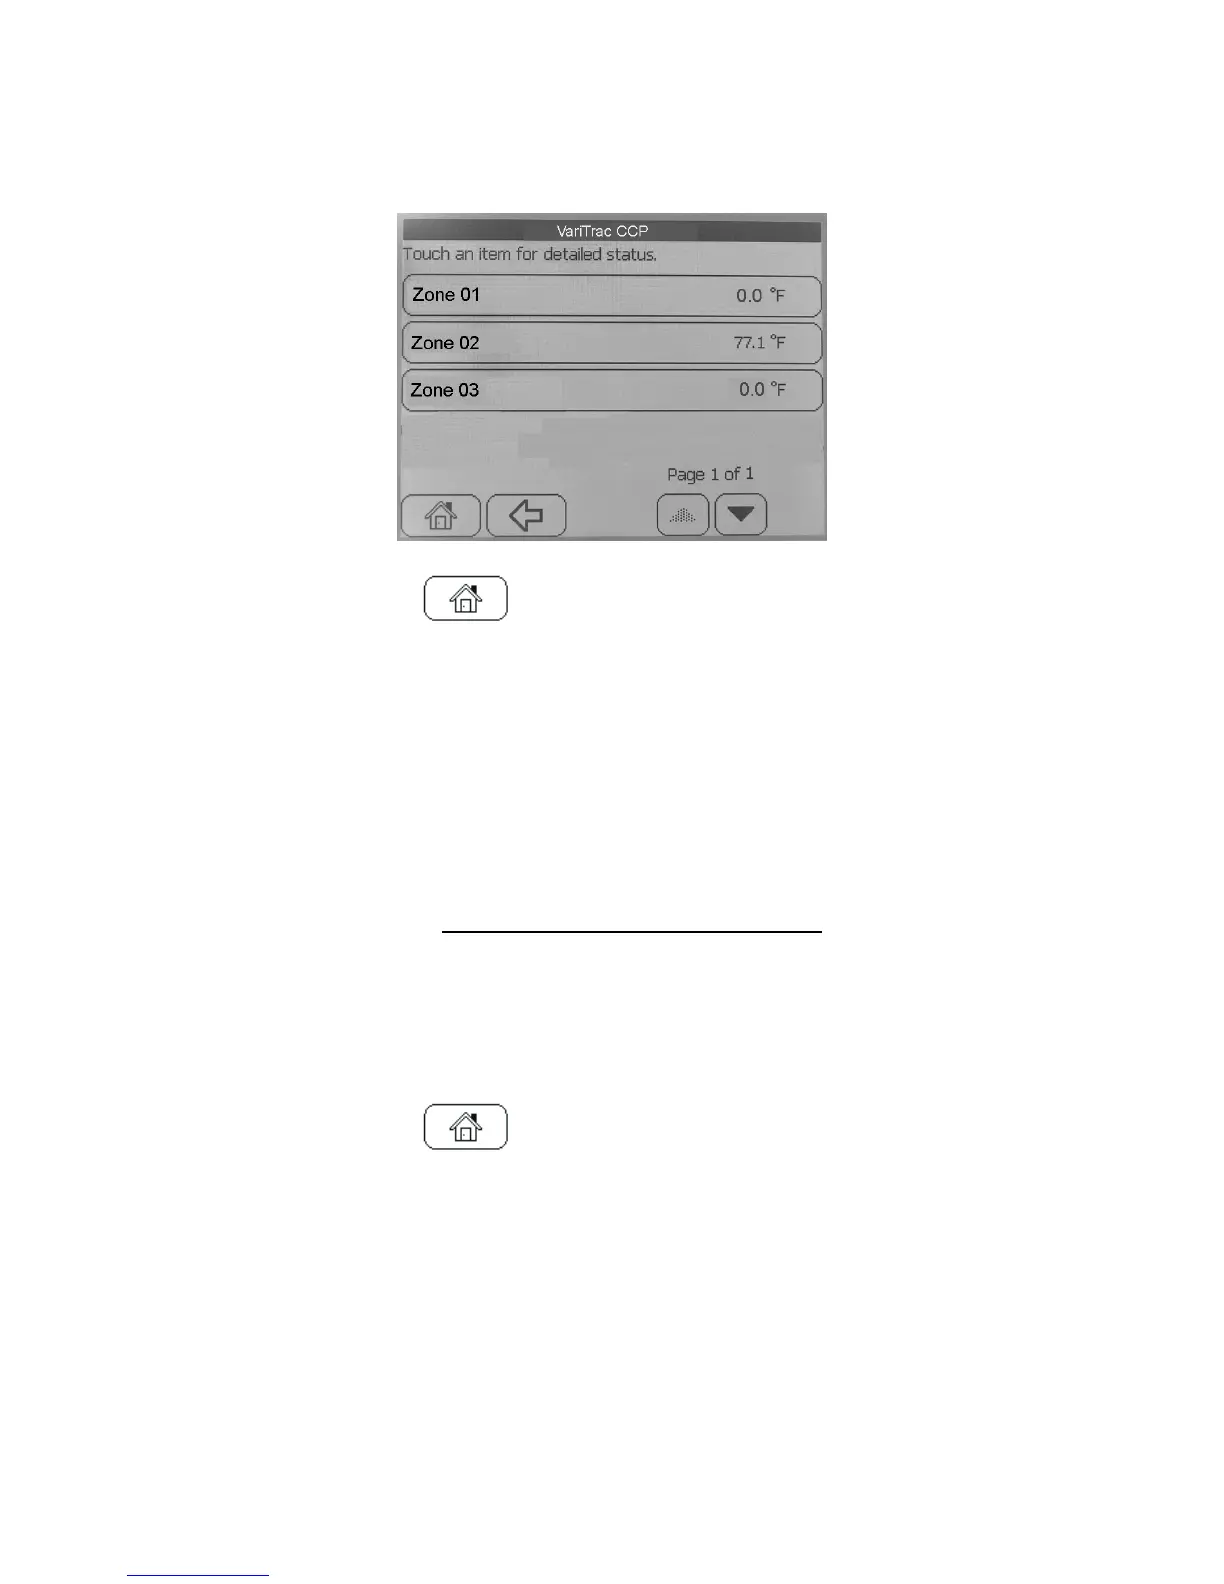
19. Press the View Button on the Home Screen. Three devices should display as shown.
20. Press the Home button to return to the home screen.
21. Make the following Setup changes to VariTrac:
Hint: Press the ‘Advanced’ button to access the following options.
π Set current date and time
π Change System Name: from “VariTrac CCP” to “Front Office Area”
π Select HVAC Unit Type: as ‘Voyager Commercial CV’
π Change Discharge Heating Setpoint: to ‘100.0’
22. Press ‘Advanced’, then ‘System setup and Status’, finally ‘System Status’.
23. Record the following and
be prepared to explain the recorded values:
π HVAC Unit Comm: ___________________.
π HVAC Comm Status: __________________.
π Operating Mode: ____________________.
π Supply Air Temperature: ___________________.
π External Time Clock Input: ________________.
24. Press the Home button
to return to the home screen.
25. Press the View Button on the Home Screen.
26. Select each zone and rename as follows:
π “Zone 1” rename to: = “Administration Area”
π “Zone 2” rename to: = “Lobby Area”
π “Zone 3” rename to: = “Sales Area”.
03- VariTrac Installation Workshop.doc 3-9