22
RT-SVX077B-EN
Verify that appropriate materials were used in the
construction of roof and ductwork. Combustible materials
should not be used in the construction of ductwork or roof
curb that is in close proximity to heater elements or any hot
surface. Any combustible material on the inside of the unit
base should be removed and replaced with appropriate
material.
Step-by-step curb assembly and installation instructions
ship with each accessory roof curb kit. Follow the
instructions carefully to confirm proper fit-up when the unit
is set into place.
Note: To verify proper condensate flow during operation,
the unit (and curb) must be level.
If the unit is elevated, a field constructed catwalk around
the unit is strongly recommended to provide easy access
for unit maintenance and service.
Recommendations for installing the supply air and return
air ductwork joining the roof curb are included in the curb
installation instructions. Curb ductwork must be fabricated
and installed by the installing contractor before the unit is
set into place.
Important: For sound consideration, cut only the holes in
the roof deck for the ductwork penetrations.
Do not cut out the entire roof deck within the
curb perimeter.
If a curb accessory kit is not used:
• The ductwork can be attached directly to the factory-
provided flanges around the unit supply and return air
openings. Uuse flexible duct connections at the unit.
• For built up curbs supplied by others, gaskets must be
installed around the curb perimeter flange and the
supply and return air opening flanges.
Rigging
WARNING
Heavy Object!
Failure to follow instructions below could result in
unit dropping which could result in death or serious
injury, and equipment or property-only damage.
Ensure that all the lifting equipment used is properly
rated for the weight of the unit being lifted. Each of the
cables (chains or slings), hooks, and shackles used to
lift the unit must be capable of supporting the entire
weight of the unit. Lifting cables (chains or slings)
may not be of the same length. Adjust as necessary
for even unit lift.
See Dimensions and Weights section for rigging
illustration, and center-of-gravity dimensional data. Refer to
the typical unit operating weights table before proceeding.
1. Confirm unit does not need additional moves by fork lift.
2. Prepare unit for rigging as follows:
Remove the front base rail bumper protection.
Important: For unit protection, the top crate should
remain in place during lifting. If it must be
removed prior to lifting, protect unit from
damage. Top crate must be removed prior
to operation.
WARNING
Improper Unit Lift!
Failure to properly lift unit in a LEVEL position could
result in unit dropping and possibly crushing
operator/technician which could result in death or
serious injury, and equipment or property-only
damage.
Test lift unit approximately 24 inches (61 cm) to verify
proper center of gravity lift point. To avoid dropping of
unit, reposition lifting point if unit is not level.
3. Rig the unit as shown in the weights section. Attach
adequate strength lifting slings to all four lifting brackets
in the unit base rail. Do not use cables, chains, or slings
except as shown.
4. Install a lifting bar, as shown in the Dimensions and
Weights chapter, protect the unit and facilitate a
uniform lift. The minimum distance between the lifting
hook and the top of the unit should be seven feet.
5. Test-lift the unit to confirm it is properly rigged and
balanced, make any necessary rigging adjustments.
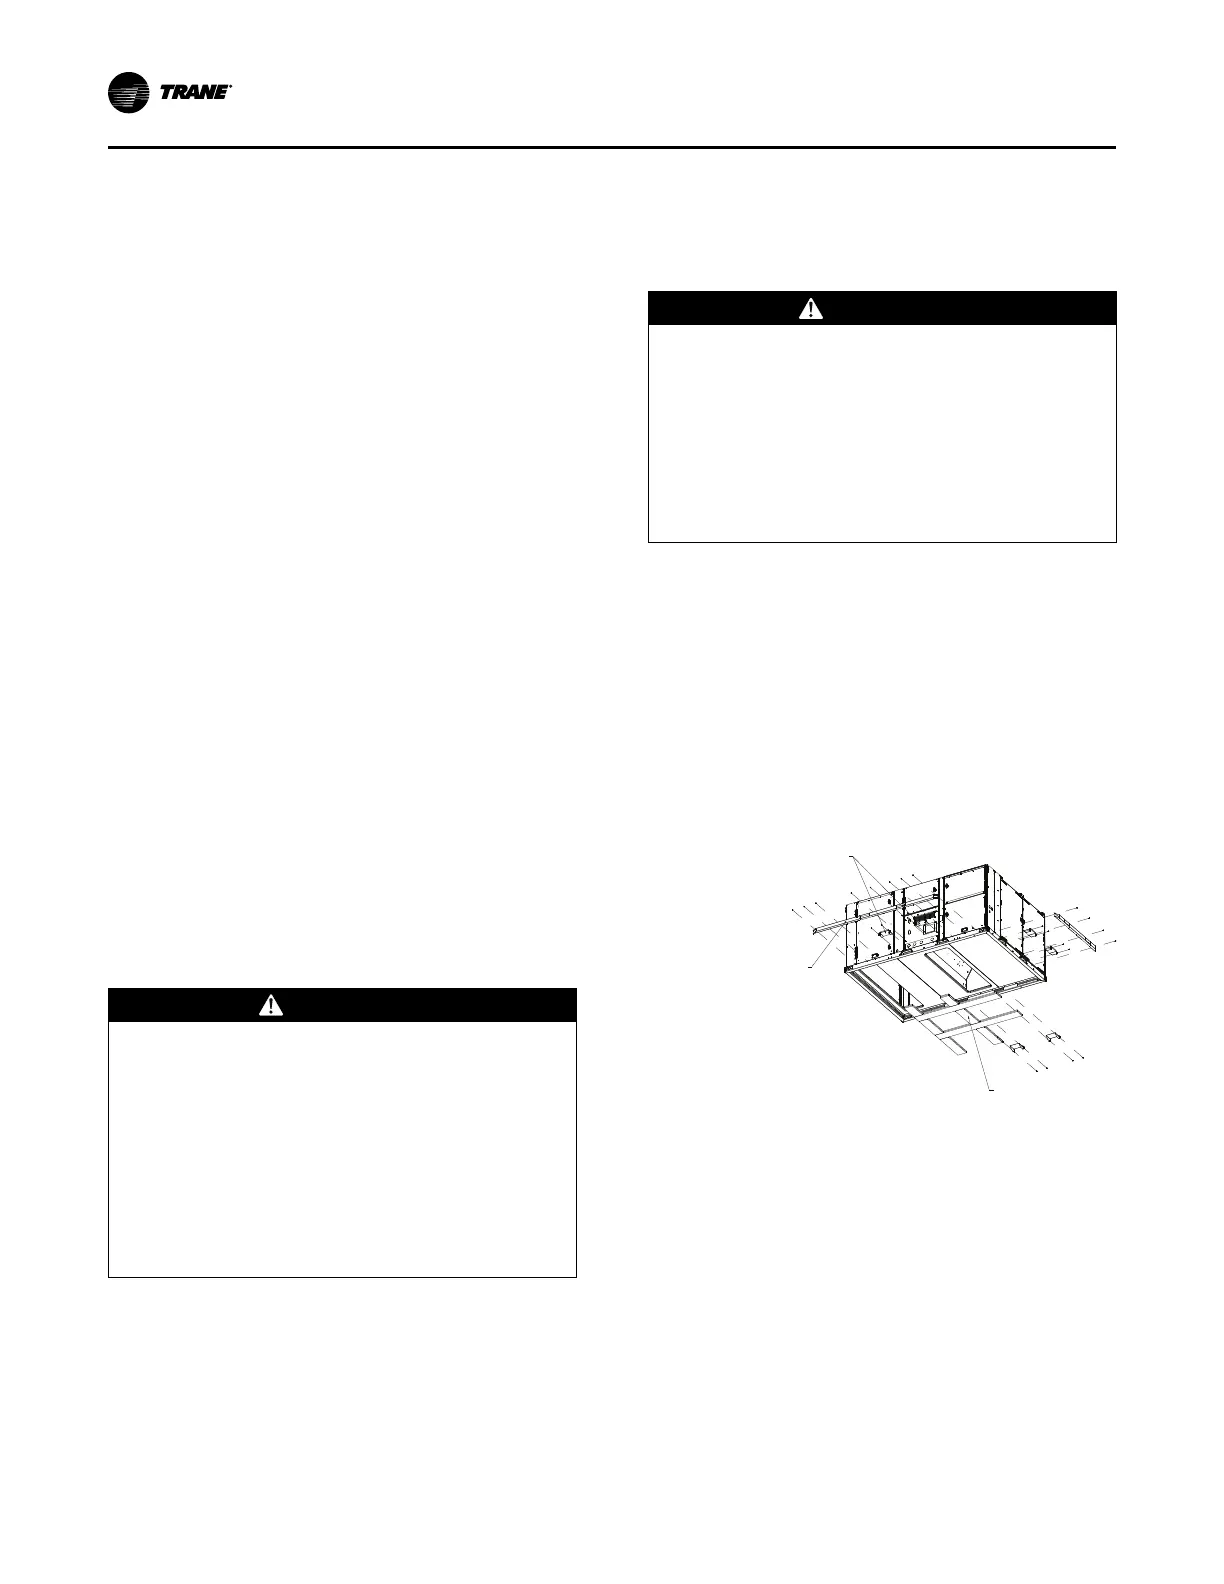
Figure 15. Fork pockets — 12.5 to 25 tons ultra high
efficiency units
REMOVE
WOODEN BOARDS
REMOVE SIX FORK
LIFT BRACKETS
REMOVE TWO SHIPPING
PROTECTIONS
6. Lift the unit enough to allow the removal of base fork
pocket protection components.
7. Downflow units: Align the base rail of the unit with the
curb rail while lowering the unit onto the curb. Confirm
the gasket on the curb is not damaged while positioning
the unit.
General Unit Requirements
The following checklist is a summary of the steps required
to successfully install a commercial unit. Installers should
use this checklist to validate what is required in the
installation process. It does not replace the detailed
instructions called out in the applicable sections of this
manual.
Installation