EasyManua.ls Logo

Trane ZZSENSAL0300AA - User Manual

Trane ZZSENSAL0300AA
4 pages
Print Icon
To Next Page IconTo Next Page
Loading...
ZZSENSAL0300AA/BAYSEN30ATEMPA
Indoor Remote Sensor/Outdoor Remote Sensor
INSTALLATION INSTRUCTIONS
FAILURE TO READ AND FOLLOW ALL INSTRUCTIONS CAREFULLY
BEFORE INSTALLING OR OPERATING THIS CONTROL COULD CAUSE
PERSONAL INJURY AND/OR PROPERTY DAMAGE.
SPECIFICATIONS
For applications where the wire run is short (100 ft. or
less) shielded cable may not be required provided the
wires are not routed parallel to or across other wires
carrying electrical power. To reduce electrical inter-
ference or inductance from other electrical wiring or
devices use shielded cable and keep Remote Sensor
wire runs separate from thermostat wiring. Remote
sensors cannot be used with systems where power
interruptions are part of normal system operation.
Operating Range: (based on thermostat range)
ZZSENSAL0300AA Indoor Model: 40 to 99°F
BAYSEN30ATEMPA Outdoor Model: -40 to 140°F
Operating Humidity Range: 0 to 90% RH
(non-condensing)
Maximum Distance from Thermostat: 300 feet
Recommended Wire: 18 or 20 gauge,
3-conductor shielded cable
Color: Classic White
Dimension: 2-1/8" x 3-1/2" x 3/4"
Outdoor Remote includes 12 ft. of outdoor
probe lead
ZZSENSAL0300AA
INDOOR REMOTE SENSOR
BAYSEN30ATEMPA
OUTDOOR REMOTE SENSOR
Interior Mounting Base
Outdoor Probe
CONTENTS
Specications ................................................ 1
Installation .................................................... 2
Wiring Diagram ...............................................3
Conguration .................................................3
Troubleshoong ...............................................4
CAUTION
!
To prevent electrical shock and/or equipment
damage, disconnect electric power to system at
main fuse or circuit breaker box until installation
is complete.
WARNING
!
Do not use on circuits exceeding specied
voltage. Higher voltage will damage control
and could cause shock or re hazard.
Do not short out terminals on gas valve or
primary control to test. Short or incorrect
wiring will damage thermostat and could cause
personal injury and/or property damage.
Pub No. 18-HD86D1-1
Part No. 37-7772001
August 2018
Question and Answer IconNeed help?

Do you have a question about the Trane ZZSENSAL0300AA and is the answer not in the manual?

Summary

INSTALLATION

INDOOR SENSOR SELECT SENSOR LOCATION

Proper location ensures the remote sensor provides a comfortable home or building temperature. Observe general rules when selecting a location.

OUTDOOR SENSOR SELECT SENSOR LOCATION

Proper location ensures the remote sensor provides a correct outdoor temperature reading. Observe general rules when selecting a location.

WIRING DIAGRAMS

CONFIGURATION

TROUBLESHOOTING

Loss of 24-volt power

Check heating and cooling system to determine why 24-volt power is absent. On models with batteries, remove and re-install thermostat.

A broken wire on +, S or -

Disconnect sensor wires at thermostat. Test with short cable. If temperature climbs correctly with short cable, fault is in wire run.

A shorted or damaged remote sensor

If conditions 1 & 2 are met and temperature stays at or near 08°, the sensor is shorted or damaged. Replace remote sensor.

Overview

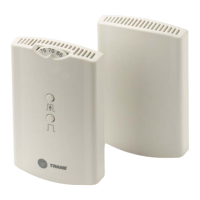
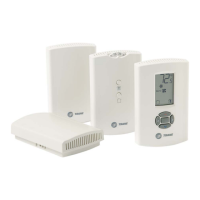
This document provides installation instructions for the ZZSENSAL0300AA Indoor Remote Sensor and the BAYSEN30ATEMPA Outdoor Remote Sensor. These sensors are designed to work with thermostats to provide accurate temperature readings for indoor and outdoor environments.

Function Description

The ZZSENSAL0300AA is an indoor remote sensor that provides temperature readings for a specific indoor area, allowing the thermostat to maintain a comfortable home or building temperature. The BAYSEN30ATEMPA is an outdoor remote sensor that provides accurate outdoor temperature readings. Both sensors transmit temperature data to a compatible thermostat, enabling precise climate control. The outdoor remote sensor includes a 12 ft. outdoor probe lead for flexible placement.

Important Technical Specifications

  • Operating Range (based on thermostat range):
    • ZZSENSAL0300AA Indoor Model: 40 to 99°F
    • BAYSEN30ATEMPA Outdoor Model: -40 to 140°F
  • Operating Humidity Range: 0 to 90% RH (non-condensing)
  • Maximum Distance from Thermostat: 300 feet
  • Recommended Wire: 18 or 20 gauge, 3-conductor shielded cable
  • Color: Classic White
  • Dimension: 2-1/8" x 3-1/2" x 3/4"
  • Outdoor Remote: Includes 12 ft. of outdoor probe lead

For wire runs shorter than 100 ft., shielded cable may not be required if wires are not routed parallel to or across other wires carrying electrical power. However, to reduce electrical interference or inductance from other electrical wiring or devices, shielded cable is recommended, and remote sensor wire runs should be kept separate from thermostat wiring. Remote sensors are not compatible with systems where power interruptions are part of normal system operation.

Usage Features

Indoor Sensor Location Selection:

To ensure accurate temperature readings and comfortable indoor conditions, the indoor remote sensor should be placed carefully:

  1. Distance: Maximum 300 feet from the thermostat.
  2. Height: Approximately 5 ft. above the room floor level.
  3. Wall Type: Install on a partitioning wall, not an outside wall.
  4. Avoid Heat Sources: Never expose the sensor to direct light from lamps, sun, fireplaces, or any temperature-radiating equipment.
  5. Avoid Drafts: Avoid locations near windows, adjoining outside walls, or doors that lead outside.
  6. Avoid Air Registers: Do not place the sensor in the direct path of air from air registers.
  7. Wall Obstructions: Ensure no pipes or ductwork are in the wall chosen for the sensor location.
  8. Temperature Consistency: Never locate the sensor in a room that is typically warmer or cooler than the rest of the home (e.g., kitchen).
  9. Air Circulation: Avoid locations with poor air circulation, such as behind doors or in alcoves.
  10. Recommended Location: In homes, the living or dining room is generally a good location, provided there is no cooking range or refrigerator on the opposite side of the wall.

Outdoor Sensor Location Selection:

For correct outdoor temperature readings, the outdoor remote sensor requires careful placement:

  1. Interior Mounting Base Distance: The interior mounting base can be located a maximum of 300 feet from the thermostat.
  2. Probe Proximity: Install the interior mounting base within 12 ft. of the intended outdoor probe location.
  3. Avoid Heat/Sun Exposure: Never install the outdoor probe where it will be exposed to direct light from lamps, sun, fireplaces, or any temperature-radiating equipment. Direct sun exposure will affect the sensed temperature.
  4. Wall Obstructions: Ensure no pipes or ductwork are in the wall chosen for the base location.
  5. Outdoor Placement: The probe must be installed outdoors. Good probe locations include under a bay window or overhang, out of direct sunlight. Install the probe with a spacer to obtain a more accurate temperature.
  6. Interior Base Placement: Although connected to the outdoor probe, the interior mounting base must be placed indoors. It should be installed near the perimeter of the building to allow the 12-foot probe wire to run through to the outside. The probe wire should not be cut or spliced. Plan the placement of both the probe and interior mounting base accordingly. Any excess wire can be coiled or bundled. The probe should be connected to E2 on the wiring diagram.

Wiring Diagrams:

When using shielded cable, connect the shield of the 18 or 20 gauge 3-conductor cable to the "-" terminal on the thermostat subbase. It is crucial not to pinch the 3-conductor wire between the sensor and the wall. Always check wire connections before applying power, as improper connections can lead to permanent damage. When shielded cable is used, the cable shield must be connected to "-" on the THERMOSTAT ONLY.

Configuration:

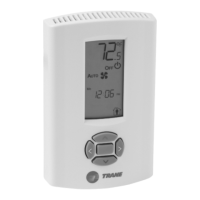
For touchscreen thermostat models (ACONT302/303 & TCONT302/303), the remote sensor option must be enabled in the Installation Menu. Refer to the thermostat's installation instructions for details.

Maintenance Features

Troubleshooting:

For the thermostat to function correctly and read temperature accurately, it must have constant 24-volt power. If the thermostat temperature is steadily dropping, reading low, or reads "08°" when a remote sensor is installed, it can be traced to one of three conditions:

  1. Loss of 24-volt power:

    • Test: For models with batteries, remove and re-install them. If the display is blank, check the heating and cooling system to determine why 24-volt power is absent.
    • Comments: The 24-volt system power must be present for the sensor to read correctly. Some systems may require an isolation relay for constant power. Limit or safety devices in the equipment can also cause a power interruption.
  2. A broken wire on +, S or - from the thermostat to the remote:

    • Test: Disconnect sensor wires at the thermostat. Attach a short (2') piece of three-wire shielded cable to +, S, and - on the subbase. Bring the remote sensor to the thermostat location and attach +, S, and -, respectively. Reattach the thermostat. If the temperature begins to climb (slowly), it is reading correctly. If it reads correctly with the 2' length but improperly when attached to the wire run, it indicates a fault in the wire run.
    • Comments: Repair or replace the 3-wire shielded cable. Ensure the remote wire run is not parallel to line voltage wires carrying heavy inductive loads or across fluorescent light ballasts that may cause an inductance to be transmitted to the thermostat.
  3. A shorted or damaged remote sensor:

    • Test: Since it is an electronic sensor, there are no Ohm values to test. If conditions 1 and 2 are correct, and the temperature stays at or near "08°", it indicates a shorted or damaged remote sensor.
    • Comments: Replace the remote sensor.

Note on Acclimation: Digital thermostats and remote sensors acclimate very slowly to temperature changes. It may take an hour or more for the temperature to acclimate to the room temperature from a low temperature reading. To expedite the room temperature display, use the reset instructions for the thermostat model. When reset, the thermostat will default to a room temperature of 70° and begin sensing room temperature. Remember to reconfigure the installer menu for a remote sensor because the reset function may cancel remote sensing.

Trane ZZSENSAL0300AA Specifications

General IconGeneral
BrandTrane
ModelZZSENSAL0300AA
CategoryAccessories
LanguageEnglish

Related product manuals