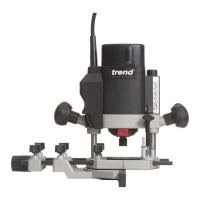
EN - T8
-12-
instructions on how to use the depth stop turret in an
actual operation.
Height Stop Rod and Thumb Wheel -
(Fig. G)
The height stop rod (10) and thumb wheel (11) limit
how high the unit can travel up the rails. The system is
adjustable to limit the rise of the plunge to full up where
the bottom of the collet is 80mm above the workpiece.
NOTE: It is easier to move the thumb wheel UP if the
plunge locking lever is locked and easier to move the
thumb wheel down if the unit is first moved down by
releasing the plunge locking lever and then tightening it.
ASSEMBLY AND ADJUSTMENTS
WARNING: To reduce the risk of serious
personal injury, turn tool off and disconnect
tool from power source before making any
adjustments or removing/ installing attachments
or accessories. An accidental start-up can cause
injury.
Installing and Removing a Cutter
- (Fig. C1, F)
WARNING: Do not tighten the collet without
a cutter fitted.
WARNING: Always use cutters with shanks
which match the diameter of the collet.
WARNING: Do not use cutters larger than
50mm (2”) unless the router is fitted in a router table.
CAUTION: Care should be taken when
removing cutter to avoid cuts to fingers.
Installing a Cutter
1. Insert at least 3/4 of the shank length of the cutter into
the collet assembly (6).
2. Press the spindle lock (5) forward until the router
spindle is locked.
NOTE: You may need to turn the spindle slightly to
engage it.
3. Turn the collet nut counter clockwise with the supplied
22mm spanner (13) to tighten it.
Removing a Cutter
1. Press the spindle lock button (5) forward until the
router spindle is lock.
2. Turn the collet nut (6) clockwise with the supplied
22mm spanner (13) to loosen.
3. Keep turning the spanner until the collet nut tightens
and then loosens again. This is the fail safe mechanism
releasing the collet.
4. The cutter should now slide out.
NOTE: Each time you finish using a cutter, remove it and
store it in a safe place.
Fine Height Adjuster - (Fig. A, D)
CAUTION: Ensure that the plunge locking
lever is unlocked. Never use unnecessary force to rotate
the fine height adjuster mechanism.
CAUTION: DO NOT remove the screw on
hex nuts.
The fine height adjuster can be used in portable mode or
when the router is held inside a table.
Fine Adjustment
When not using a depth template, or if the depth of cut
needs readjustment, it is recommended to use the fine
height adjuster (14).
1. Adjust the depth of cut as described in Adjusting the
Depth of Cut.
2. Set the fine height adjuster to zero using the fine zero
reset ring (15).
3. Rotate the fine height adjuster (14) to the required
position: one turn corresponds to approximately 1mm
and 1 mark to 0.1mm.
Fitting Guide Bush and Inner Plate -
(Fig. H)
1. Turn the router upside down.
2. Fit inner plate (58) into the recess in the router base
plate (8). The raised side of the inner plate must be away
from router base. Loosely fit the two pan head machine
screws (59) through the inner plate and into the tapped
holes. DO NOT TIGHTEN SCREWS.
3. Fit the 30mm guide bush (24) to the inner plate (58).
Fit guide bush with the two M5 countersink machine
screws (25). Tighten these screws.
4. Fit line up pin (60) into the collet (6) depending on the
size fitted) in the router, lightly tighten collet nut to hold
the line up pin (60).
5. Release plunge locking lever and gently depress base
until line up pin (60) projects through the 30mm guide
bush (24).
6. Once in line, tighten the pan head machine screws
(59) with a flat screwdriver.