3
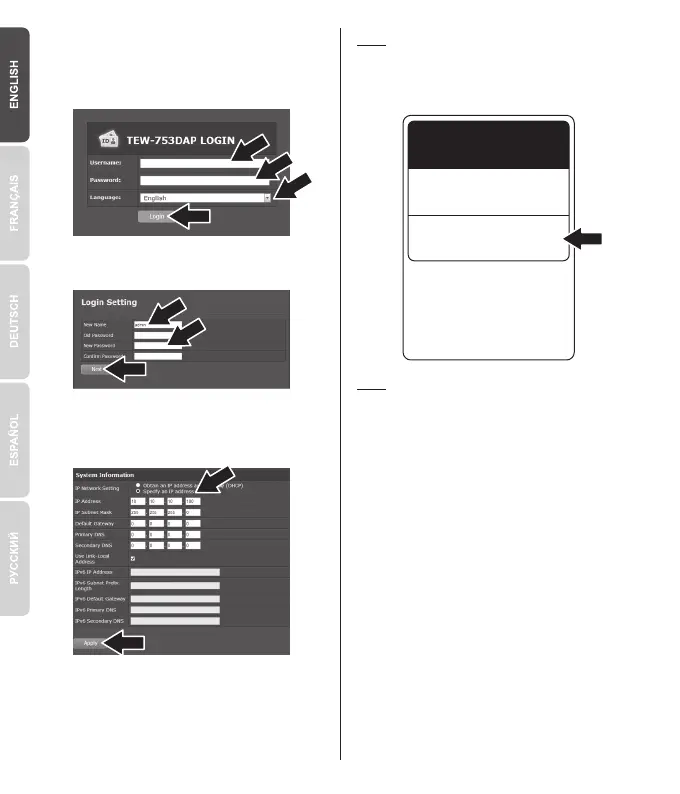
5. Enter a new password, verify the new
password and click Next.
6. Select an IP address for the access point
within the same subnet as your default
gateway and then click Apply.
7. Setup is complete.
Note:
For detailed information regarding the access
point configuration and advanced settings,
please refer to the User's Guide CD-ROM.
Preset
Wireless Settings
Wi-Fi Name/SSID
XXXXXXXXXXXXX
Wi-Fi Key
XXXXXXXXXXXXX
Management Login
http://tew-753dap
username: admin
password: xxxxxxxx
4. Enter the Username and Password. By
default: Username: admin; Password: admin.
Select the desired language and then click
Login.
Note:
For added security we have pre-encrypted each
TEW-753DAP with a unique Wi-Fi Name (SSID)
and Wi-Fi Key. You can find these pre-
configured settings on the labels at the front and
back of the TEW-753DAP. You will use this
information to connect wireless to the access
point. To change the Wi-Fi Key, refer to the
product manual. If the access point is reset, the
Wi-Fi Key and the Wi-Fi Name will also reset to
factory defaults.
 Loading...