7
3. Installation
6
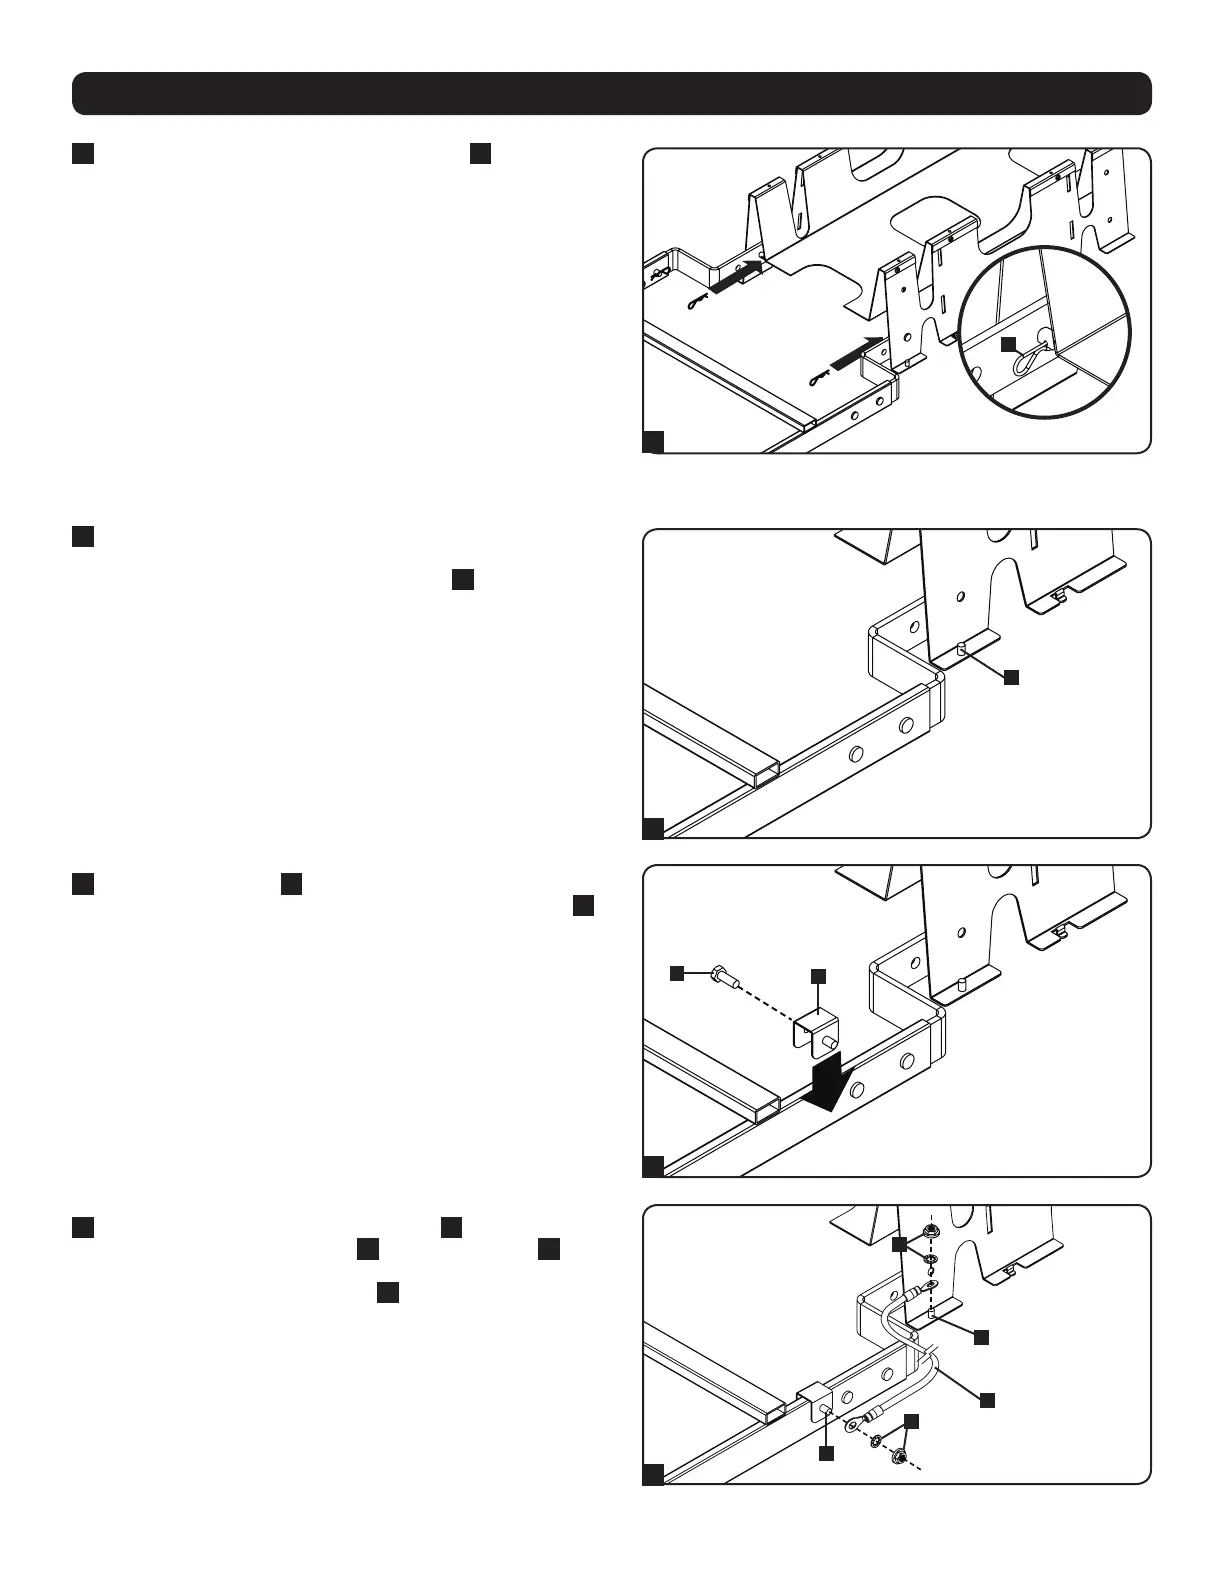
After inserting the clevis pins, insert a cotter pin
G
through the
hole at the end of each clevis pin. (The straight section of the
cotter pin goes through the hole.)
3.6 Ground Connection
1
After installing the SRCABLELADDER18 accessory, determine
where to place ground brackets by noting the distance between
one end of the ladder and the grounding post
A
at the corner of
the nearest SRCABLETRAY accessory.
2
Place a ground bracket
B
near the end of the
SRCABLELADDER18 accessory’s leg and use a hex-head bolt
C
to secure it.
3
Use the included hex nuts and lock washers
G
to connect one
end of the included ground cable
H
to a grounding post
I
at
the corner of the nearest SRCABLETRAY accessory and connect
the other end to the grounding post
J
of the ground bracket
attached to the SRCABLELADDER18 accessory. Repeat steps
1 to 3 for the other end of the SRCABLELADDER18 accessory.
G
6
A
1
2
3
B
C
G
G
H
I
J