3
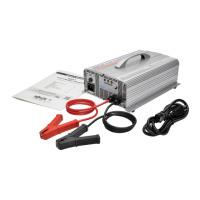
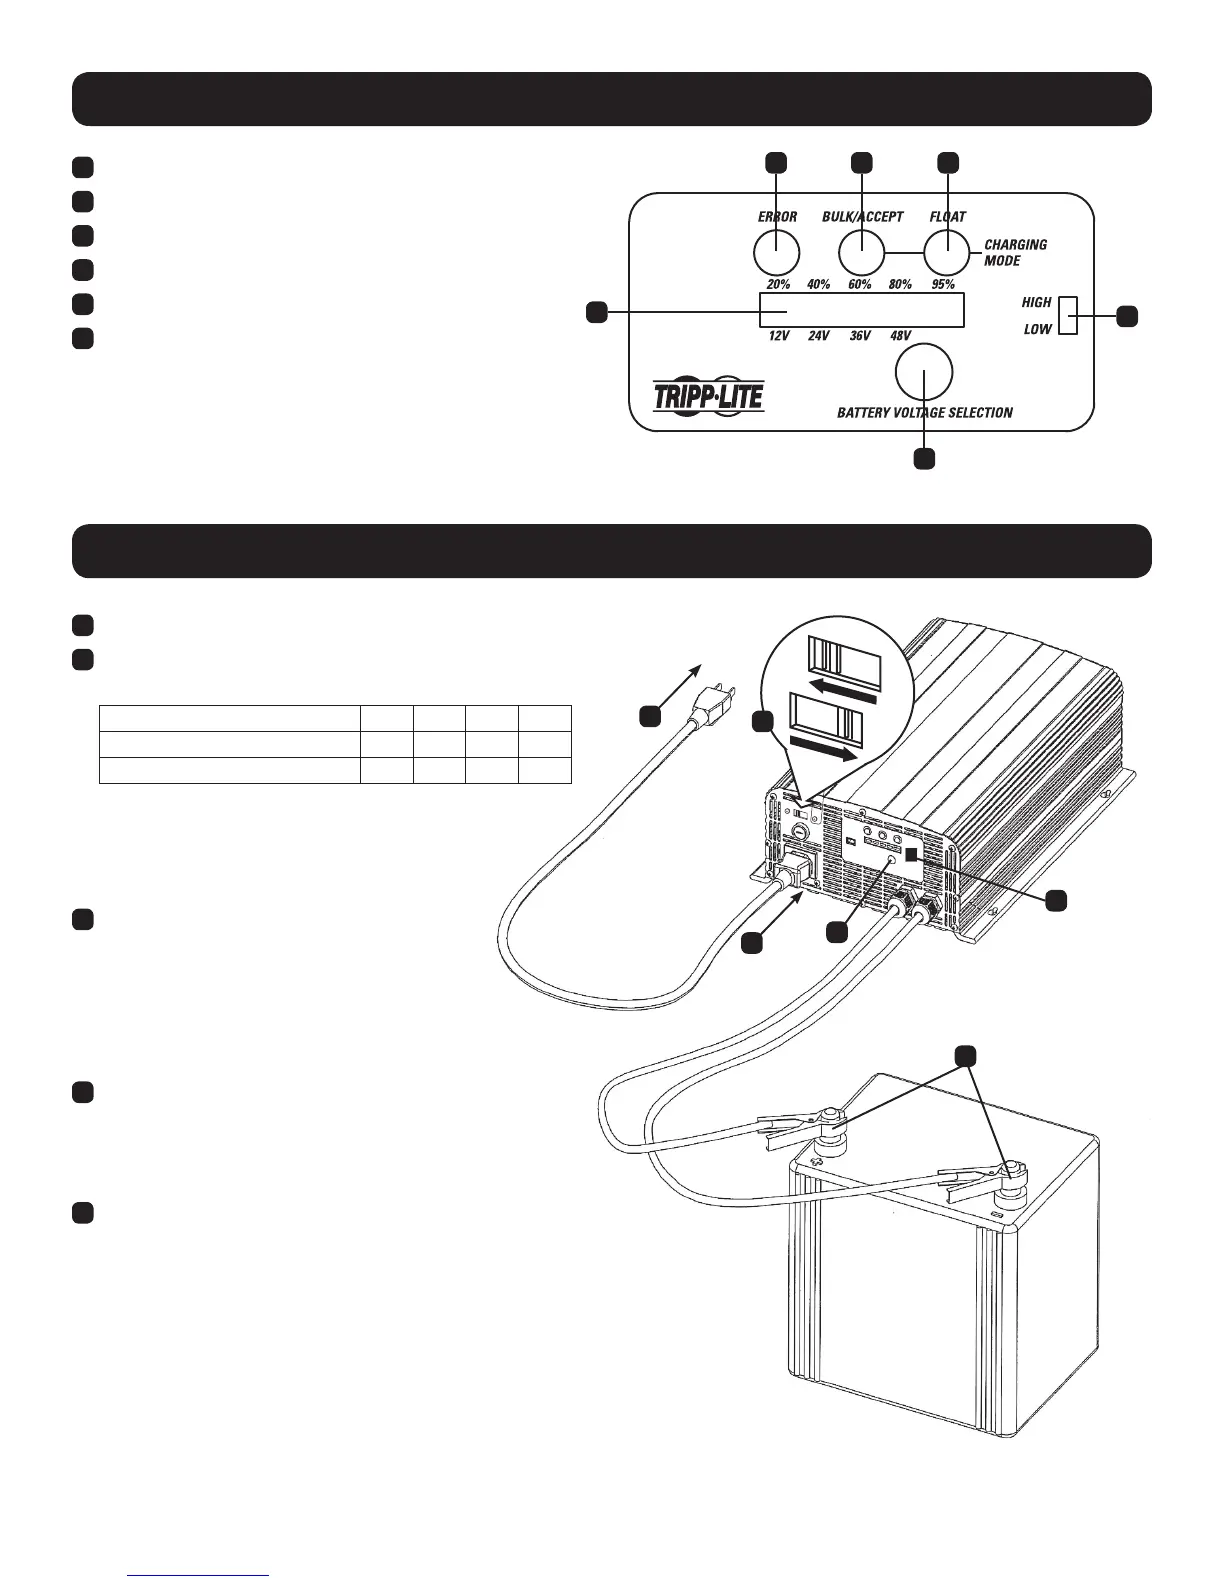
Controls
A
B
C D E
F
A
Battery Voltage Selection Button
B
High/Low Charge Rate Switch
C
Error (Red) LED
D
Bulk/Accept (Yellow) LED
E
Charging/Float (Green) LED
F
Battery Charge % / Battery Voltage Selector LEDs
Installation
115
115
230
2
5
3
1
3
4
1
Select the appropriate mains voltage for your region.
2
Set the High/Low Charge Rate Switch according to battery’s
capacity:
DC Output Voltage to Battery
12V 24V 36V 48V
Set to “High”
30A 30A 25A 15A
Set to “Low”
10A 10A 10A 7A
Note: The “Low” setting is recommended for general battery charging
and batteries whose charge has been severely depleted. The “high”
setting will charge a battery faster, but repeated fast charges may
overcharge a battery and reduce useful battery life. Reference your
battery manufacturer’s charging instructions to determine the
proper setting.
3
Insert the power cord’s C19 connector into the
charger’s C20 power inlet. Then plug the other
end of the power cord into an available AC power
outlet. CAUTION: Do not establish power
connections with an ungrounded AC outlet.
Note: Complete Step 3 before connecting the
charger to a battery.
4
Once an AC power connection is established, press the
Battery Voltage Selection button to match the battery’s
voltage (12/24/36/48V). LEDs will illuminate in the Battery
Charge % / Battery Voltage Selector bar to correspond
with the desired charging voltage.
5
Connect the charger’s clamps to the battery terminals.
Note: Always attach the red clamp to the positive (POS, P, +) battery
terminal before attaching the black clamp to the negative (NEG, N, -)
terminal. For unmarked terminals, the positive post usually has a larger
diameter than the negative post. When disconnecting the charger, reverse
the order of the connecting steps.