8
In the event of the PRD operating, turn off the
electricity-and water supplies to the shower
at the isolating switch and stopvalve. Contact
Customer Service for advice on replacing the
PRD.
DO NOT operate the shower with a damaged or
kinked shower hose, or a blocked showerhead
which can cause the PRD to operate.
When commissioning, the showerhead must be
removed from the flexible hose. If not removed,
it may cause the PRD to operate.
Routing control cable and heated water
pipe
After deciding the position of the riser rail and
control panel, you may wish first to channel a
route for the semi-rigid heated water pipe and
the control cable from the remote pack position
to the control panel and bulkhead position.
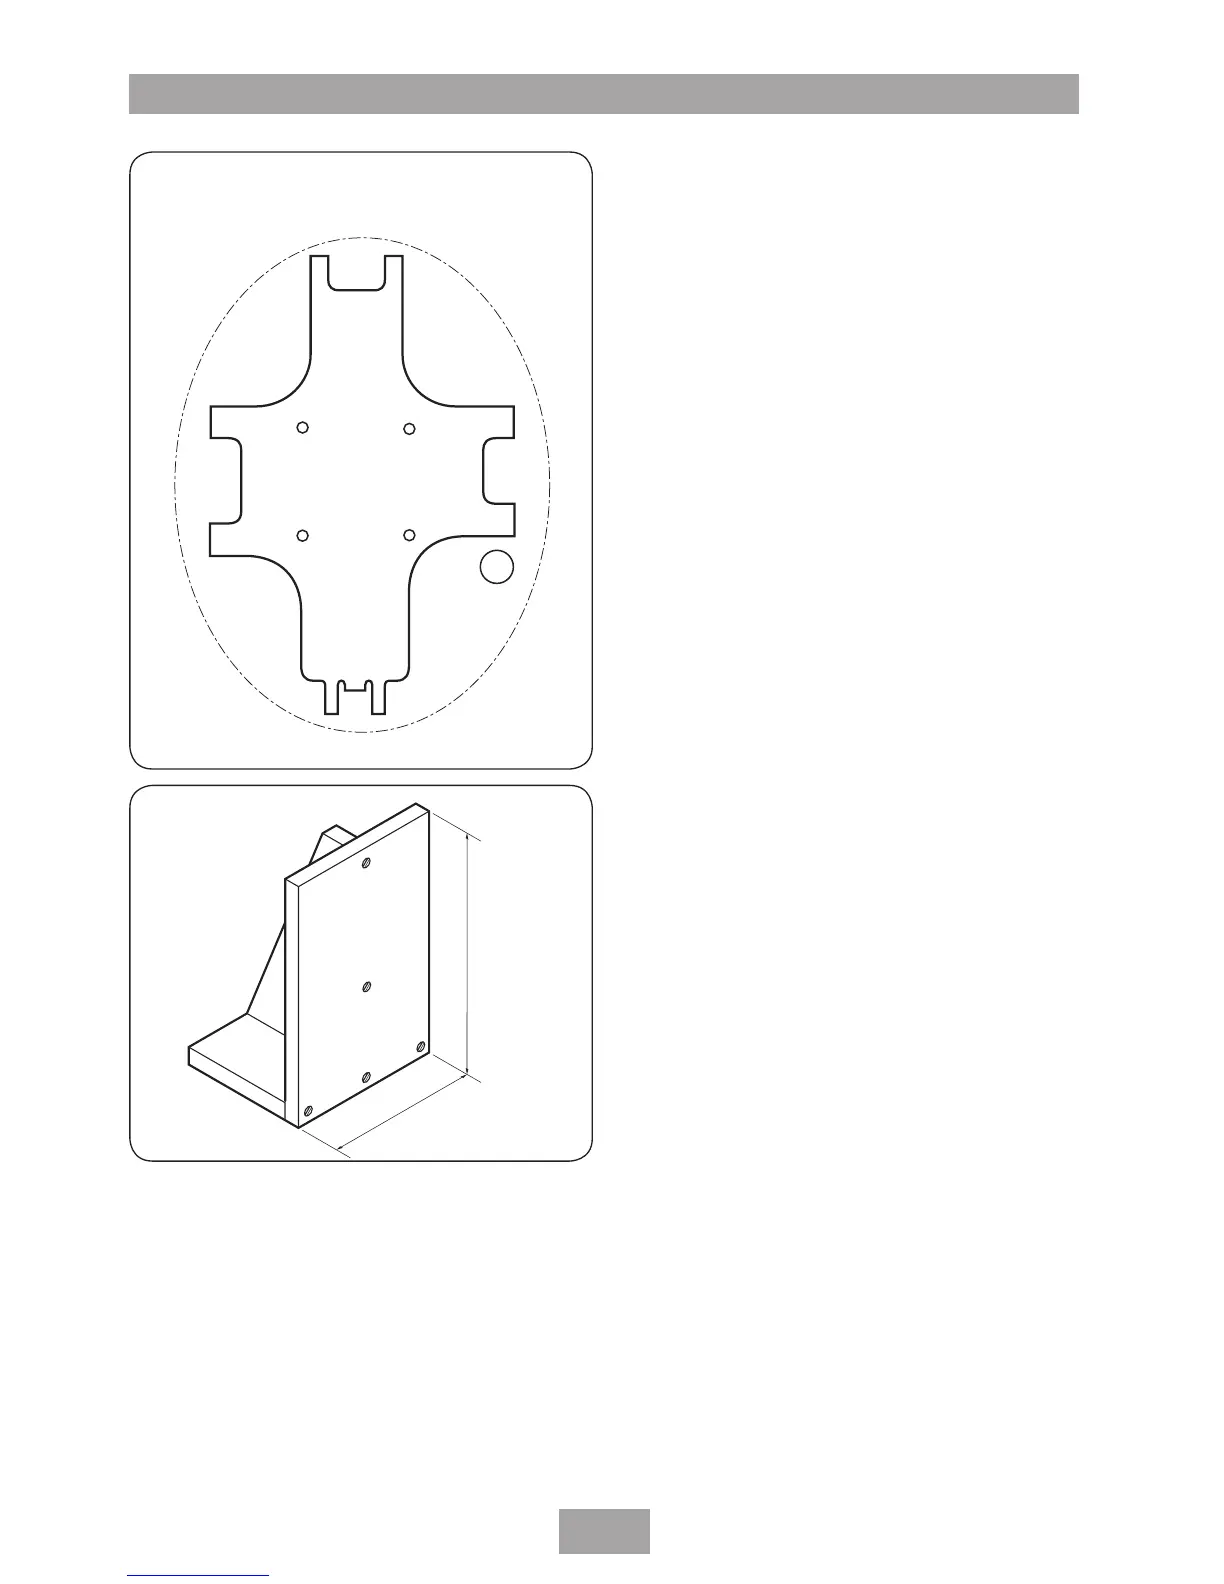
The control cable must exit the shower cubicle
wall through a 15 mm hole, marked ‘B’ on
the supplied fixing template (Fig.8). Place the
template on the wall and mark the position of
the 15 mm hole.
Drill and channel a route as required. Place and
position the control cable between the remote
pack and control panel. Make sure there is
enough slack cable at the remote pack end for
the control panel to be removed should the
need arise for future maintenance
Within the shower cubicle, the end of the
control cable outer sleeve must be flush with the
finished wall surface to allow easy installation,
and the inner cable should be loose and able
to slide through the outer sleeve when finally
installing the control panel.
It is advisable to seal the outer sleeve in the hole
using a silicon seal.
Make good the wall, including any tiling, as all
the units must be screwed to the finished wall
surface.
IMPORTANT: In the shower area the control
cable linking the remote pack and control
panel must be secured by routing through
conduit, trunking or capping if embedding in
the wall. It must NOT be surface clipped.

 Loading...