Bewitch
11
SWITCH OFF THE ELECTRICITY SUPPLY AT
THE MAINS.
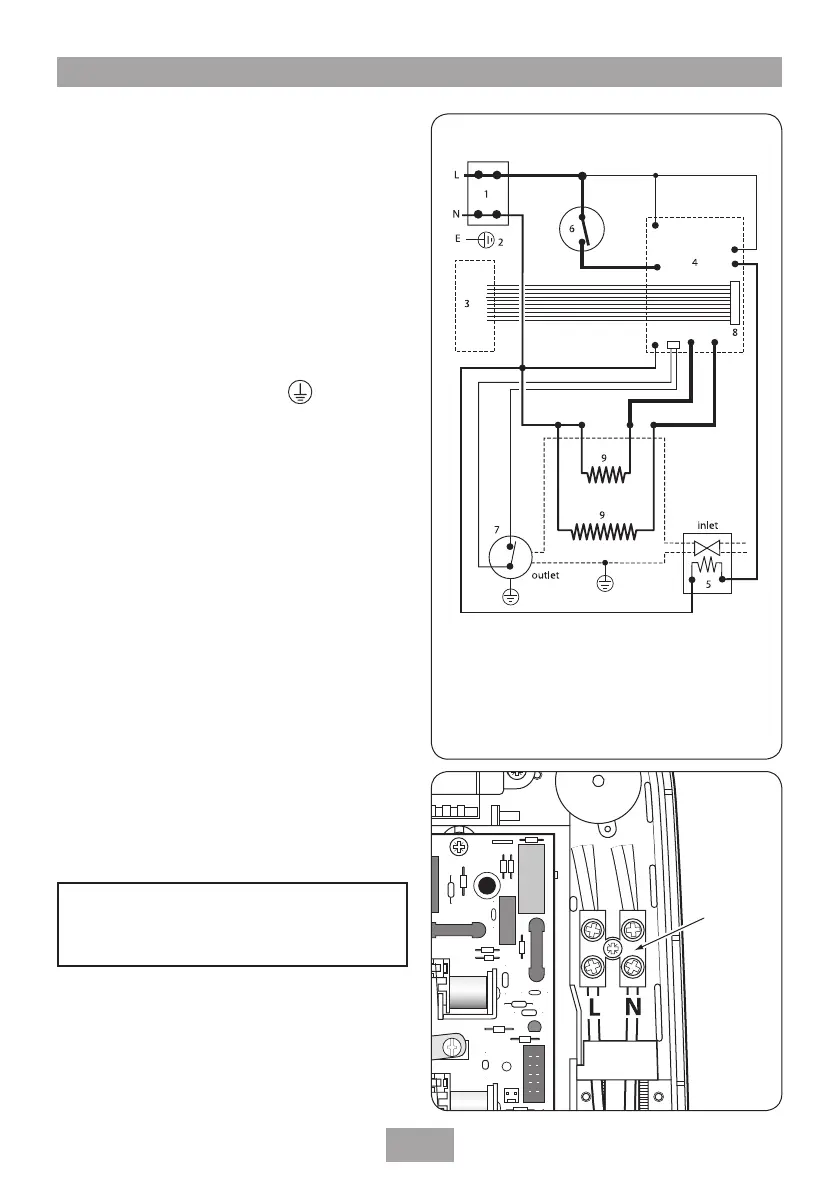
Fig.13 shows a schematic wiring diagram.
The cable entry points are shown in fig.1. The
cable can be surface clipped, hidden or via
20 mm conduit.
Note: Conduit entry can only be from rear.
Route the cable into the shower unit and
connect to the terminal block (fig.14) as
follows:
Earth cable to terminal marked
Neutral cable to terminal marked N
Live cable to terminal marked L
IMPORTANT: Fully tighten the terminal block
screws and check that no cable insulation is
trapped under the screws. Loose connections
can result in cable overheating.
Note: The supply cable earth conductor must
be sleeved. The outer sheath of the supply cable
must be stripped back to the minimum.
The supply cable must be secured either by
routing through conduit or in trunking or by
embedding in the wall, in accordance with the
current IEE wiring regulations.
The use of connections within the unit, or other
points in the shower circuit, to supply power to
other equipment i.e. extractor fans, pumps etc.
will invalidate the guarantee.
Note: The elements on UK models are to 240V
specification and will give a lower kW rating if the
supply voltage is below 240V.
W-016-A
WARNING!
DO NOT switch on the electricity
supply until the cover has been fitted.
Electrical connections
Fig.14
Fig.13
1. Terminal block
2. Earth post
3. Control PCB
4. Power PCB
5. Solenoid valve
6. Thermal cut-out
(main)
7. Thermal cut-out
(outlet)
8. Connector socket
9. Element



 To Next Page